Creating an event with a seating map
Aug 7, 2026Updated6 min read00
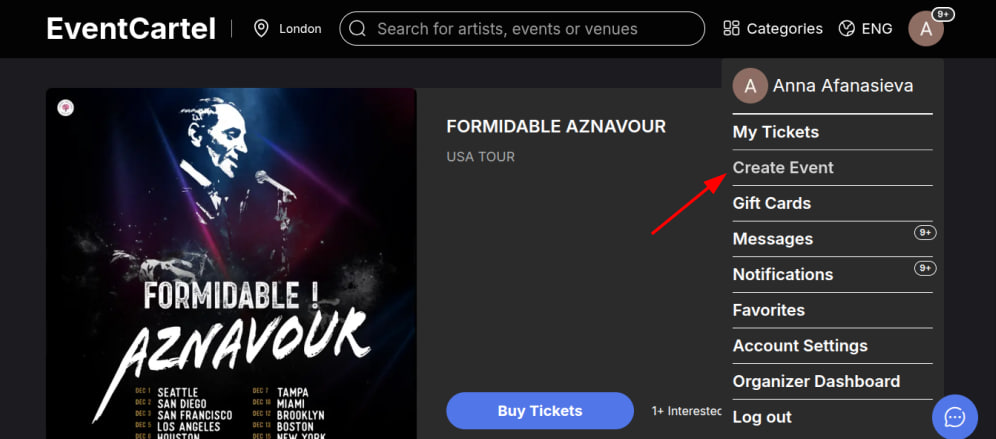
- Sign in to your Event Cartel account;
- Hover over the account icon (in the top-right corner of the page);
- Click "Create Event".
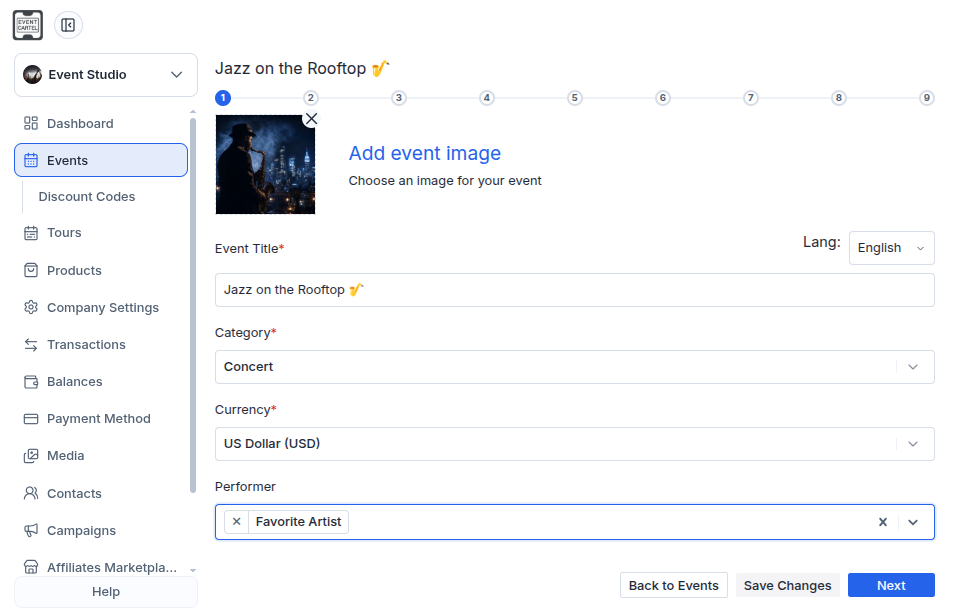
Step 1: Add the event details:
- Upload a cover image;
- Enter the event title;
- Select a category;
- Select a currency;
- Enter the artist's name (if your event features an artist);
- Click "Next" (your progress is automatically saved when you click this button).
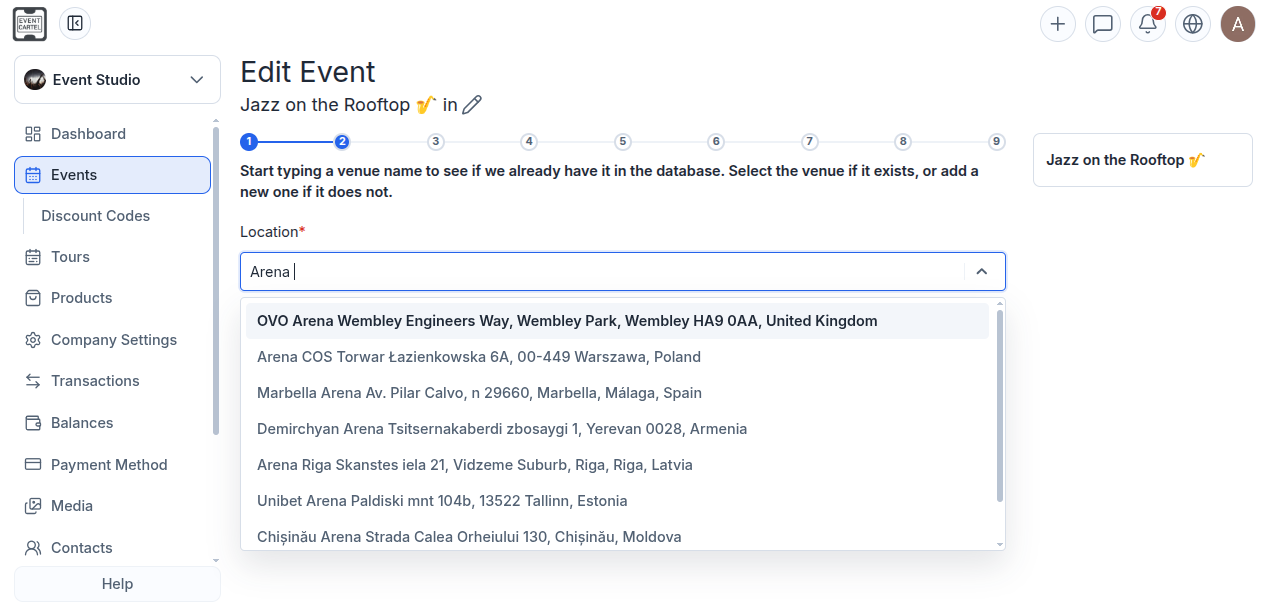
Step 2: Select the venue:
- Start typing the venue name and select it from the list;
- Click "Next".
If the venue is not in the database, you'll be prompted to create a new one:
- Enter the venue name;
- Select the address;
- Click "Next".
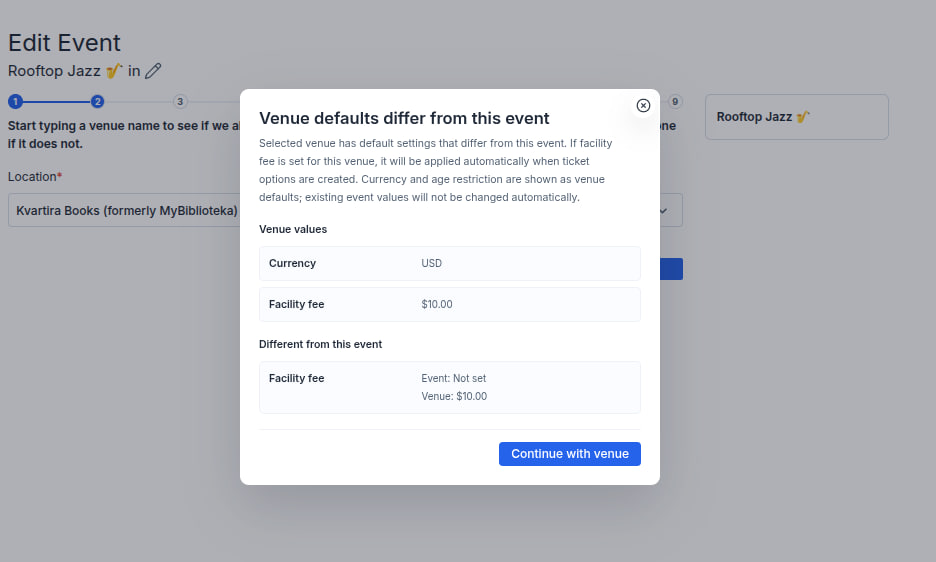
Depending on the selected venue, you may see a pop-up titled "Venue defaults differ from this event" while creating your event.
This notification appears when the venue has its own default settings that differ from your event settings. For example:
- The venue may only support a specific currency. If you selected a different currency, the system will notify you;
- The venue may have recommended age restrictions. The system will display the suggested age limits for attendees;
- The venue may charge a "Facility Fee" - an additional fee collected on behalf of the venue. If enabled, it will be applied automatically when you create ticket types;
Please note: Age restrictions are recommendations only and are not applied automatically. We recommend reviewing them when setting up your event to help avoid confusion for attendees and potential issues on the day of the event;
After reviewing the information, click "Continue with venue" to continue creating your event.
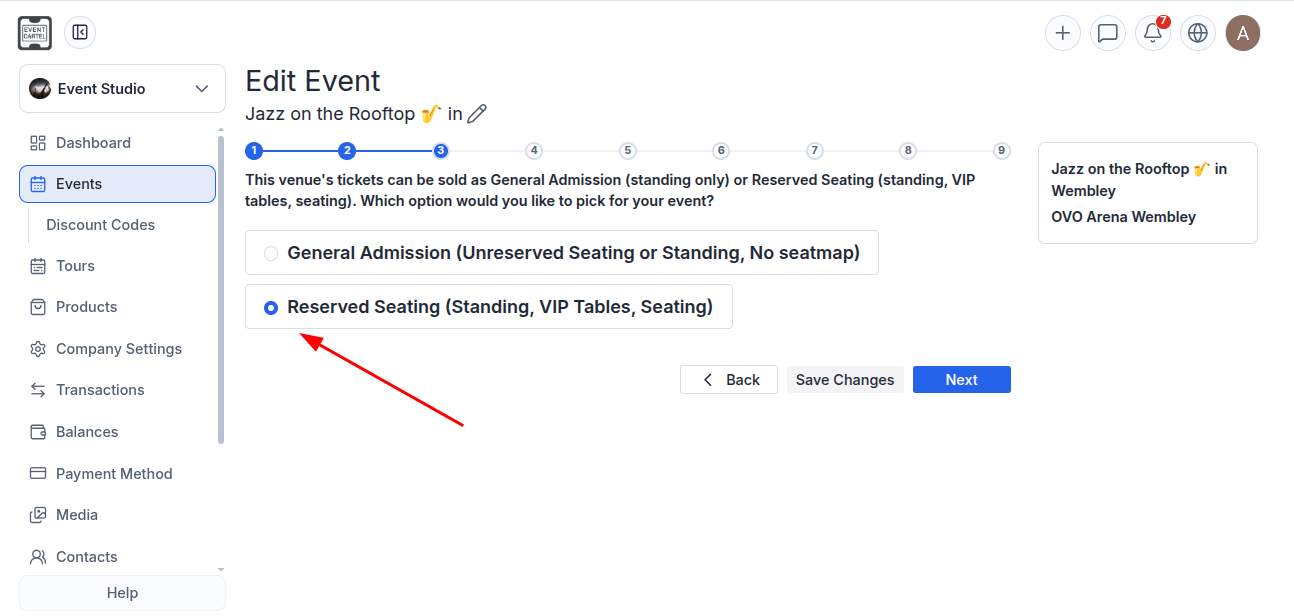
Step 3: Select "Reserved Seating (Standing, VIP Tables, Seating)"
(this option is used for events with reserved seating).
(this option is used for events with reserved seating).
- Click "Next".
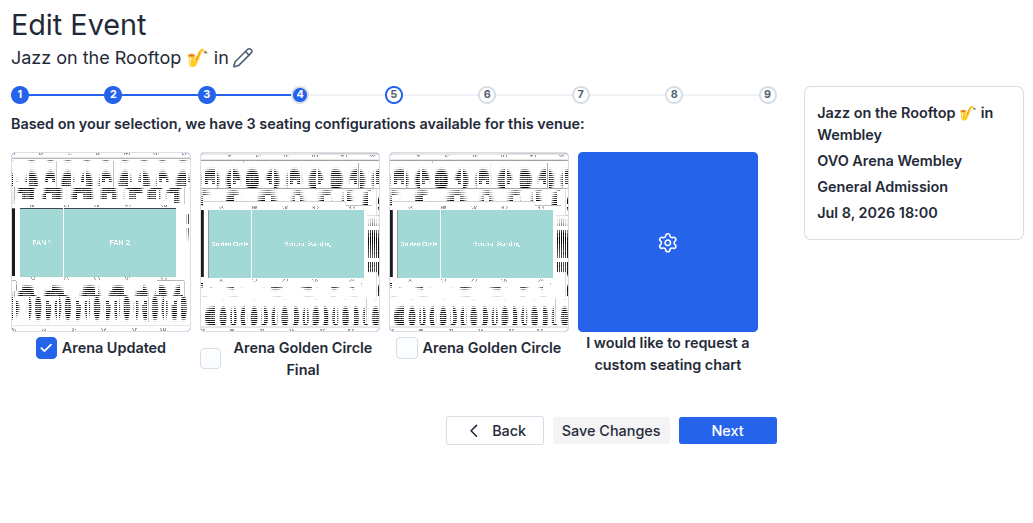
Step 4: Select a seating chart:
Depending on the selected venue, you may be offered one or more seating charts.
- Click the seating chart you want to use (you can open each one to view it in more detail);
- If none of the available seating charts are suitable, click "I would like to request a custom seating chart" to upload your own venue layout;
- Click "Next".
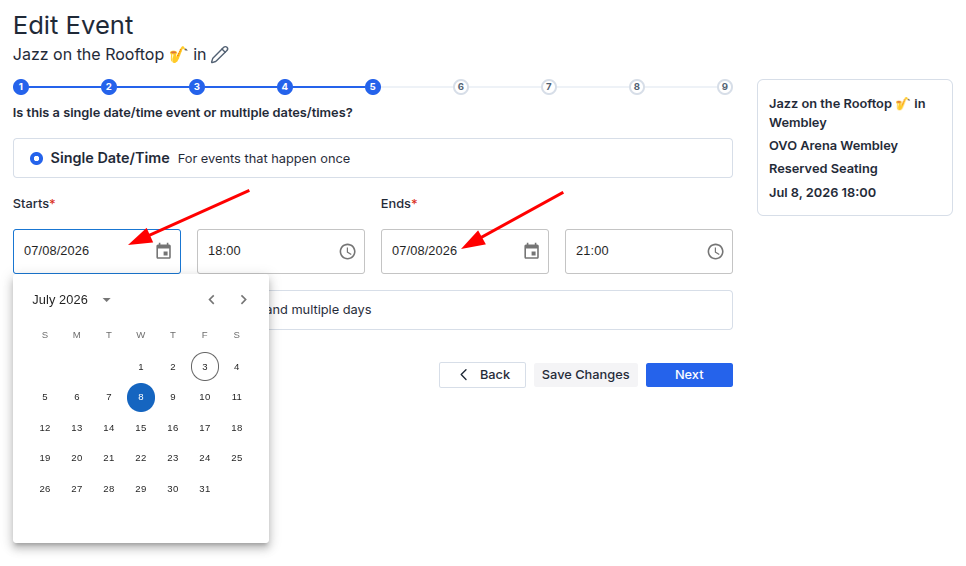
Step 5: Set the event date and time:
If your event takes place only once, select "Single Date/Time".
For a single-date event:
- Enter the event start date and time;
- Enter the event end date and time (if you leave this field blank, the system will automatically set the end time to three hours after the start time);
- Click "Next".
Step 6: Choose how you want to create tickets:
Create Estimate – lets you configure the seating chart in advance, assign ticket types to seats, and set prices. The completed Estimate can be saved and reused for future events with the same seating chart;
Create Tickets – lets you create tickets for the current event immediately;
Select Estimate – lets you use a previously saved Estimate;
- Click "Next".
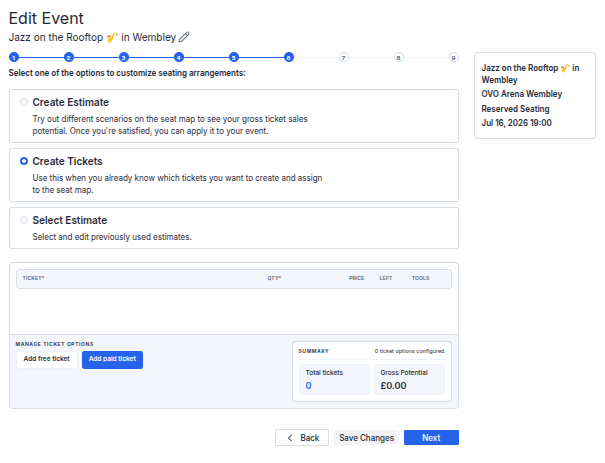
If you selected "Create Tickets":
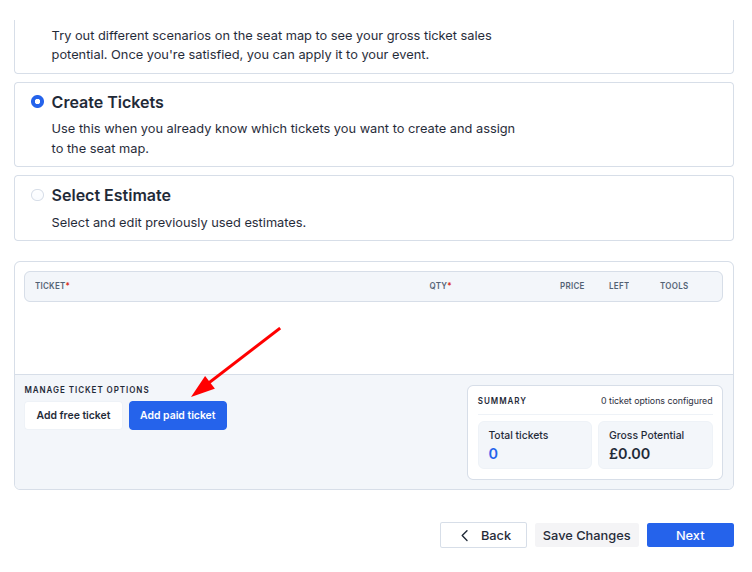
- Click "Add paid ticket" to create a ticket type and proceed to seat assignment on the seating chart;
- You can also create a free ticket type by clicking "Add free ticket".
(You can create multiple ticket types by clicking "Add Ticket" again. For each ticket type, you can set a name, color, ticket limit, and price. The maximum number of tickets per ticket type is 500.)
(Ticket types can also be added or edited later while configuring the seating chart.)
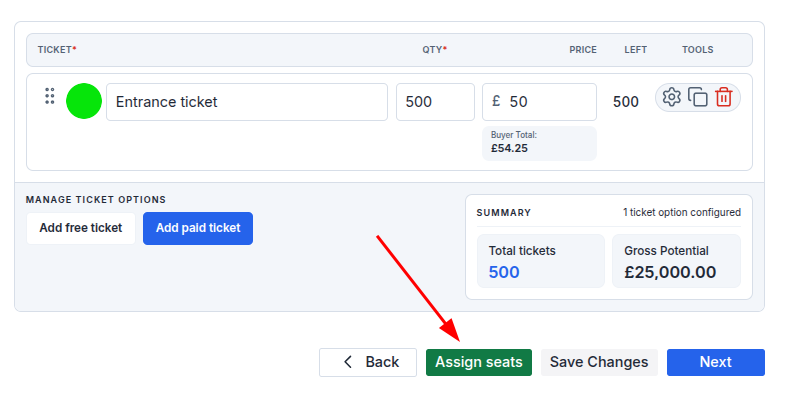
- Fill in the required ticket details;
- Click "Save Changes", then "Assign Seats" to start assigning seats on the seating chart.
By clicking the ⚙️ icon, you can configure additional ticket settings, such as:
- How the service fee is handled;
- The ticket sales start and end dates;
- An access code required to purchase tickets;
- A ticket group.
By clicking the ⧉ icon, you can create a copy of the ticket type.
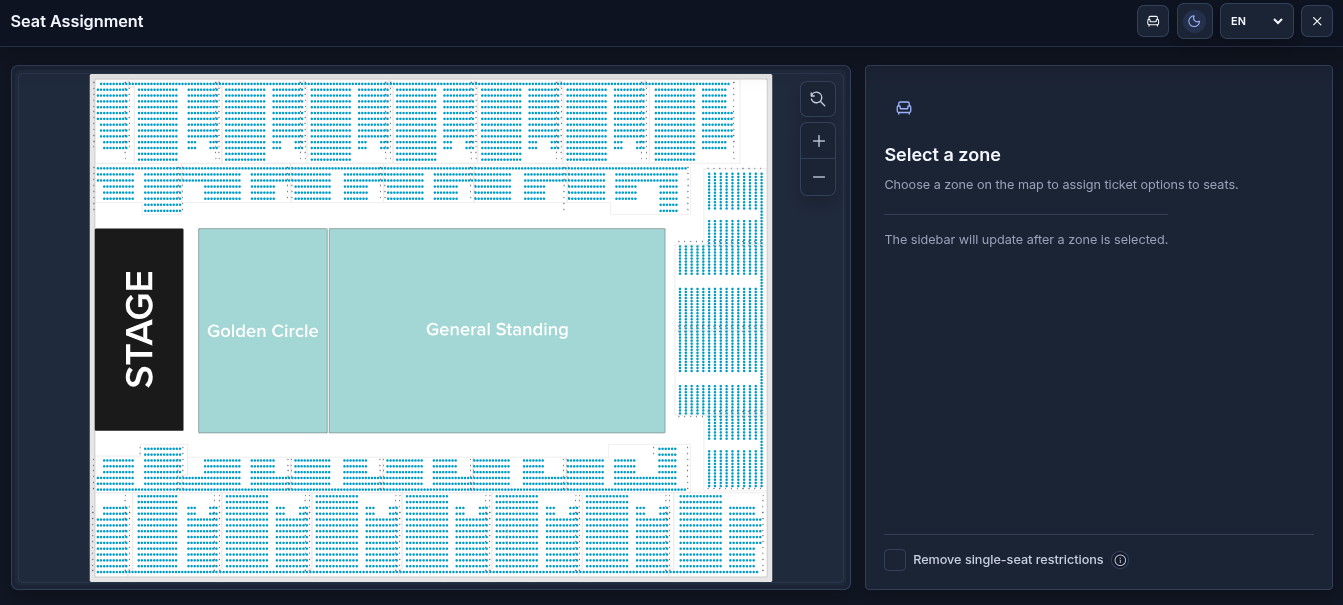
After clicking "Assign Seats", the seating chart will open. Click the section you want to configure to start assigning ticket types.
Use the + and − buttons to zoom in or out, and click and hold the left mouse button to move around the seating chart.
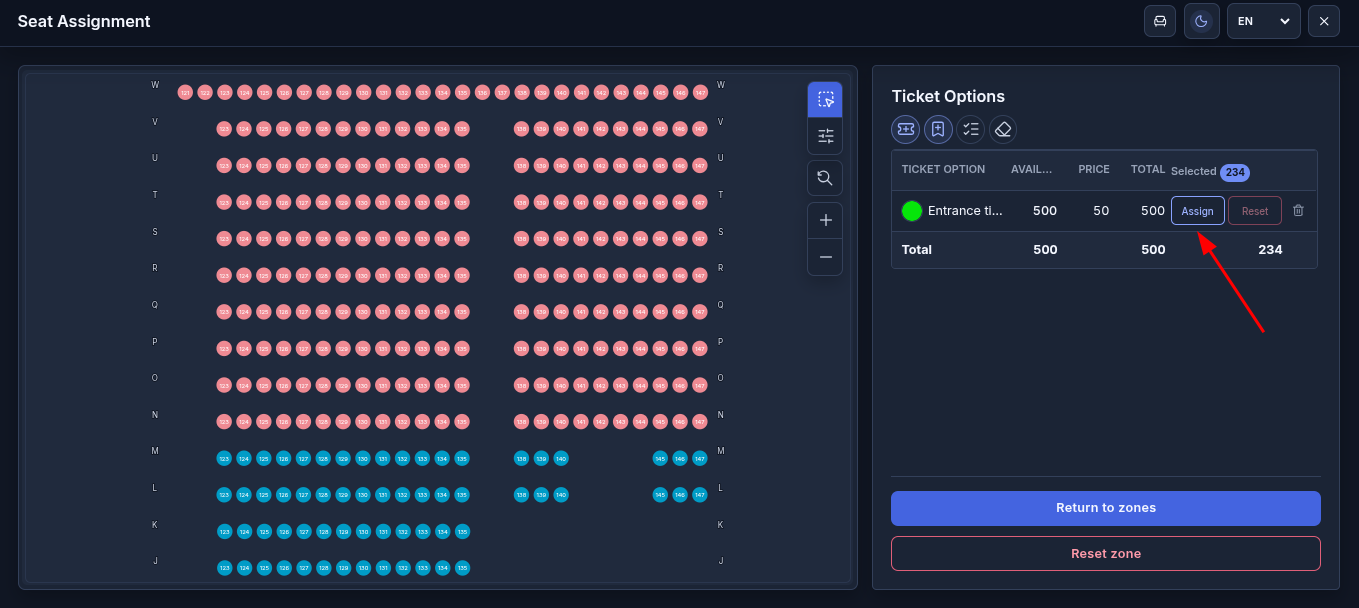
- Select one or more seats;
- In the right-hand panel, click "Assign" next to the ticket type you want to use;
- The assigned seats will be highlighted in the color of the selected ticket type;
- When you're finished with this section, click "Return to zones" to continue configuring the remaining zones..
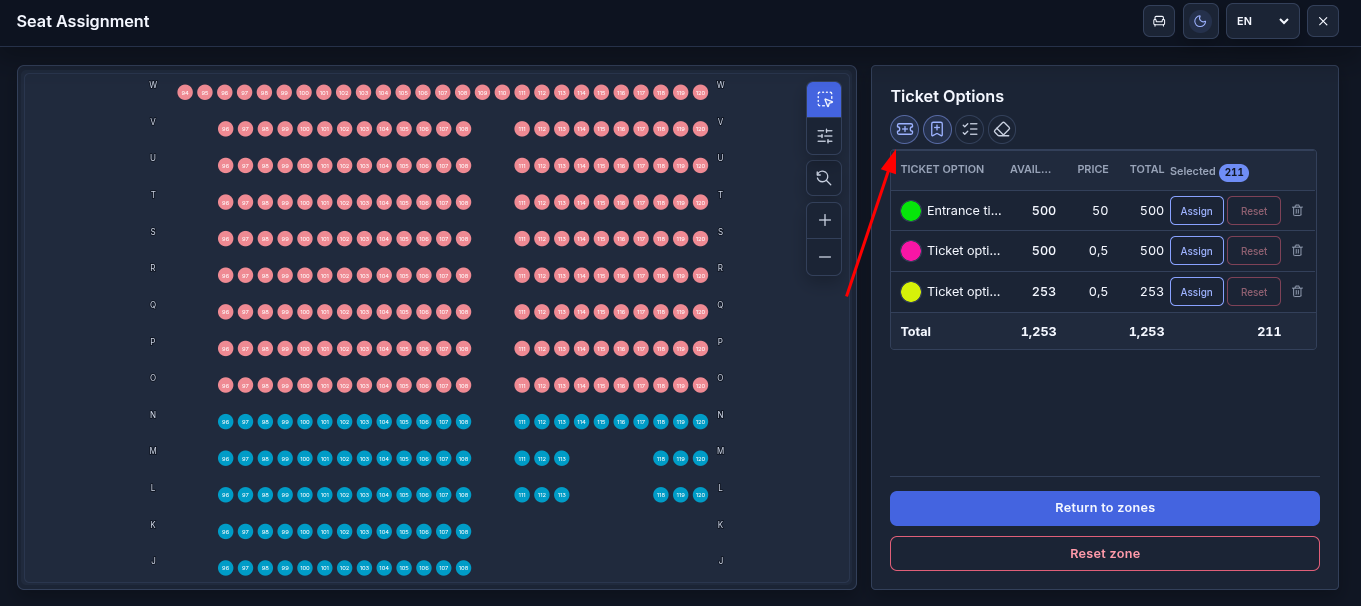
- To add another ticket type, click the 🎟️ icon;
- Next to it is the "Hold" tool, which lets you temporarily reserve seats, making them unavailable for purchase.
The seat assignment tool includes many additional features. To get the most out of it, we recommend reading the "Managing the Seating Chart" article.
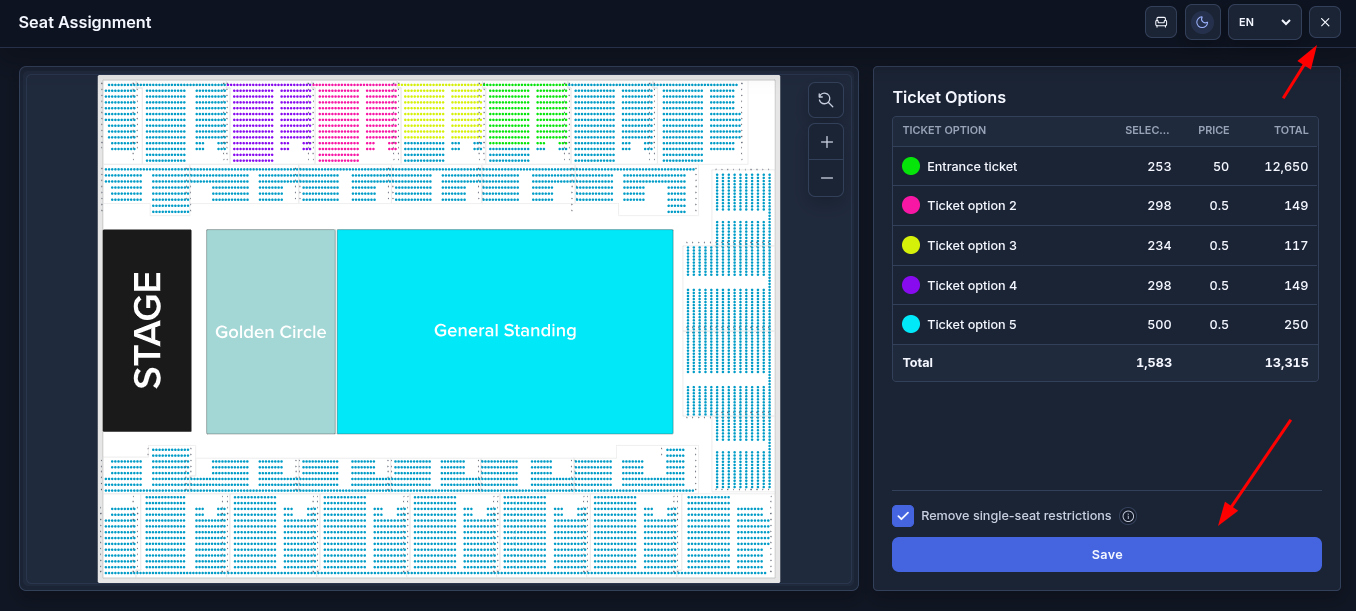
- Configure all sections of the seating chart that will be used for ticket sales;
- Remember to click "Save" regularly so you don't lose your changes;
- When you've finished configuring the seating chart, click ✕ in the top-right corner to return to the event setup.
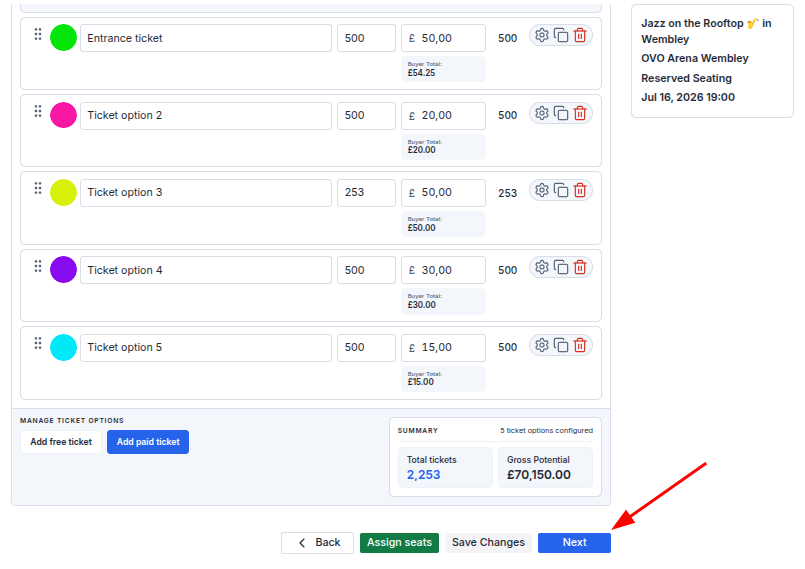
- After completing the seating chart setup, you'll see all the ticket types you've created;
- Make sure all the information is correct and make any changes if needed;
- Click "Next".
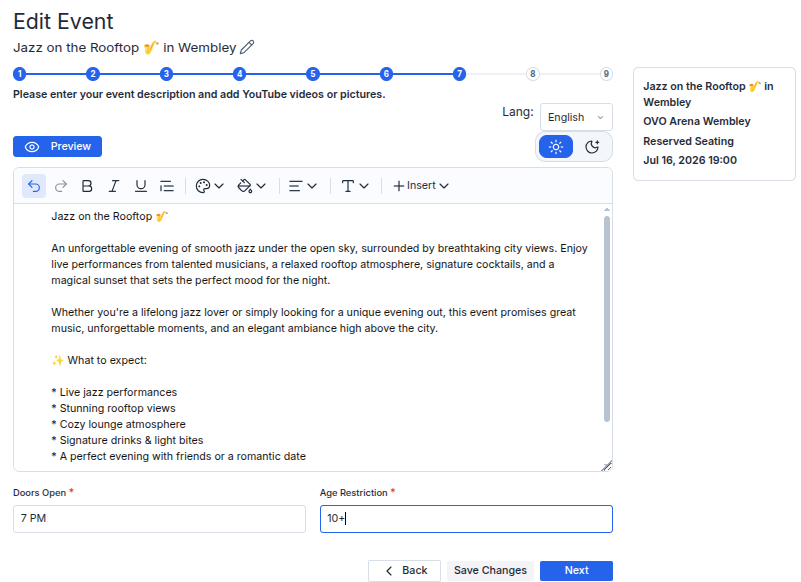
Step 7: Add the event description:
- Enter a description so attendees can learn more about your event;
- Set the door opening time and age restriction;
- Click "Next".
Tip: You can make your description more engaging using the built-in editor: change the font, highlight important text, choose text and background colors, or switch to dark mode for a more comfortable editing experience.
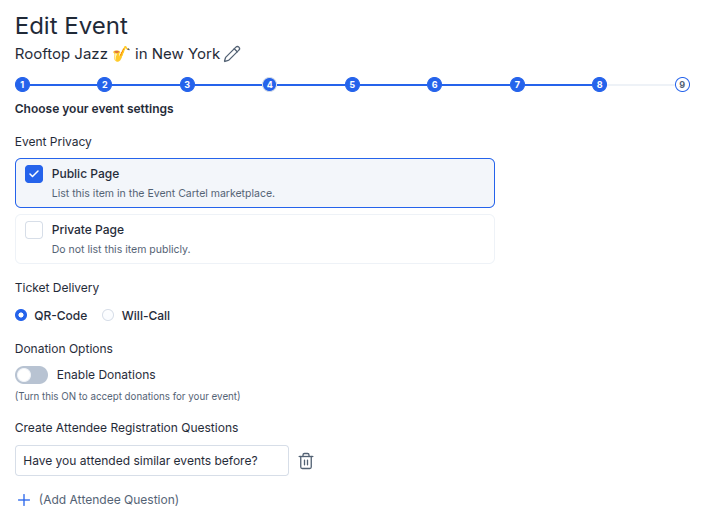
Step 8: Event settings:
Event Privacy – allows you to make your event private;
(Please note: if "Will Call" is selected, attendees will not receive tickets with QR codes by email, SMS, or in the mobile app.)
Donation Options – enable this option if you'd like to give attendees the opportunity to support you with an additional donation during checkout. They can enter a donation amount or skip this step;
Create Attendee Registration Questions – add registration questions if you need to collect additional information from attendees. These questions must be answered before the purchase can be completed.
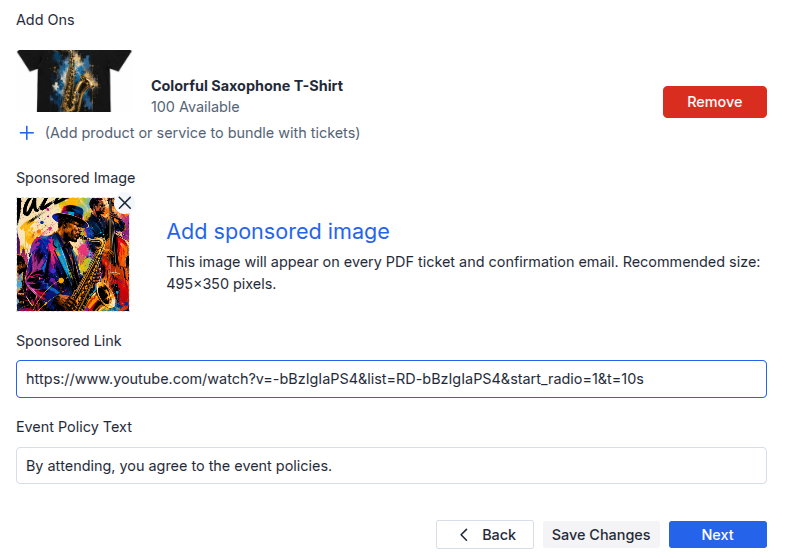
Add Ons – lets you add optional products or services that attendees can purchase along with their tickets;
Sponsored Link – add a link to a sponsor's website, partner page, or any other external website you'd like to promote. After purchasing a ticket, attendees will see the Sponsored Image and can click it to visit the linked page.
Event Policy Text – enter important event rules or policies. For example: "Minors may attend only when accompanied by an adult."
You can preview your event at any time by clicking "View Event".
- Click "Next".
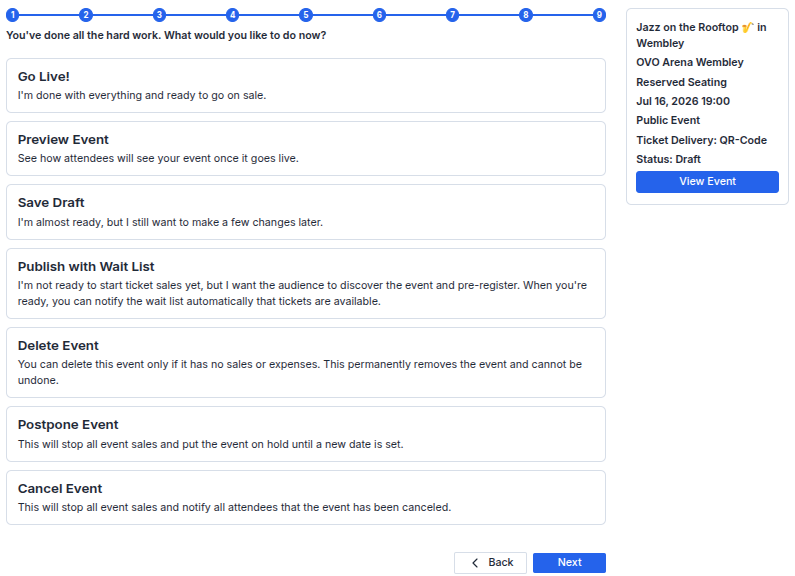
Step 9: You're all set! Choose what you'd like to do with your event:
Go Live – publish your event and start selling tickets;
Preview Event – see how your event page will appear to attendees;
Save Draft – save your event as a draft if you're not ready to publish it yet;
Publish with Wait List – publish your event without starting ticket sales. Attendees will be able to view the event page and join the wait list;
Delete Event – permanently delete the event. Please note that an event can only be deleted before ticket sales begin;
Postpone Event – postpone the event to a later date. Ticket sales will be paused until a new date is scheduled;
Cancel Event – cancel the event. Ticket sales will stop, and all registered attendees will be notified of the cancellation;
- Click "Next".
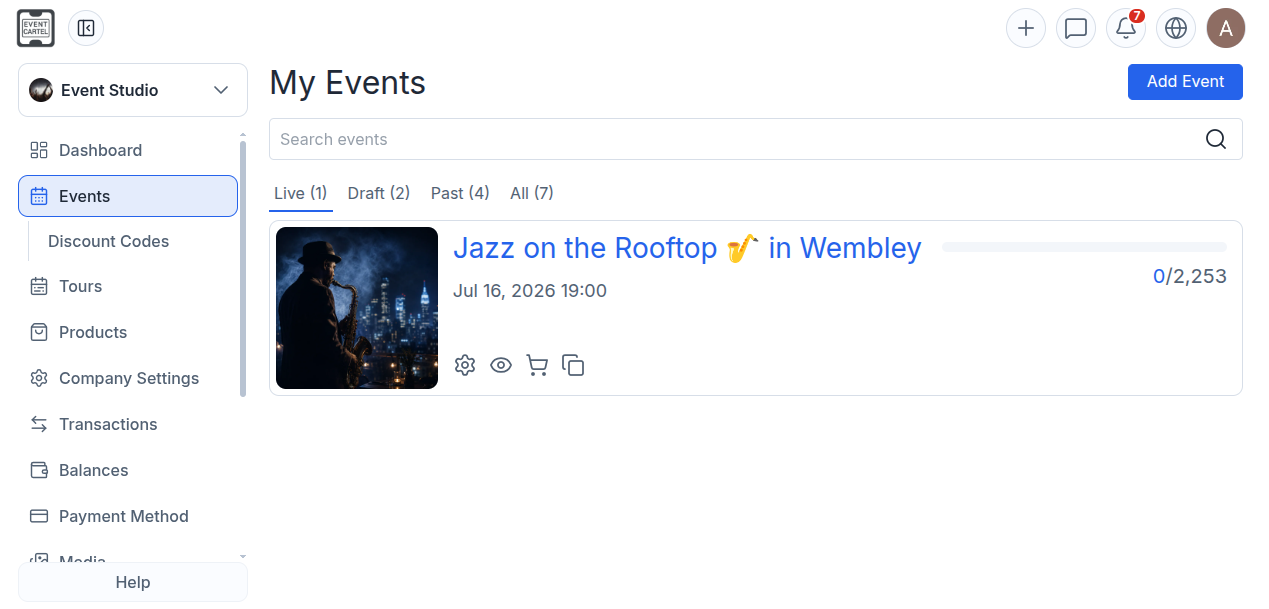
Done! Your event is now available in the "Events" section.
Available actions:
⚙️ Manage – edit your event settings;
👁️ View – open the event page and see it as attendees do;