How to use Estimate?
Jul 7, 2026Updated3 min read00
An Estimate allows you to create a seating map template with assigned ticket types and prices. You can later apply this setup to other events that use the same seating layout, without having to configure everything again.
Creating an Estimate:
- On Step 6, select "Create Estimate".
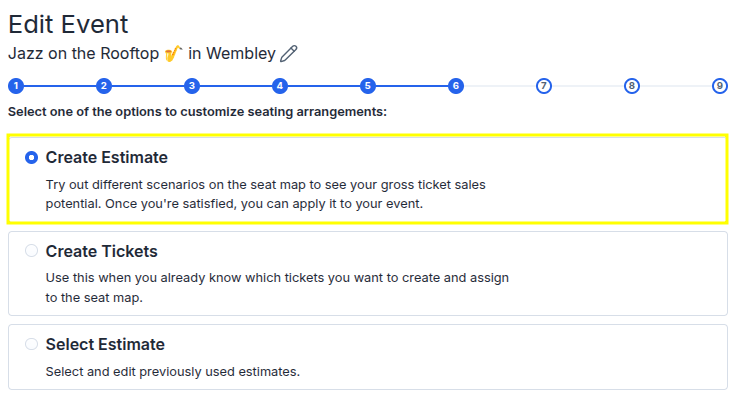
The seating map will open.
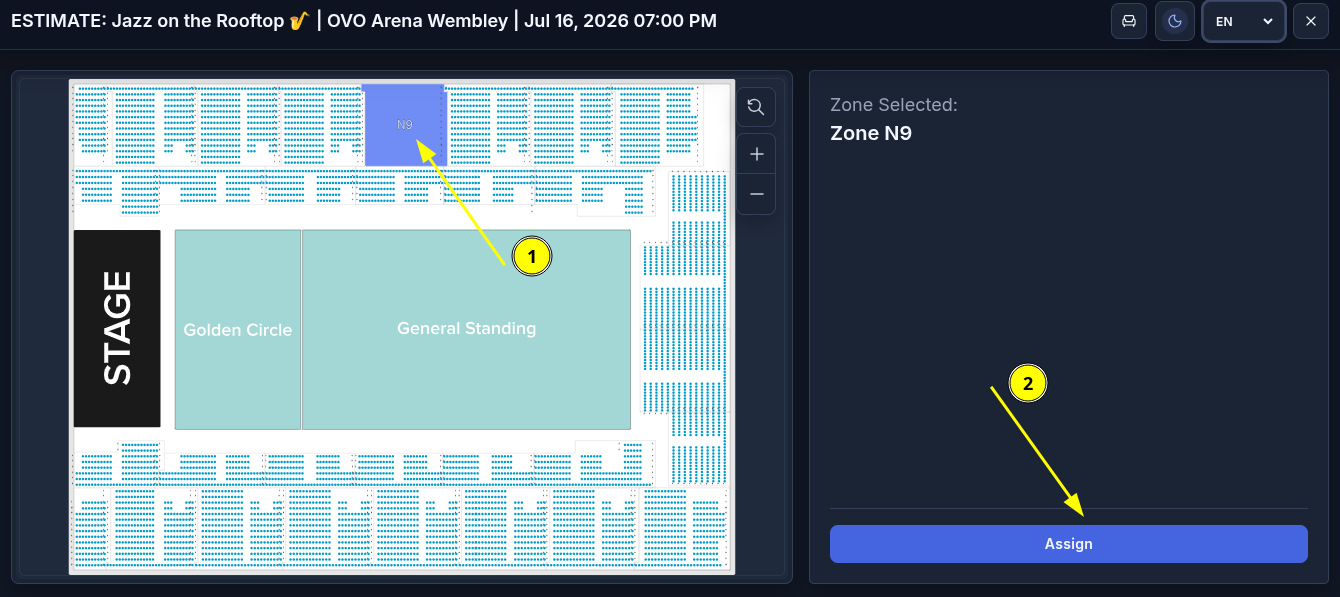
- Click the section you want to assign tickets to (1);
⦁ Information about the selected section will appear on the right side of the screen;
- Click "Assign" to start assigning ticket types (2).
- Click "Assign" to start assigning ticket types (2).
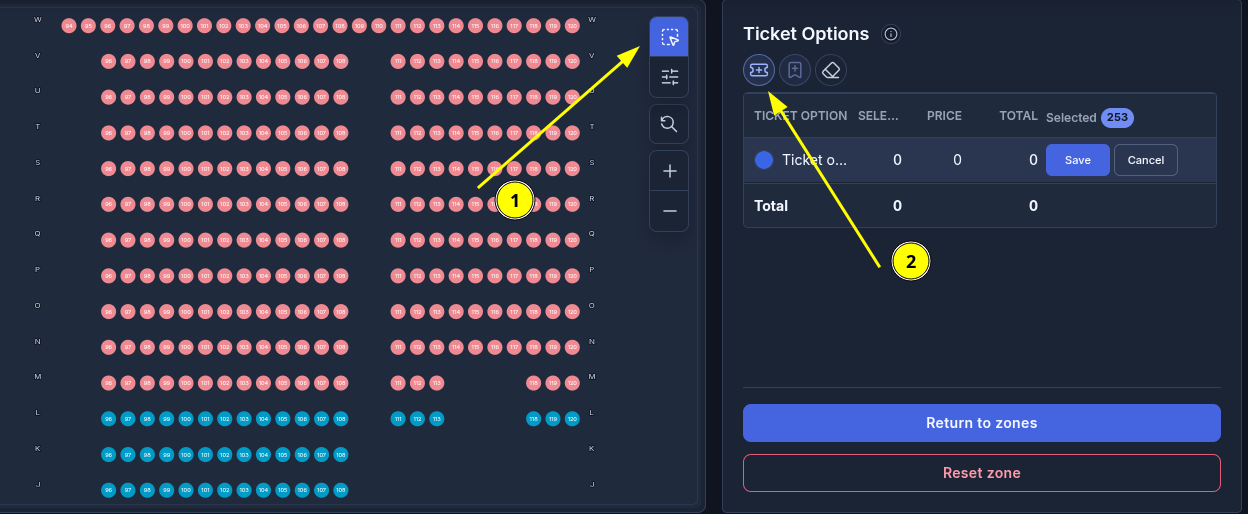
After opening a section, select the seats you want to assign tickets to:
- Click the selection tool (1);
- Click and hold the left mouse button, then drag to select the desired seats on the map;
⦁ You can also select seats individually by clicking on them;
⦁ To select an entire row, click the row letter.
After selecting the seats, add a ticket type:
- Click the ticket icon (2);
⦁ A new ticket type will appear in the table with empty fields;
- Click "Save";
⦁ Click any field to edit the ticket color, name, or price.
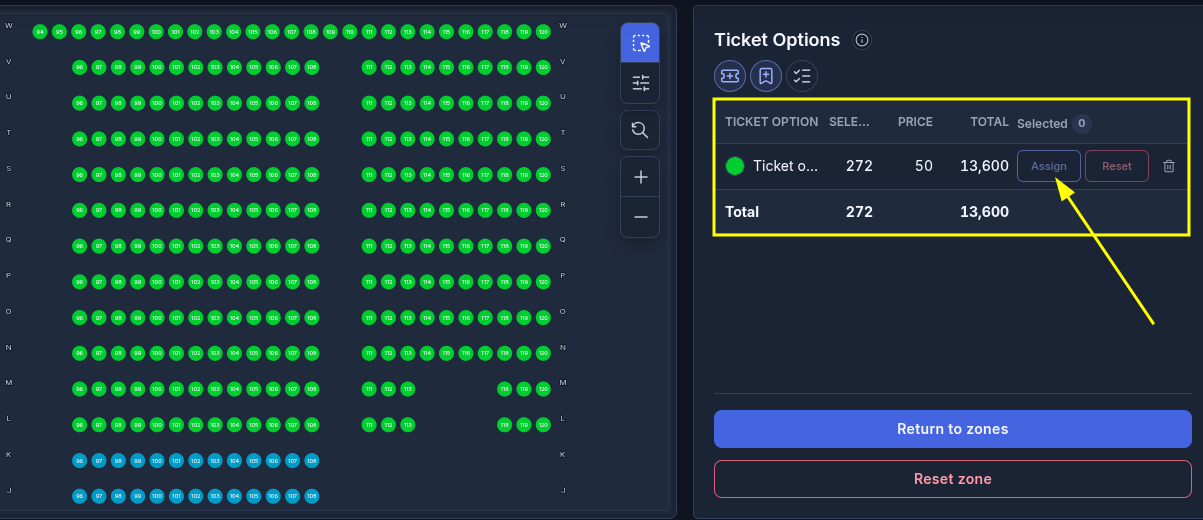
Assigning tickets in an Estimate works a little differently than when configuring a seating map for an event. You don't need to specify the number of tickets in advance. Simply select the seats you want and click "Assign" - the system will automatically calculate the number of tickets. The maximum number of tickets per ticket type is still 500.
After the tickets are assigned:
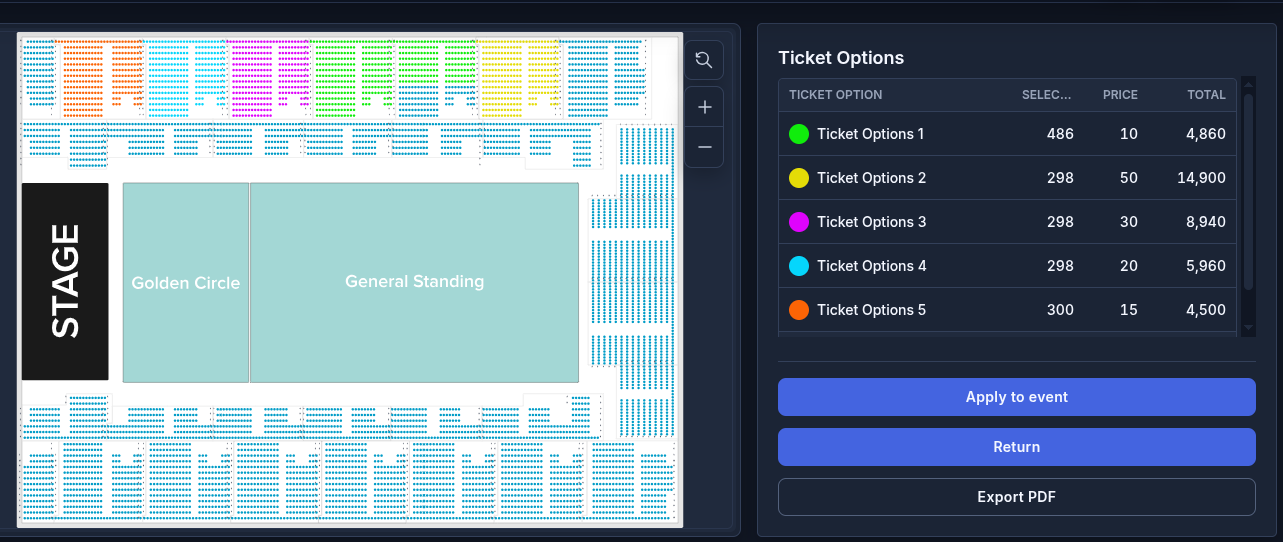
⦁ The "Selected" column shows how many seats are assigned to that ticket type;
⦁ The "Price" column shows the price of a single ticket;
⦁ The "Total" column shows the total value of all assigned tickets.
Navigating the map:
⦁ When you finish configuring the current section, click "Back to Zones" to continue with the next one;
⦁ To remove all ticket assignments from the current section, click "Reset Zone".
Assigning tickets to a standing area:
(for example, a dance floor)
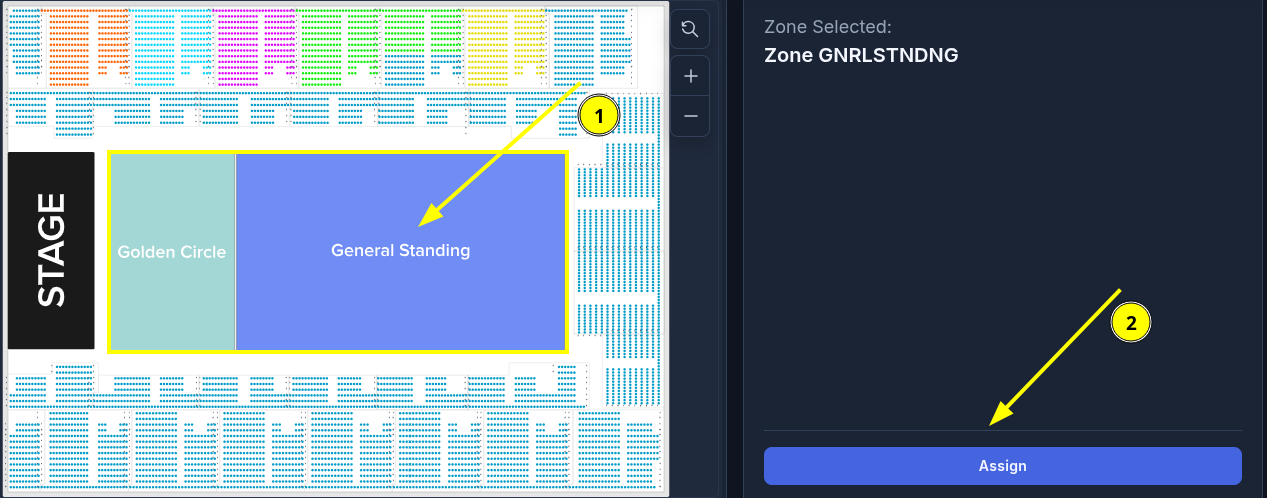
- Click the desired standing area on the map (1);
- Click "Assign" (2).
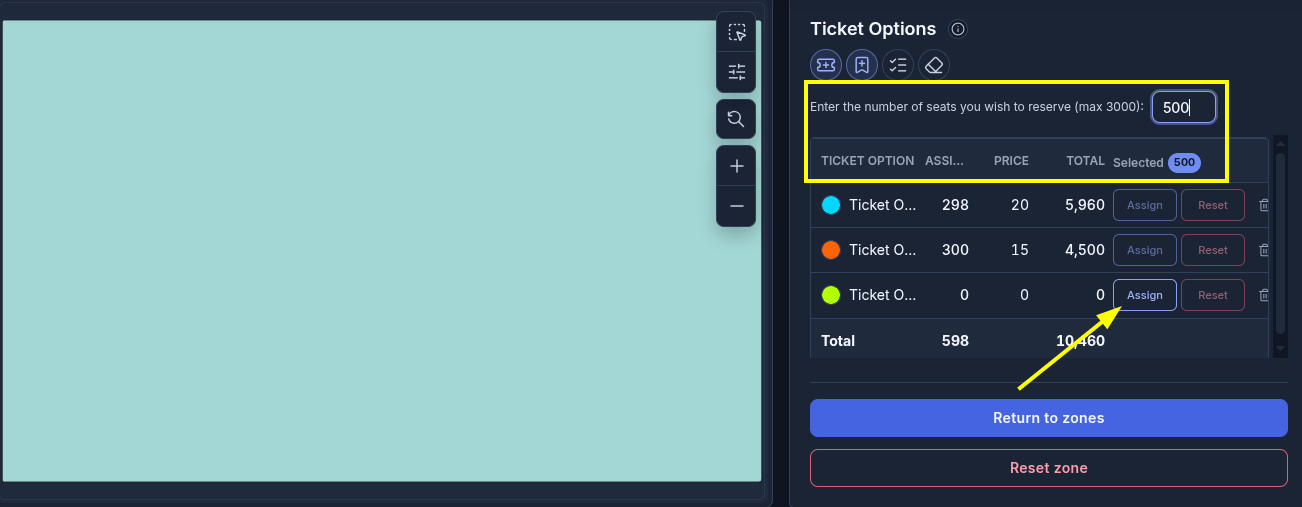
- In the field above the ticket list, enter the number of spots you want to assign to this standing area;
⦁ The maximum available capacity for the selected area is displayed next to the input field;
- Create a new ticket type and click "Assign".
Important: The same ticket type cannot be assigned to both seated and standing areas. In addition, each ticket type is limited to a maximum of 500 tickets.
Saving and exporting:
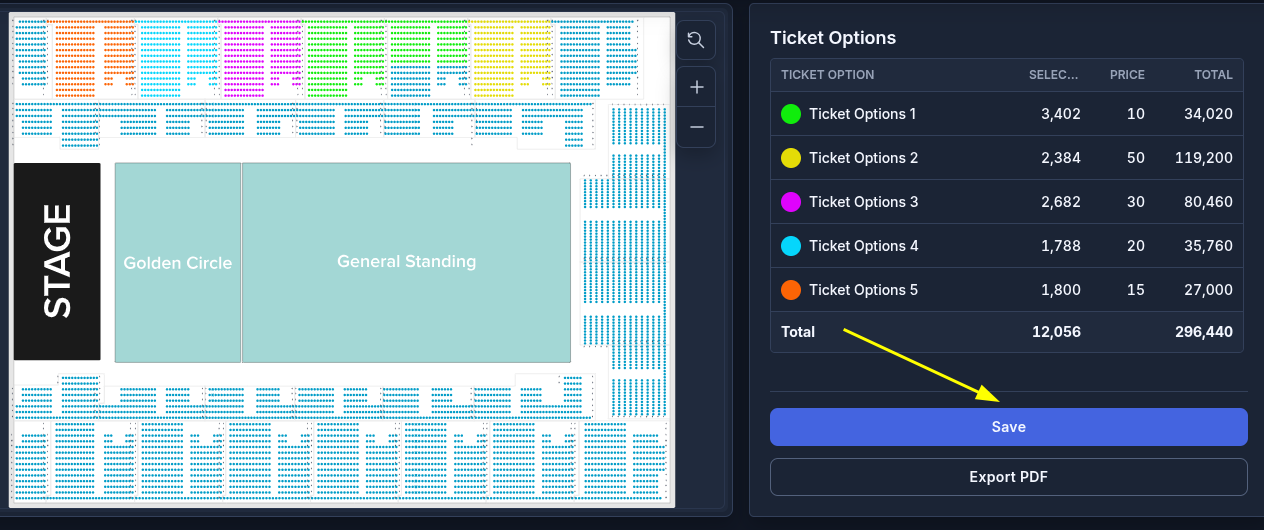
- After configuring all sections, click "Save" to keep your changes;
⦁ If needed, click "Export PDF" to download a PDF version of the seating map.
Additional features:
⦁ You can also use the "Hold" feature to temporarily reserve seats and prevent them from being sold.
⦁ For more information about working with the seating map, assigning tickets, and using other editor tools, see the "Seat Map Editor" article.
Finishing the Estimate:
- Click "Apply to Event";
⦁ The Estimate will be saved to your account and can be used for the current event as well as future events with the same seating layout.
Where to find your saved Estimate:
⦁ After applying the Estimate, you will return to Step 6 of event creation;
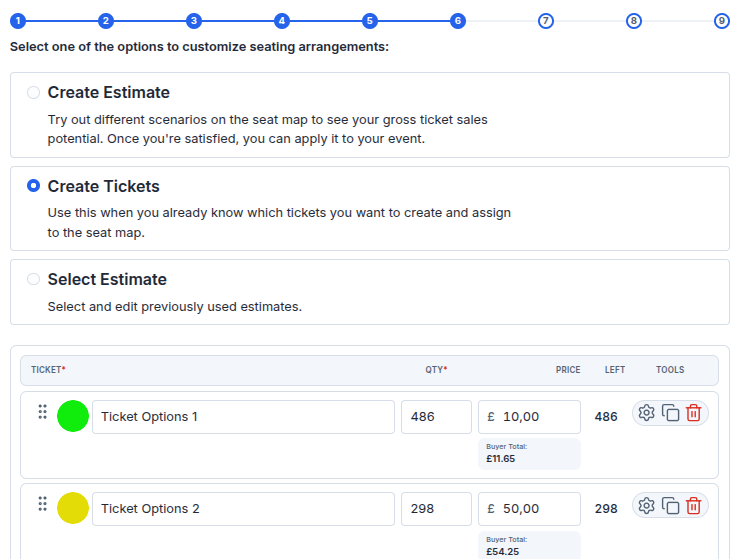
⦁ In the "Create Tickets" section, all ticket types created while configuring the seating map will appear in the "Ticket" list;
⦁ The seating map template will be automatically saved in the "Select Estimate" section;
⦁ You can store multiple templates in this section. When creating a new event, you can choose any saved Estimate, or edit or delete it if needed.