Seat Map Editor
Jul 24, 2026Updated4 min read10
In this article, you'll learn about the main features of the Seat Map Editor and how to use its tools.
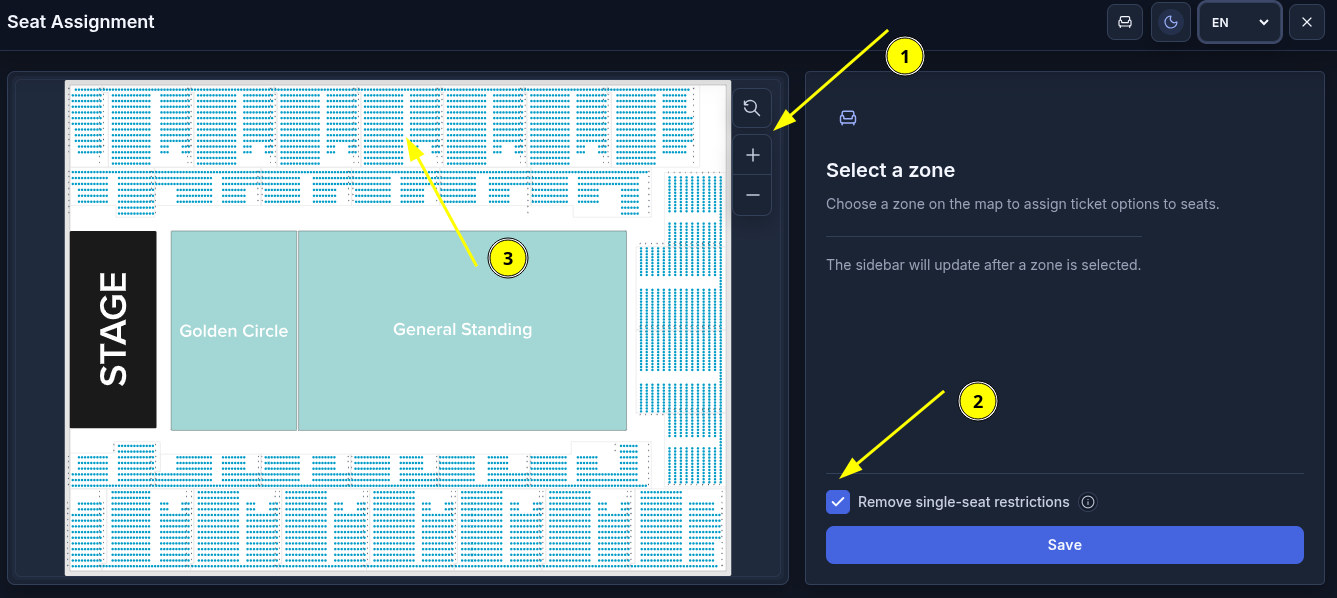
While creating an event, click "Assign Seats" to open the Seat Map Editor. The layout and appearance of the seat map depend on the selected venue.
① Map Navigation:
Use + and − to zoom in or out. Click and drag with the left mouse button to move around the map. Click the magnifying glass icon to restore the default zoom level and map position.
② Single-Seat Restrictions:
Enable "Remove single-seat restrictions" to allow customers to leave a single empty seat next to the seats they select. If this option is disabled, customers won't be able to complete their purchase if it would leave a single empty seat next to the selected seats.
③ Selecting a Zone:
③ Selecting a Zone:
Select the desired zone by clicking it, then click "Assign".
The following icons are available in the top-right corner:
The following icons are available in the top-right corner:
🪑 — open the seat inventory;
🌙 — switch between light and dark mode;
🌐 — change the interface language;
❌ — close the Seat Map Editor (do not exit if you have unsaved changes).
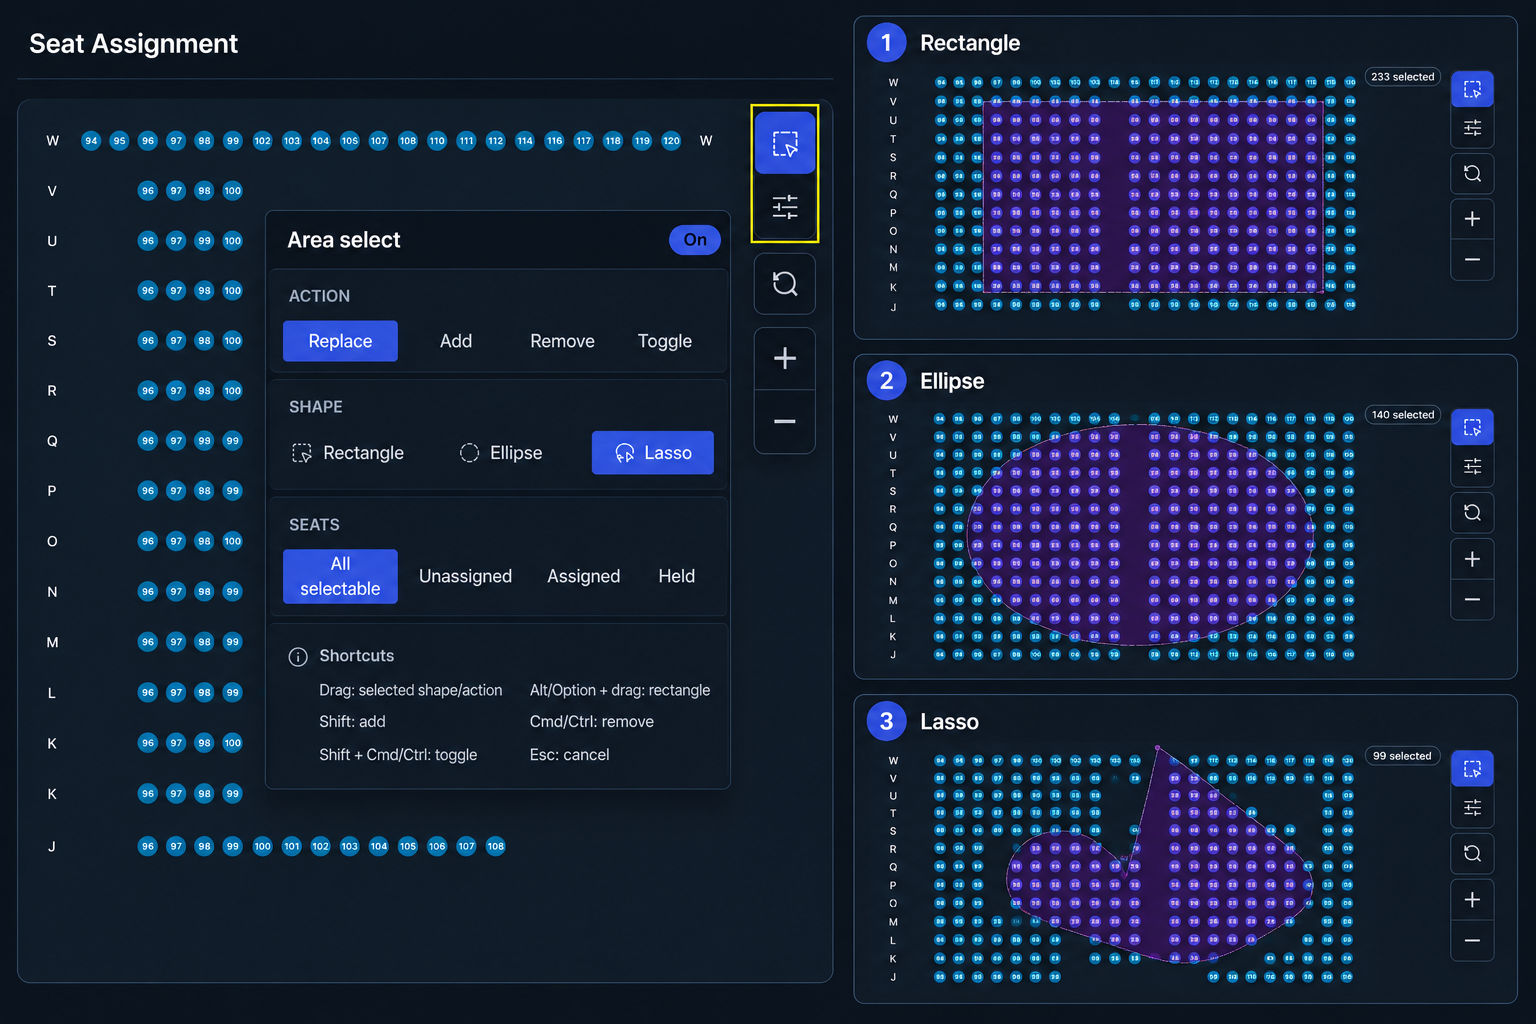
You've opened the settings for the selected zone. Let's start with the seat selection tools.
Choose the selection tool you want to use to select seats on the map:
Rectangle - allows you to select seats using a rectangle or square;
Ellipse - allows you to select seats using a circle or ellipse;
Ellipse - allows you to select seats using a circle or ellipse;
Lasso - allows you to select seats using a freeform shape.
(You can also select seats without using shapes by clicking individual seats or entire rows.)
Choose how the new selection should interact with the seats that are already selected:
Replace - replaces the current selection with the new one;
Add - adds the new selection to the current selection. For example, you can first select seats with a rectangle, then add more seats using an ellipse or lasso;
Remove - removes only the selected area from the current selection;
Toggle - inverts the current selection: selected seats become unselected, and unselected seats become selected.
Choose which seats should be included in the selection:
All Available - includes all available seats in the selection;
Unassigned - includes only unassigned seats in the selection;
Assigned - includes only seats that already have a ticket type assigned;
Held - includes only temporarily blocked seats in the selection.
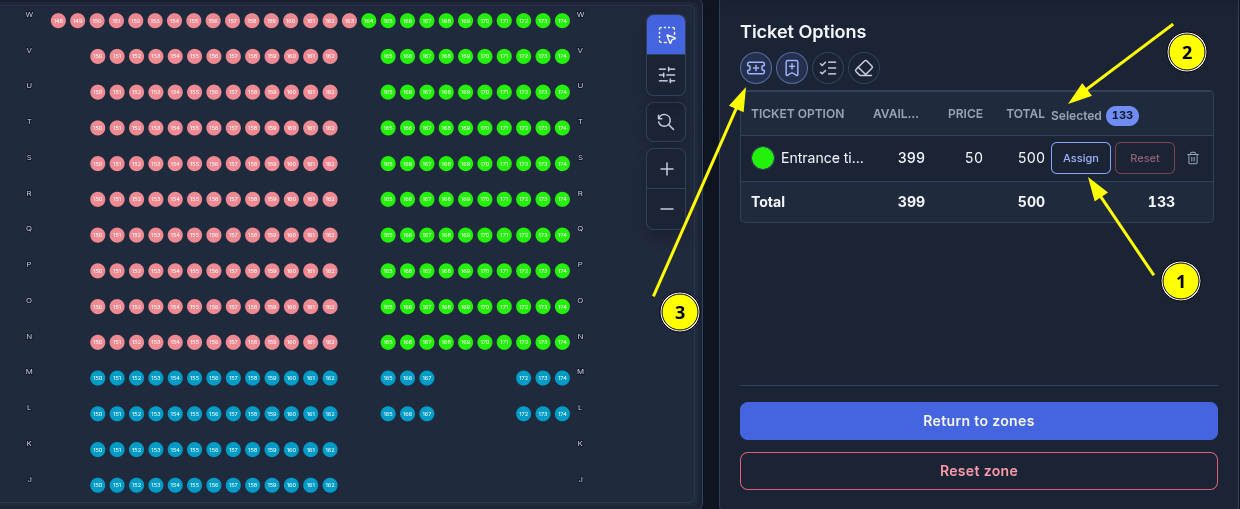
After selecting the seats, you can assign a ticket option, edit an existing one, or create a new one.
① Select the seats, then click "Assign" next to the desired ticket option.
(After the ticket option is assigned, the selected seats will change to its color.)
To remove the assignment, select the same seats again and click "Reset".
② The "Selected" counter shows how many seats are currently selected.
② The "Selected" counter shows how many seats are currently selected.
If the number of selected seats does not exceed the value in the "Available" column, they can be assigned to the selected ticket option.
(You can change the ticket price and quantity while configuring the seat map. Each ticket option can include up to 500 tickets.)
③ Click the ticket option settings icon 🎫 to edit its parameters.
③ Click the ticket option settings icon 🎫 to edit its parameters.
(We recommend using different colors for different ticket options to make them easier to distinguish on the seat map.)
Now let's look at how to create a hold. This feature lets you reserve seats, making them unavailable for purchase. You can release them at any time.
- Click the "Create Hold" icon.
- Select the seats you want on the map, then click "Assign".
- After the hold is assigned, the selected seats will be marked with a striped pattern.
- To make these seats available for purchase again, select them and click "Release".
Unlike ticket options, you don't need to specify the number of seats in advance when creating a hold.
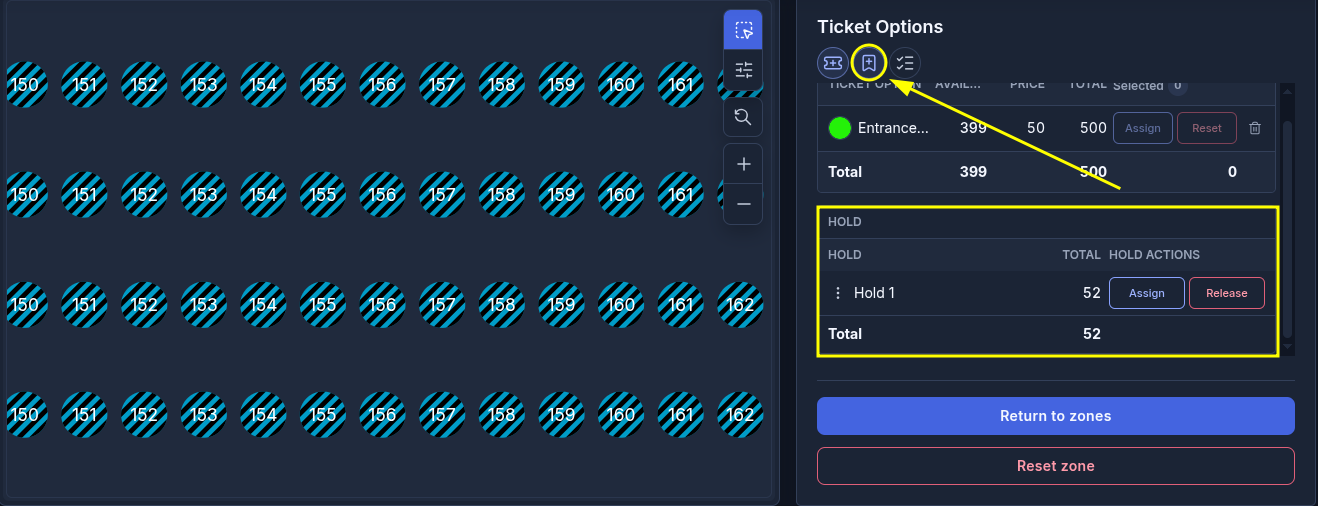
Click "Return to zones" to go back to the main seat map.
If you want to remove all assignments from the current zone, click "Reset zone".
Before switching to another zone, don't forget to click "Save" to avoid losing your changes.
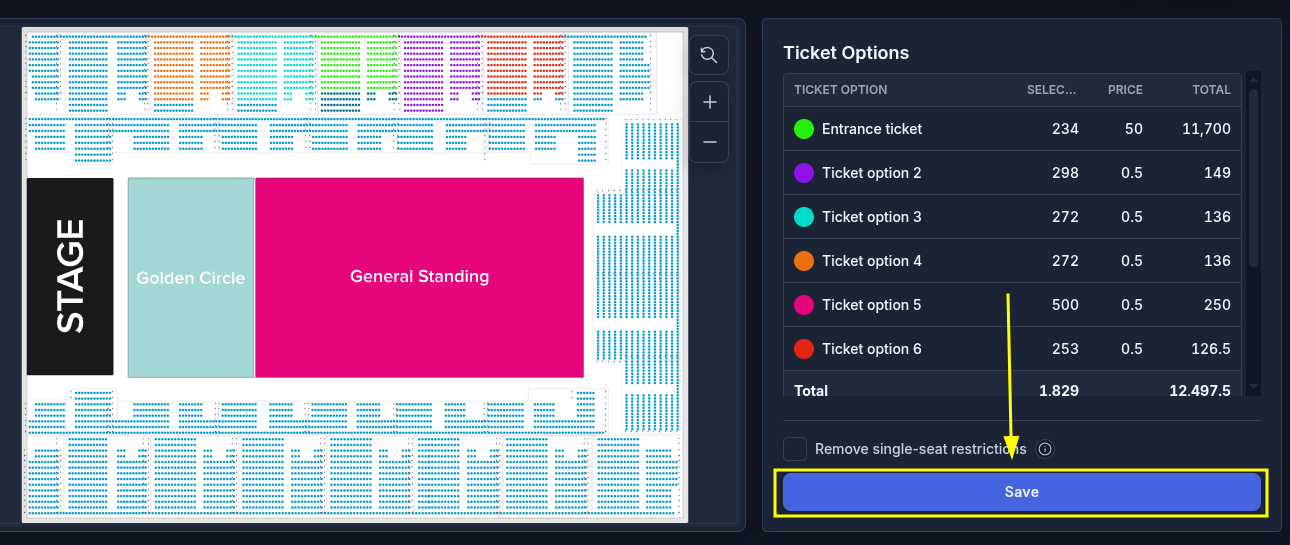
Standing Zones:
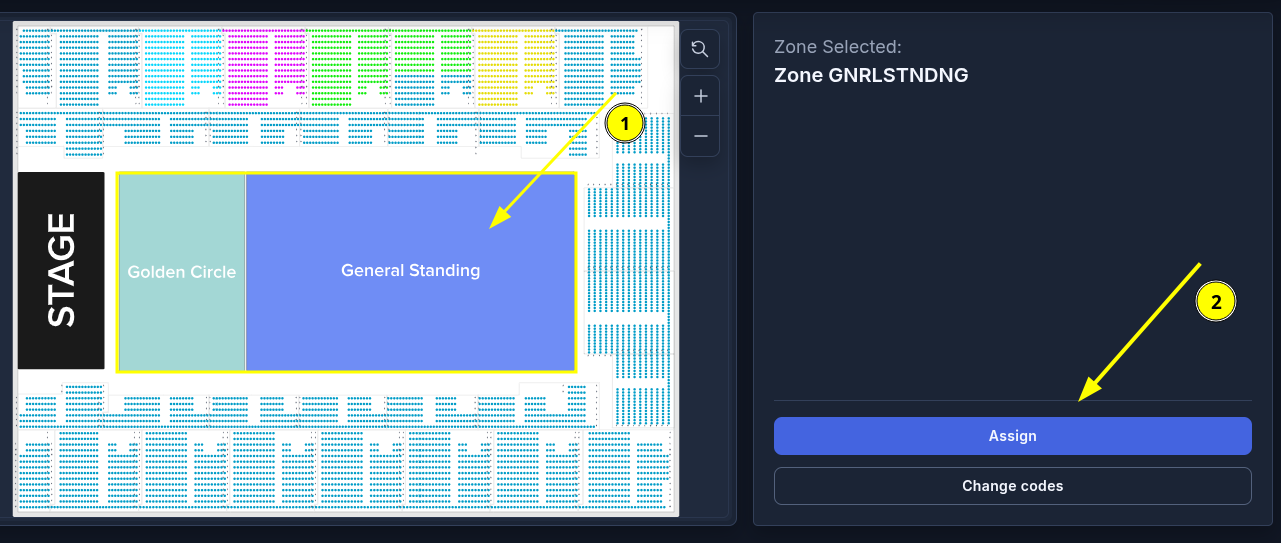
If the seat map contains areas without individual seats (for example, a standing floor), you can configure them separately.
① Select the standing zone on the map;
② Click "Assign".
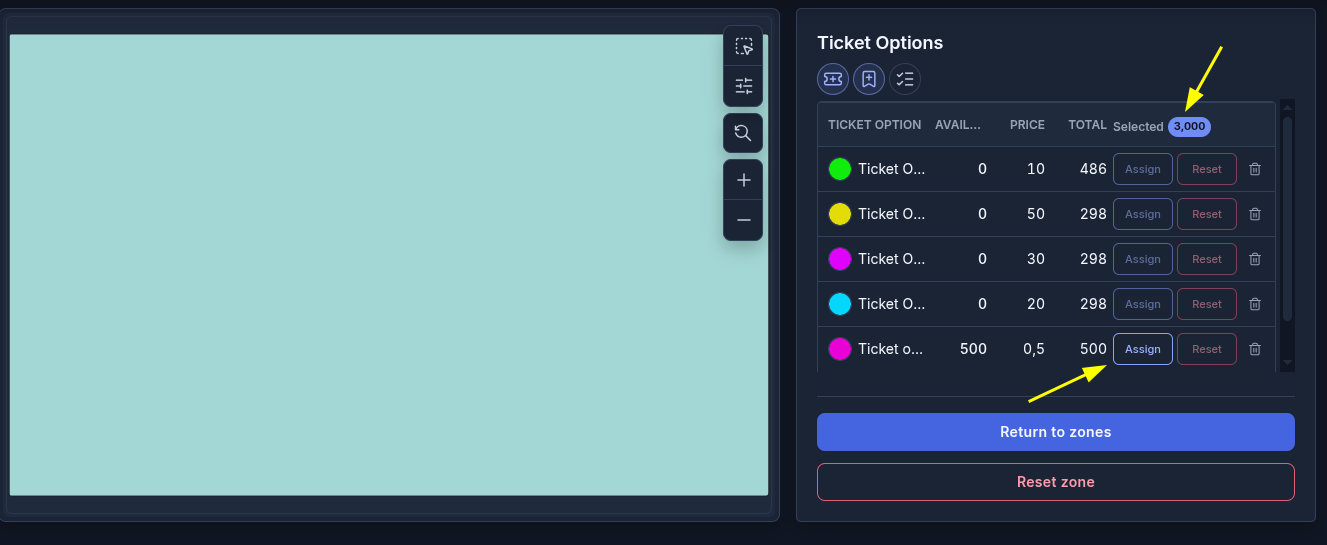
After opening the standing zone:
- The "Selected" column will display the capacity of the standing zone;
- Select the required ticket type and click "Assign".
You can assign multiple Ticket Options to a single standing zone and divide the available ticket inventory among them. For example, for a zone with a capacity of 300 people, you can assign two Ticket Options with 150 tickets each.
These Ticket Options will go on sale one at a time. This is useful when they provide the same access but need to be sold at different prices in stages. The Ticket Option added first will be available to customers first. Once all its tickets have been sold, the next Ticket Option will automatically go on sale.
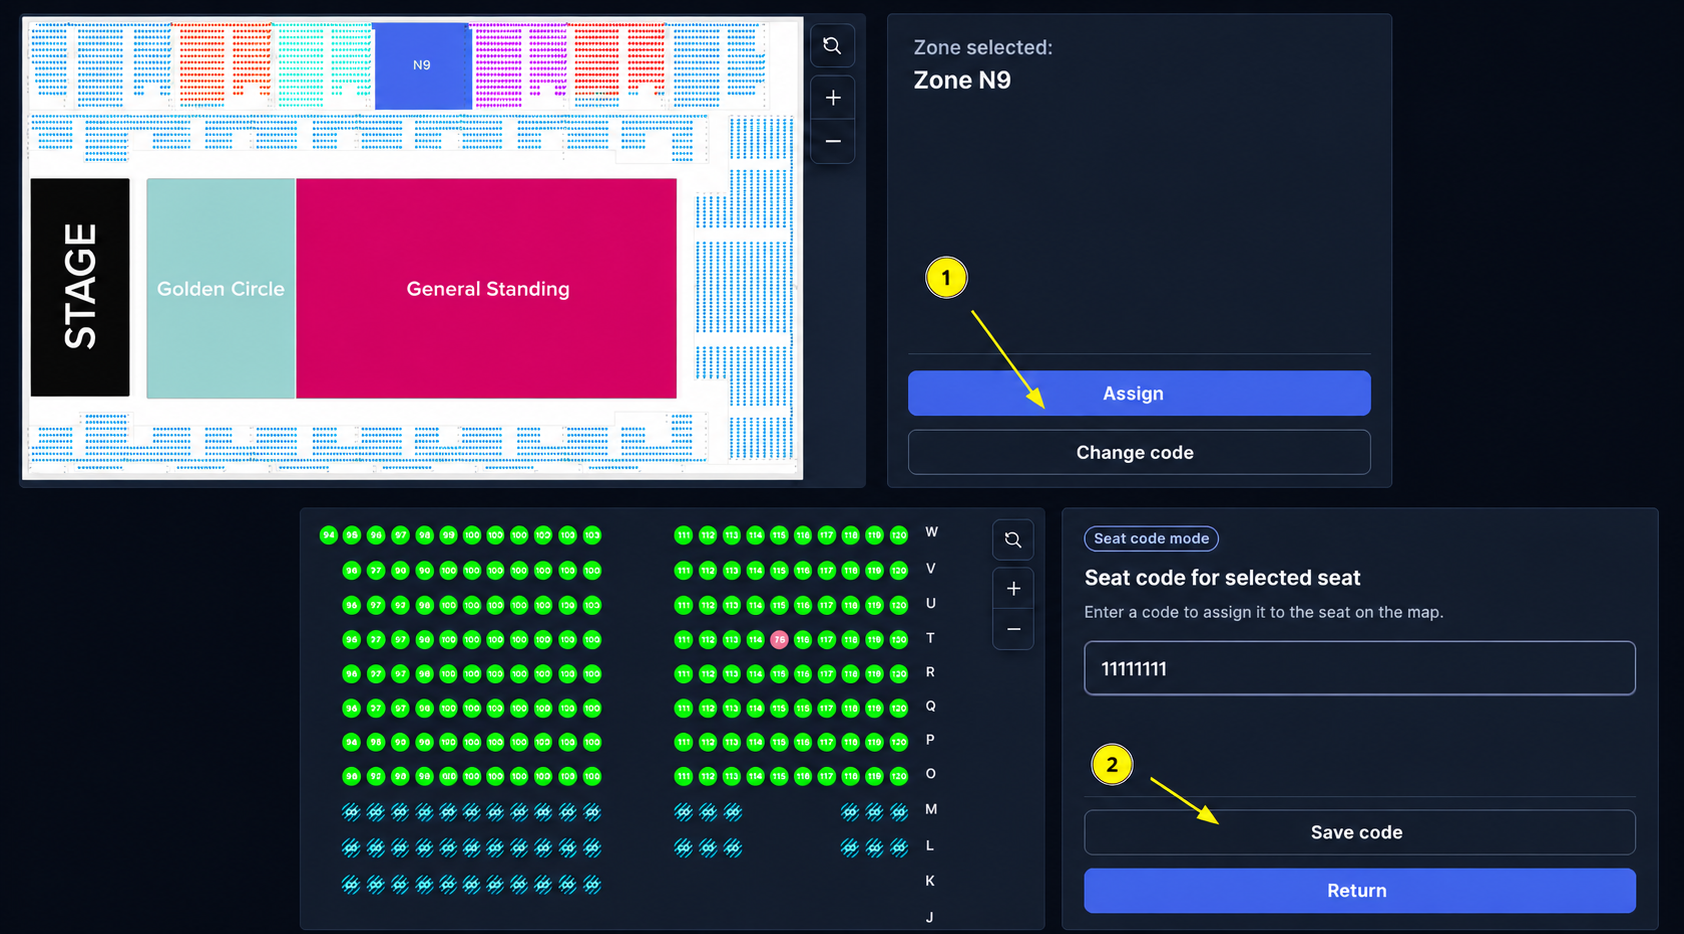
Changing Seat Codes:
By default, the system automatically generates a unique code for each ticket. If you want to use your own codes for specific seats, you can assign them manually.
① Select the desired zone and click "Change code".
② Click the seat you want, enter the code in the field, and click "Save code".
After the ticket is purchased, the assigned code will be displayed on the ticket.