How to import external ticket codes?
Jul 29, 2026Updated3 min read00
The import feature allows you to upload codes for tickets that were sold or issued through third-party platforms. Once uploaded, they are saved in the event details alongside tickets purchased directly through EventCartel.
To upload ticket codes:
- Log in to the “Organizer Dashboard”;
- Go to “Events”;
- Click the event you need.
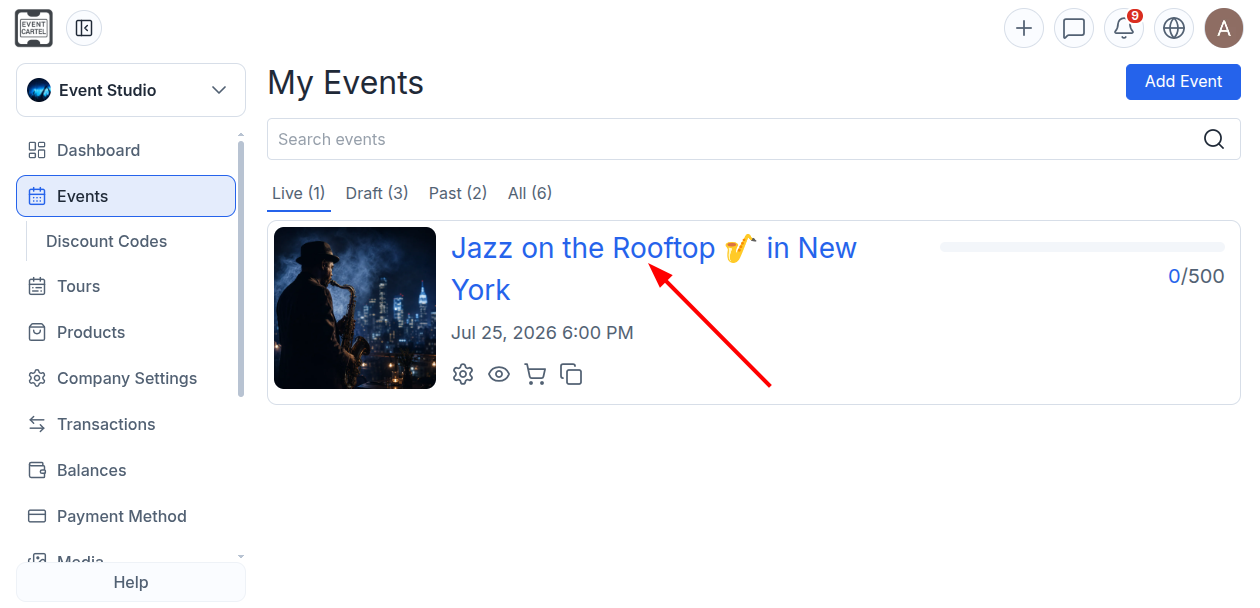
- Select “Import Tickets” from the menu on the left.
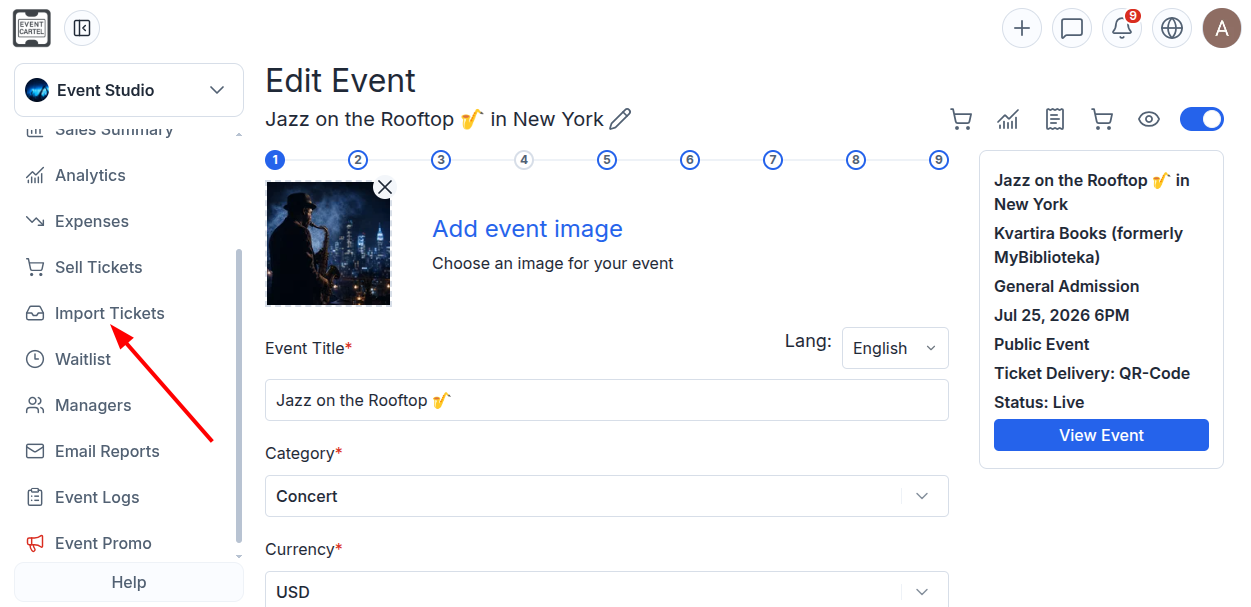
Preparing the CSV file:
Two templates are available on the import page:
"Download ticket codes CSV" - a sample CSV file containing only ticket codes;
"Download full import CSV" - a complete template containing information about customers, tickets, and seats.
The full template contains the following columns:
"First Name" - the customer’s given name;
"Last Name" - the customer’s surname;
"Email" - the customer’s email address;
"Phone" - the customer’s phone number;
"Ticket Type" - the Ticket Option assigned to the ticket;
"Ticket Code" - the unique code assigned to the ticket;
"Section" - the seating area on the map;
"Row" - the row designation;
"Seat" - the seat number.
The "Section," "Row," and "Seat" columns only need to be completed when importing tickets for an event with a seating map.
Each ticket code must contain between 5 and 22 characters.
Uploading the CSV file:
- Click + and upload the CSV file containing the ticket codes;
- Click "Upload."
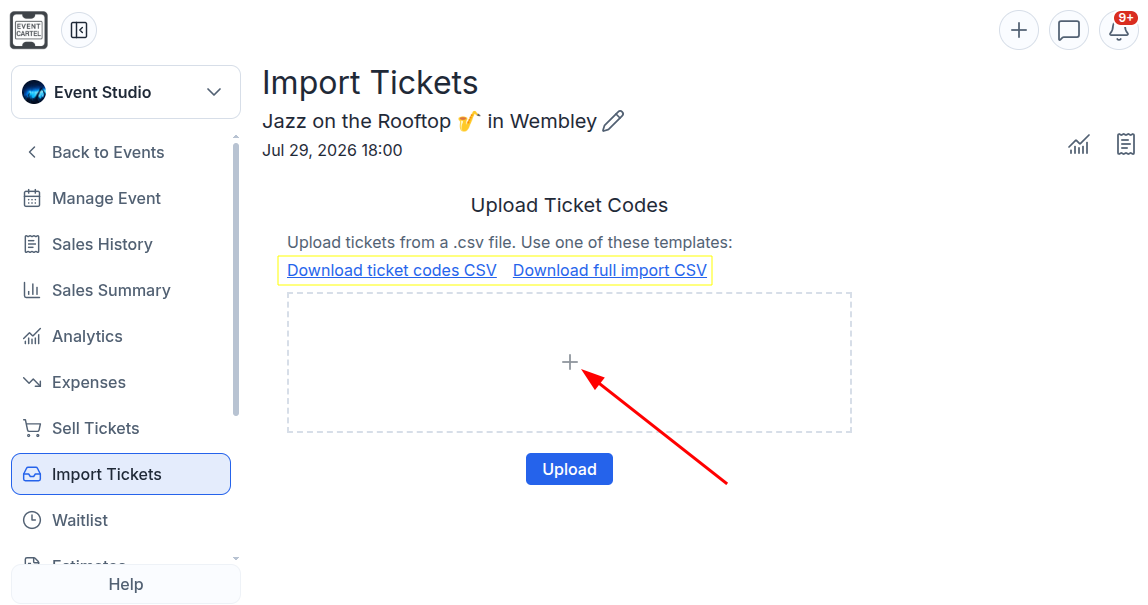
If you upload a file containing only ticket codes, or use the provided template and all columns are recognized, you will be taken directly to the "Confirmation" page.
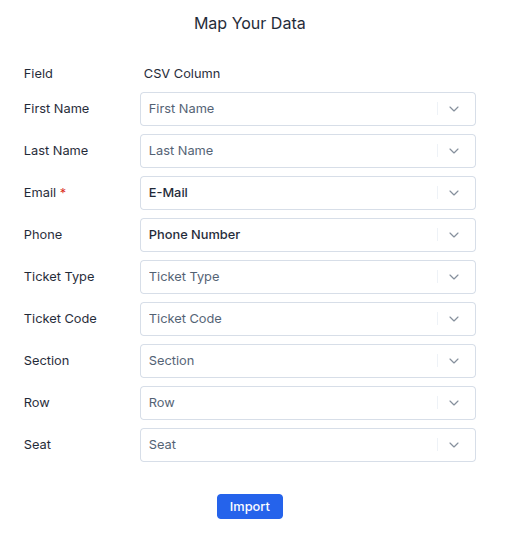
If the system detects unknown, duplicate, or ambiguous column names, you will be asked to map them manually:
- On the "Map Your Data" page, select the type of data contained in each column;
- Click "Import".
• You will then be taken to the "Confirmation" page.
Before confirmation, the system will display the number of tickets being imported and the fee that will be charged for adding them.
Make sure a bank card is linked to your account. If you have not added a payment method yet, you can do so in the "Payment Method" section.
- Click "Confirm."
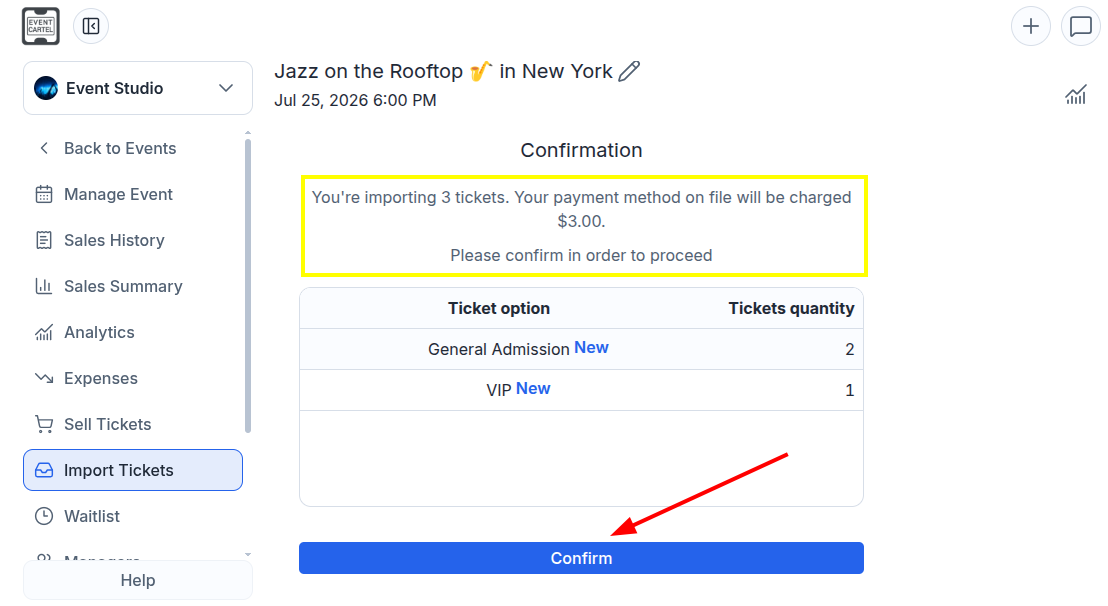
Done! The “✅ Tickets imported successfully!” message means that the codes have been uploaded successfully. The imported tickets will be available in the “Sales History” section and the Scanner app.
The Ticket Options created during the import can be found in Step 6 of the event creation process. If the CSV file contained only ticket codes, the Ticket Option will be named “Upload.”
If no guest details were included in the CSV file, the ticket will be displayed under the name “John Doe.”
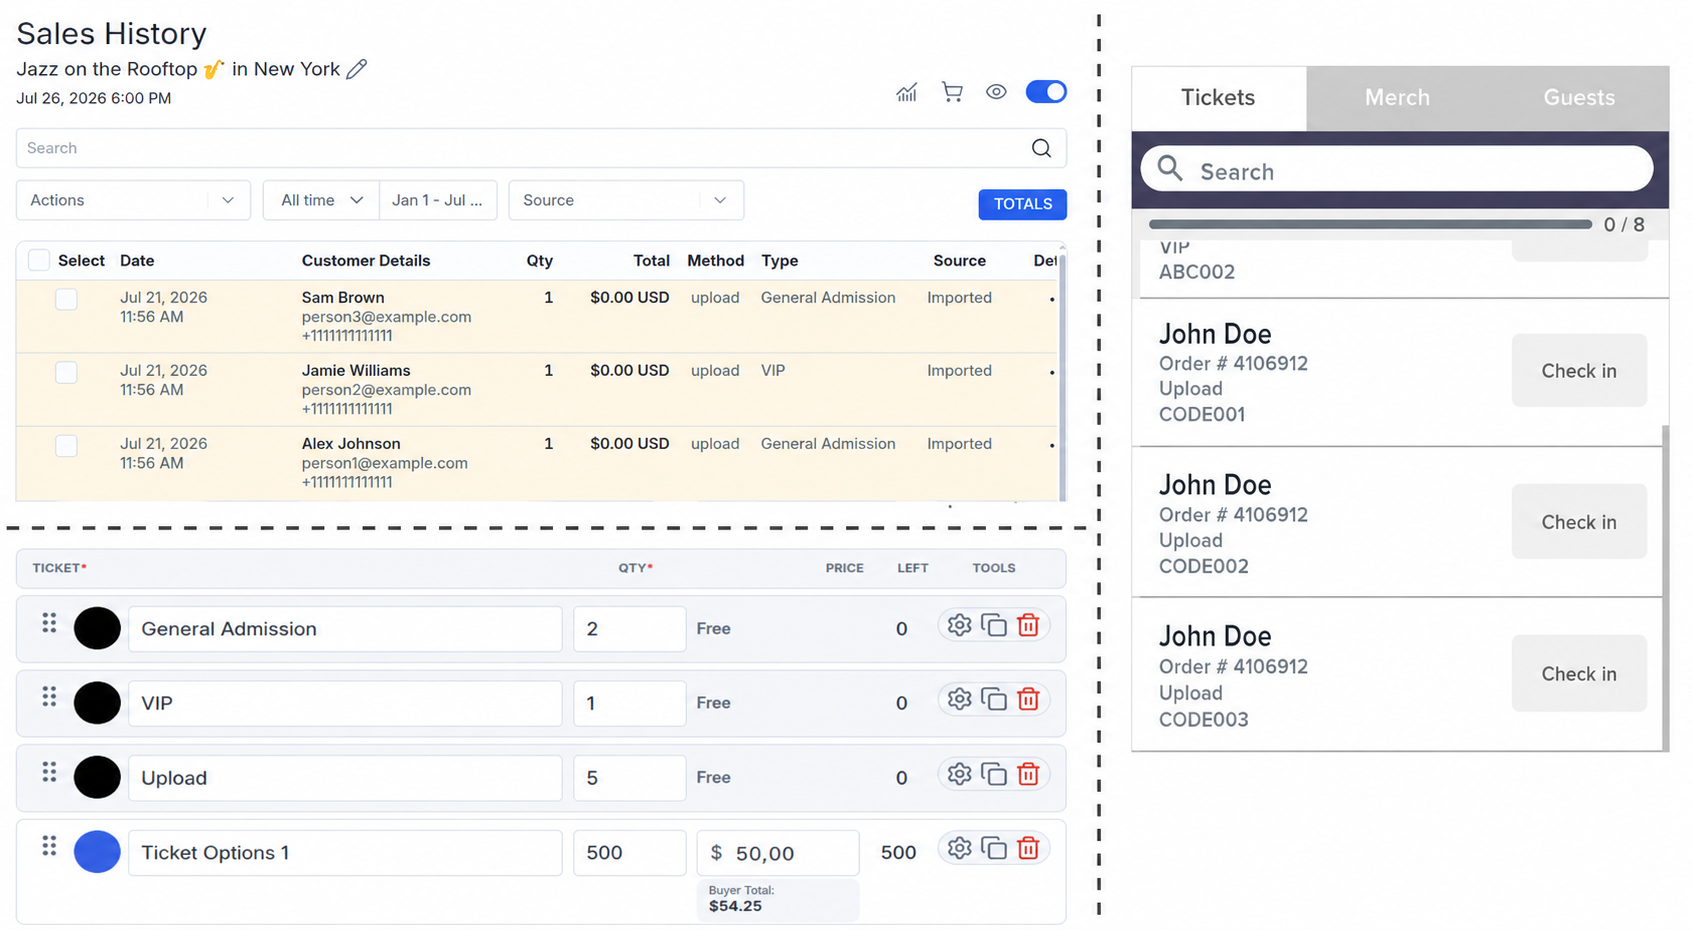
How to assign a ticket code to a specific seat on the seating map:
- Open the seating map;
- Select the seat and note its section, row, and seat number;
- Assign a Ticket Option to the seat;
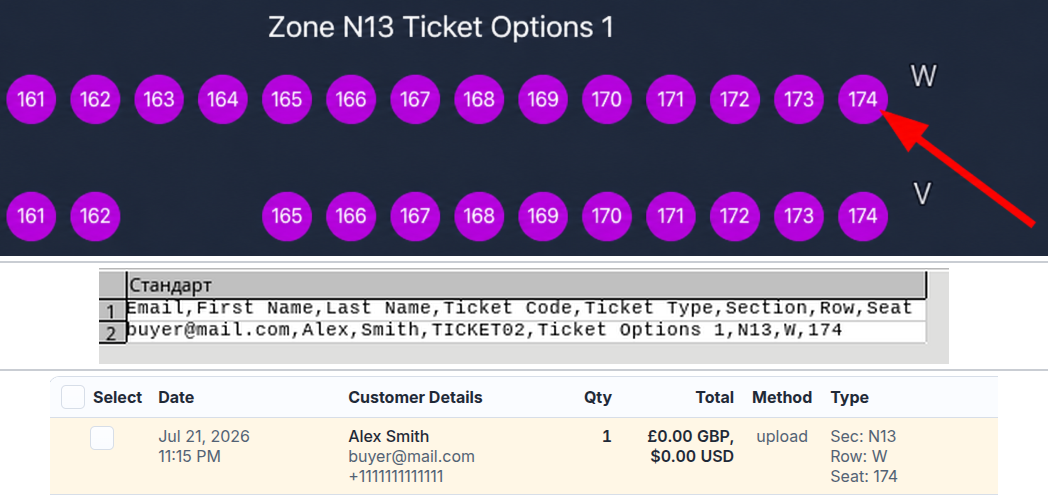
- Enter these details in the corresponding columns of the full CSV template.
For example:
"Ticket Type" - Ticket Options 1;
"Section" - N13;
"Row" - W;
"Seat" - 174.
After uploading the CSV file, the section, row, and seat details will appear on the ticket in the "Sales History" section. The selected seat will be marked as sold on the seating map, preventing other customers from purchasing it.
If you want customers to receive your custom codes when purchasing tickets through EventCartel, you can assign them in advance to individual seats or a general admission area on the seating map. For more information, see "How to add custom codes to seats on a seating map".