How to add custom codes to seats on a seating map
Jul 27, 2026Updated2 min read00
By default, the system automatically generates a unique 12-character code consisting of Latin letters and numbers for each ticket. If necessary, the organizer can replace the automatically generated code with a custom one.
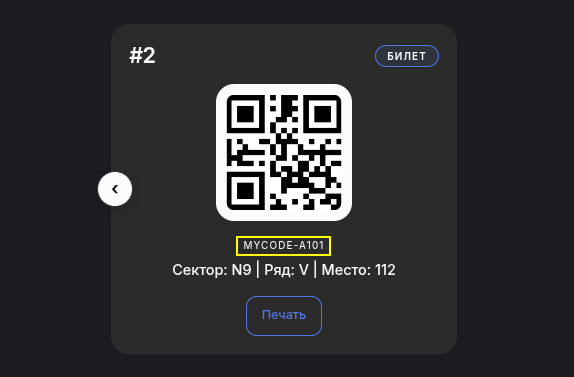
You can add custom codes for both individual seats and standing zones, such as a dance floor. After purchase, the code you added will be displayed on the buyer’s ticket.
To open the Seat Map Editor:
- Log in to "Business Manager";
- Open the "Events" section;
- Select the desired event or create a new one;
- Go to Step 6 of the event creation process;
- Click "Assign Seats".
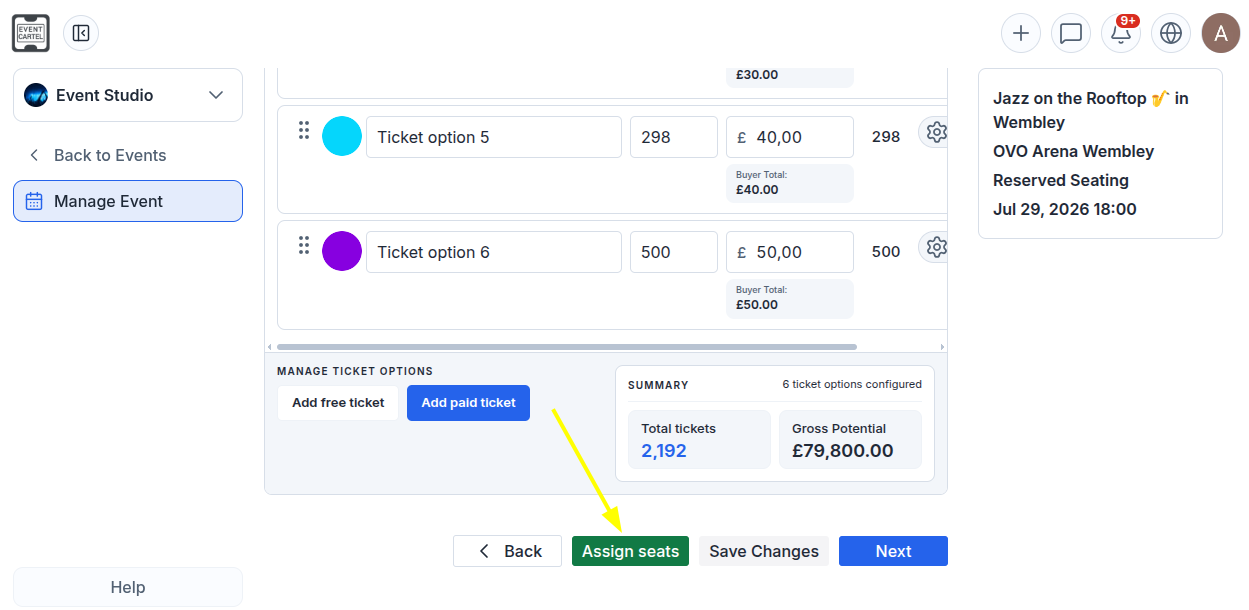
How to assign a code to a specific seat:
- Select the desired zone;
- Click "Change Code".
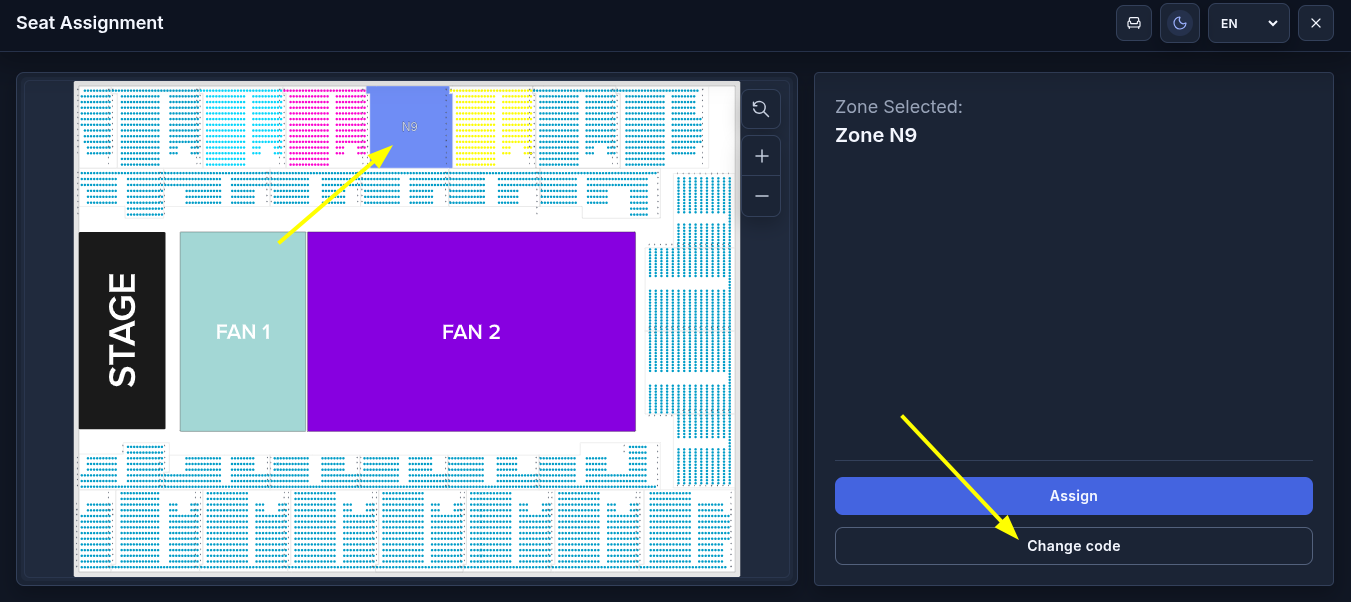
- Select a seat on the map;
- Enter your custom code;
- Click "Apply Code".
Please note:
• A Ticket Option must be assigned to the selected seat;
• The code can contain Latin letters (a–z, A–Z), numbers (0–9), a hyphen (-), and a question mark (?);
• The code must be between 5 and 27 characters long;
• Each code must be unique. The same code cannot be assigned to multiple seats;
• If the seat has already been sold, its code cannot be changed.
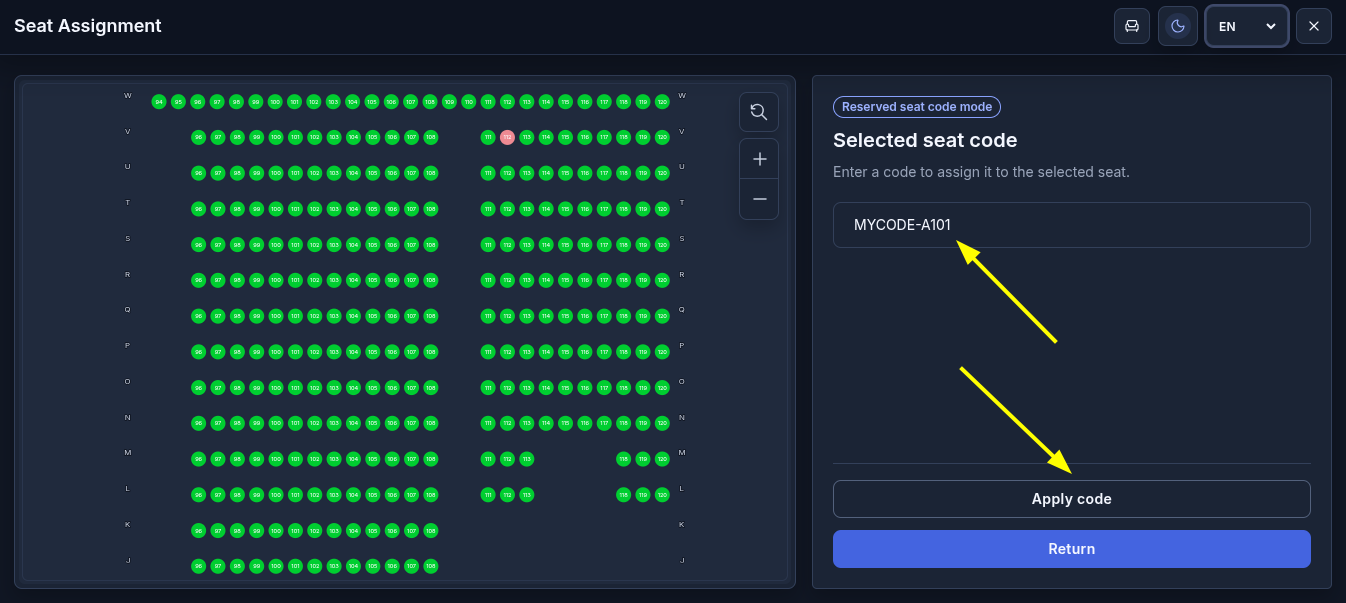
After applying the code, the message "Code added to unsaved changes" will appear. This means that the code has been applied to the selected seat, but the changes have not yet been saved.
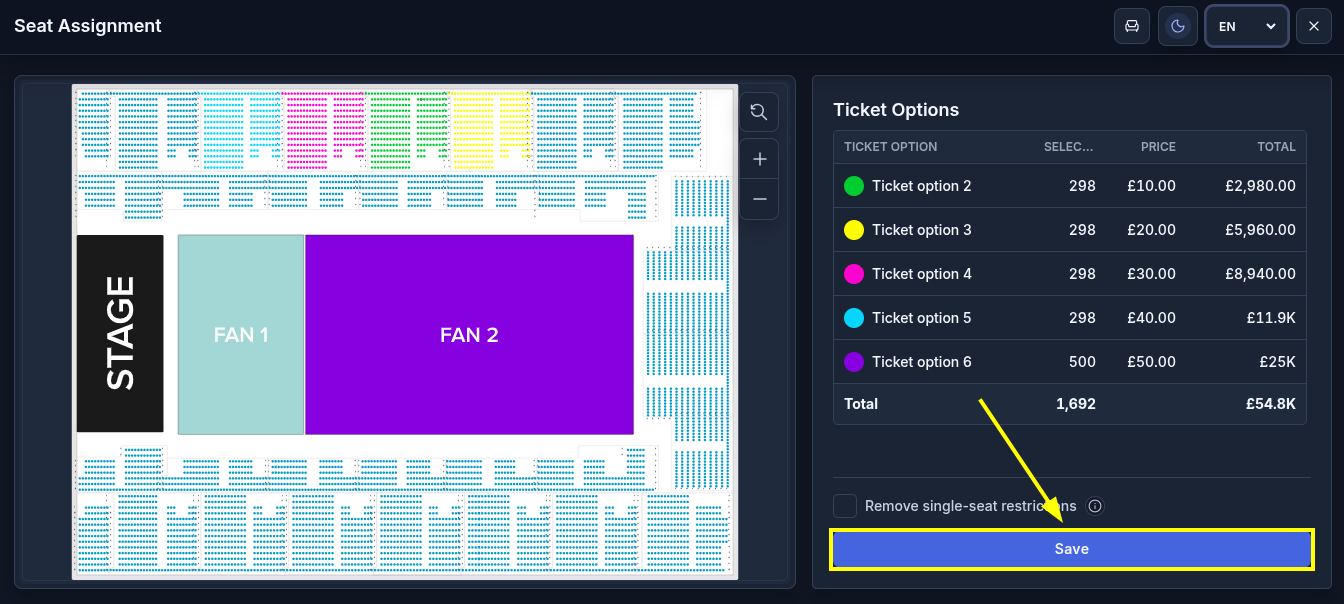
- Click "Return";
- Click "Save";
To assign codes to other seats, repeat these steps for each seat.
How to add codes to a general admission zone:
For general admission zones without assigned seats, such as a dance floor, you can add multiple codes at once.
- Select the desired general admission zone;
- Click "Change Codes".
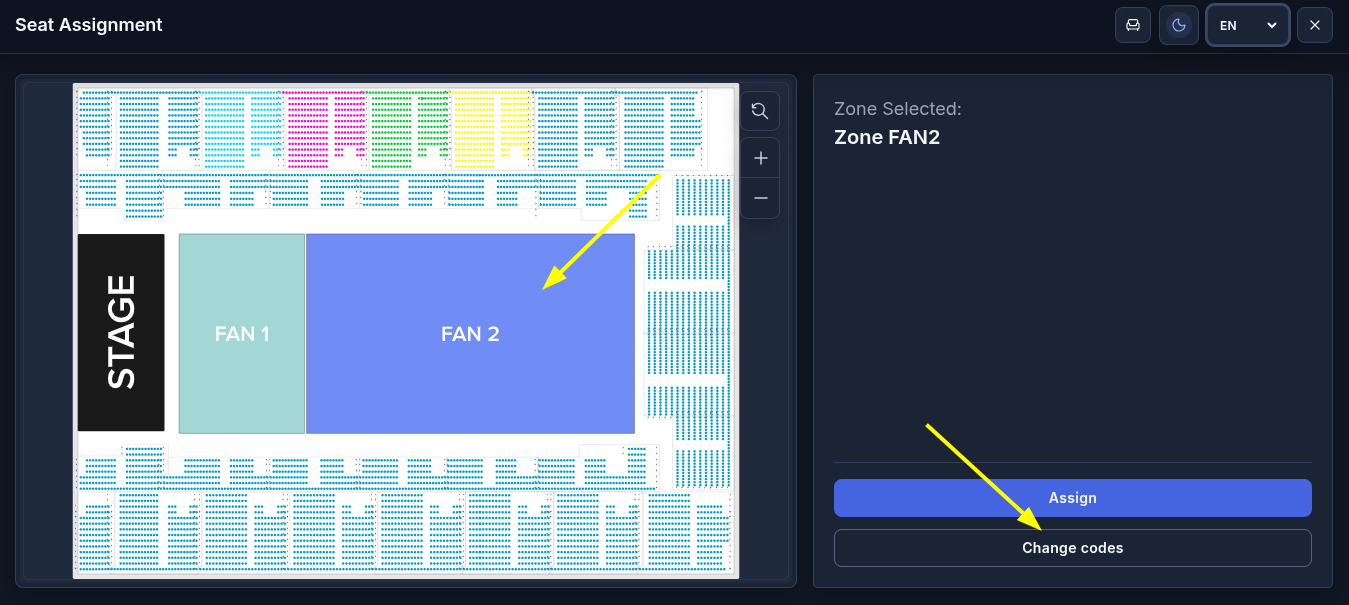
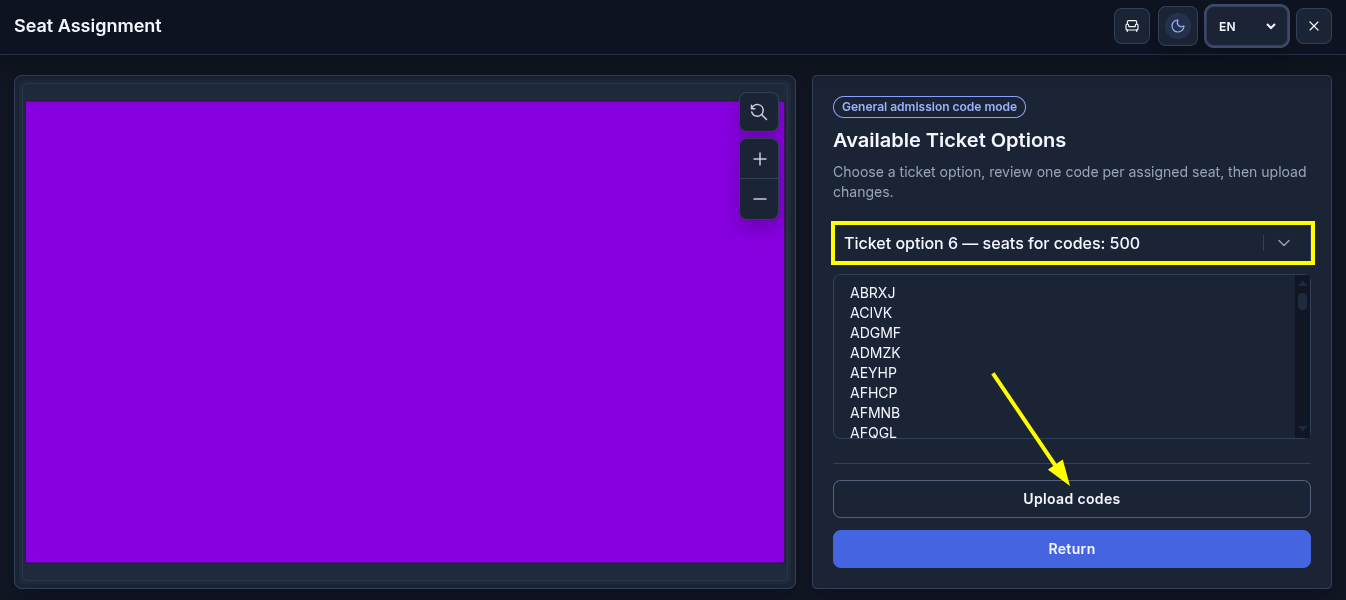
- Select the Ticket Option to which you want to assign the codes;
- The number of remaining unsold tickets will be displayed to the right of its name. You can upload the required number of codes, up to this limit;
- Enter the codes in the text field, placing each code on a new line;
- Click "Upload Codes".
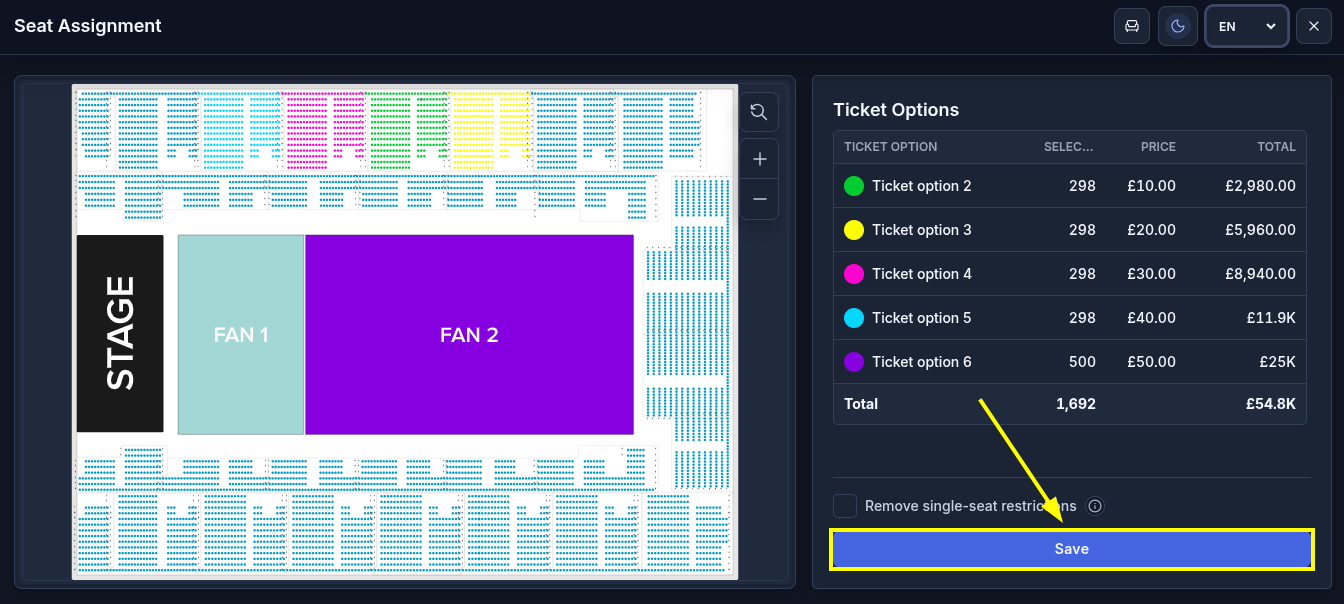
- Click "Return";
- Click "Save";
Once everything is ready, close the Seat Map Editor by clicking ✕ in the upper-right corner.
Done! After the ticket is purchased, your code will be displayed below the QR code on the buyer’s ticket.
If you need to add tickets sold or issued through another ticketing platform to your event, use the external ticket code import feature. Detailed instructions are available in the article "How to import external ticket codes?"