How to grant a partner access to sell selected seats for a seated event
Sep 21, 2026Updated3 min read00
EventCartel allows you to work with partners and grant them access to sell tickets for your events.
However, our platform is not involved in financial agreements between promoters and partners and is not responsible for their terms.
To grant a partner access:
- Then return to step 6 and click "Assign seats".
Access can only be granted to seats and GA tickets that have a ticket option assigned.
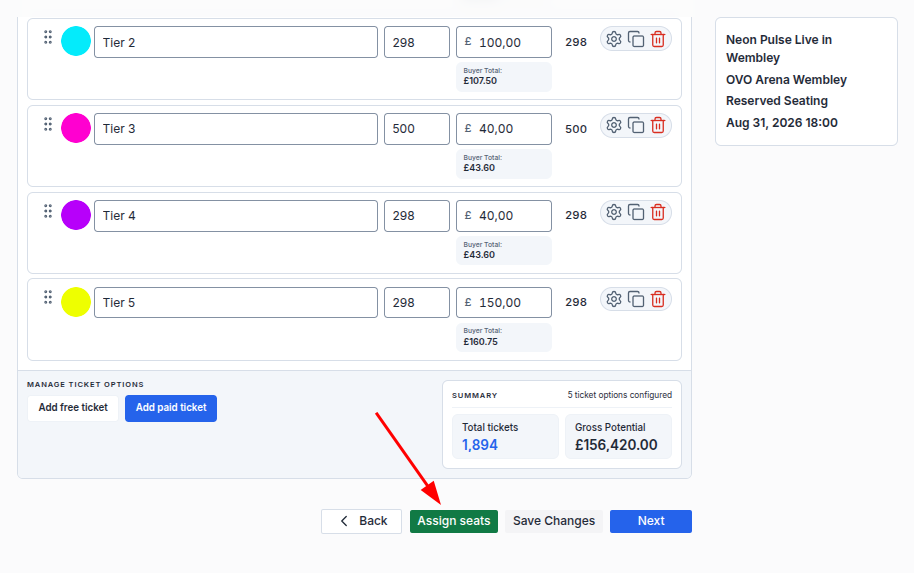
To grant a partner access to reserved seats:
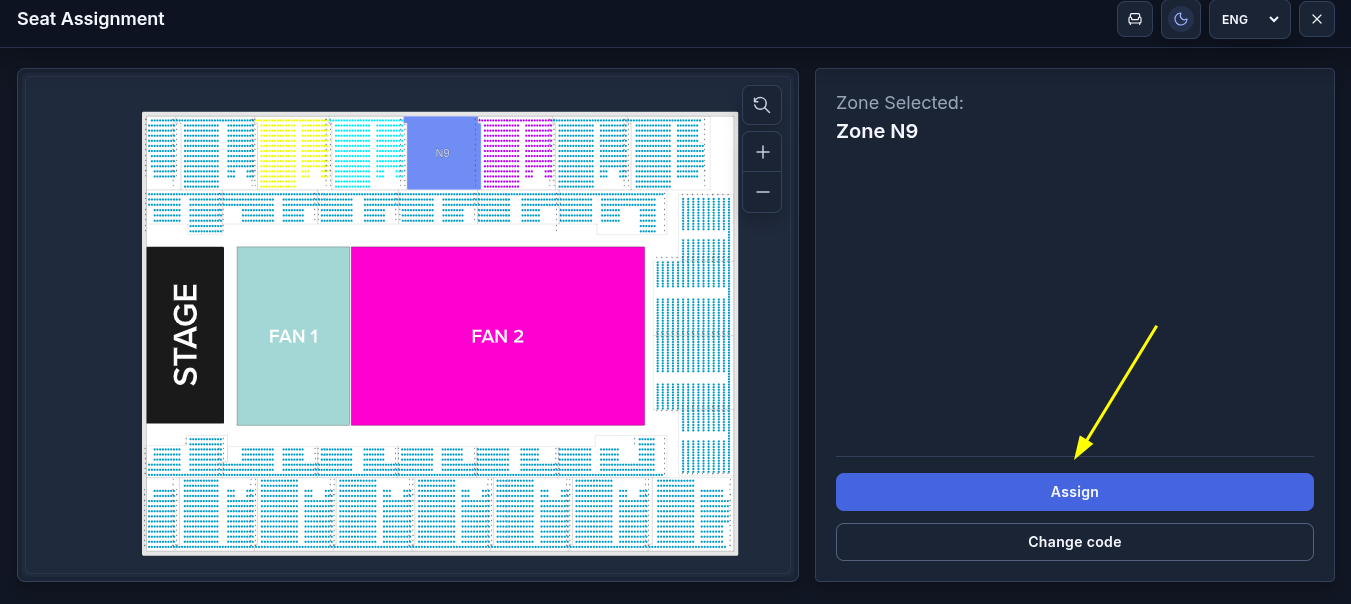
- On the map, select the zone containing the seats you want to make available to the partner, then click "Assign".
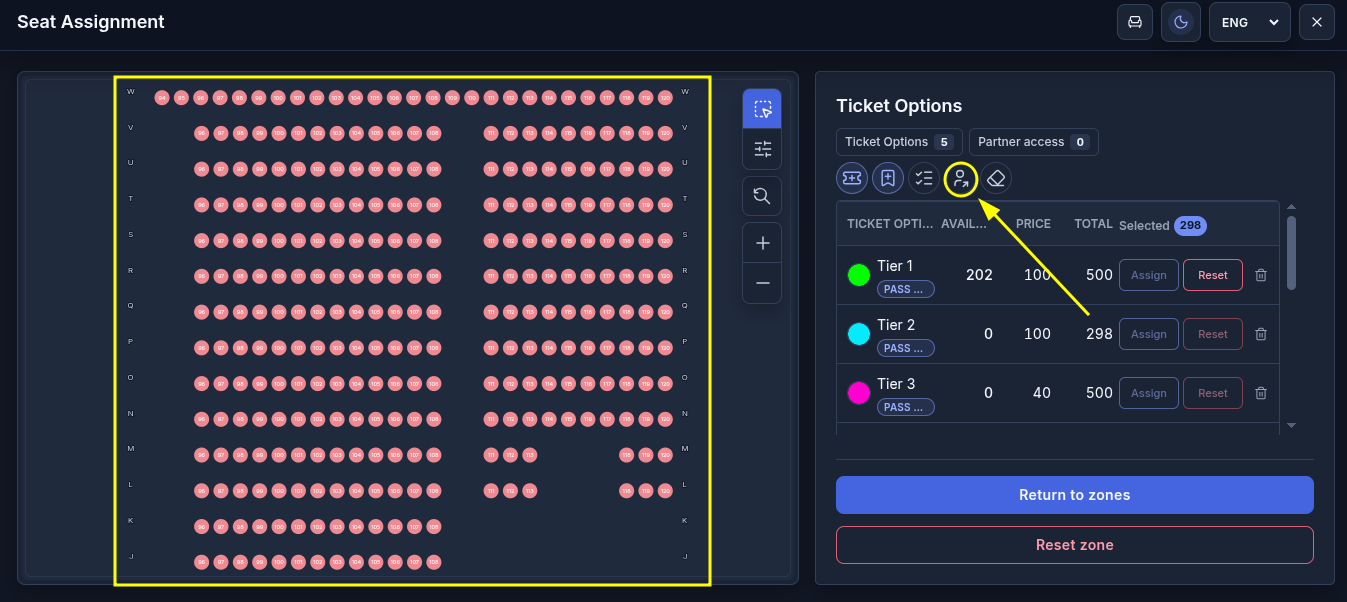
- Select the seats you want to make available to a partner for sale. These seats must already have ticket options assigned. Then click the 👤+ icon next to the "Ticket Options" section.
- In the window that opens, select a partner from the list. Check the number of selected seats and click "Add".
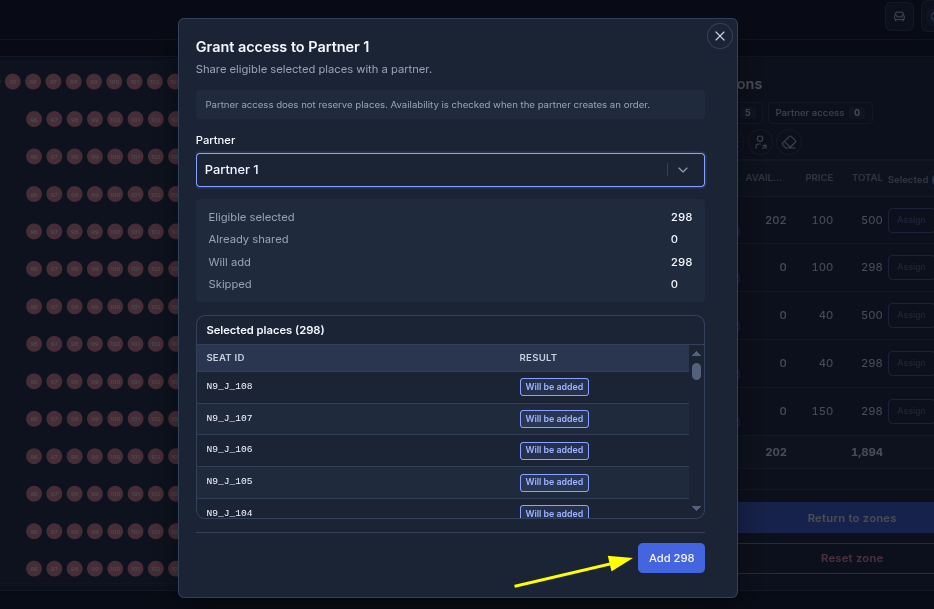
Access will be granted to the selected seats. The seats will not be reserved for the partner: you can still sell tickets for these same seats independently.
- Click "Return to zones" to return to the general map;
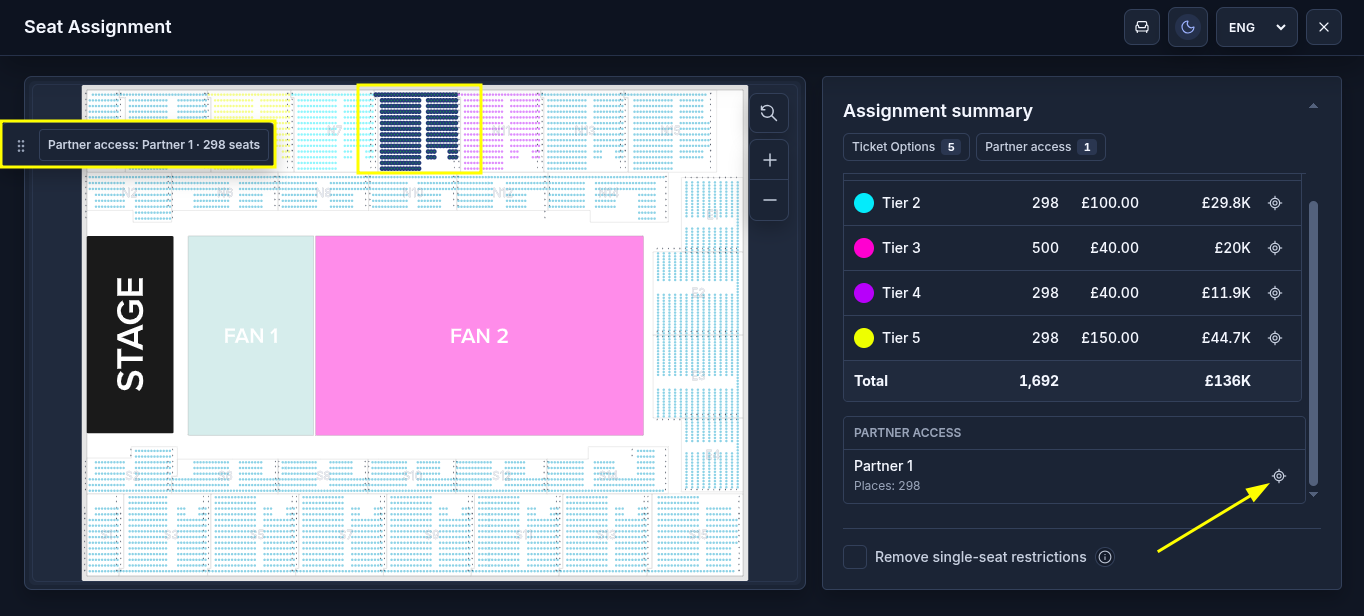
- In the "Partner access" section, the partner and the number of seats made available to them will be displayed. Click the view icon to see them on the map.
- In the "Partner access" section, the partner and the number of seats made available to them will be displayed. Click the view icon to see them on the map.
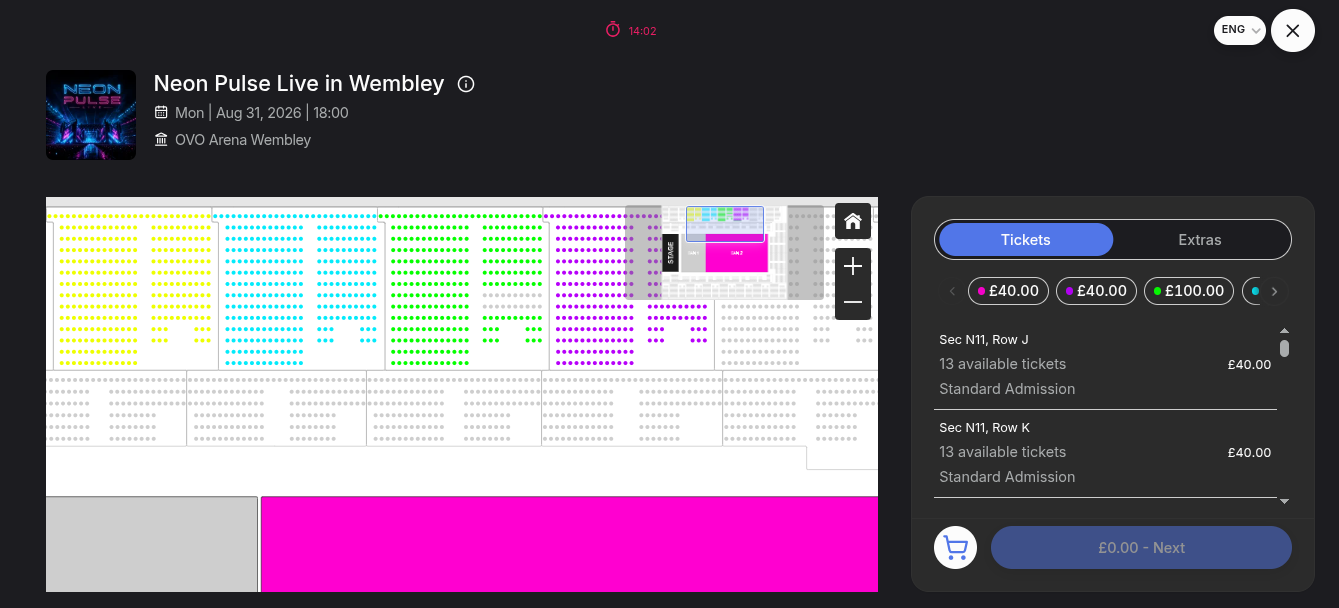
When a partner sells a ticket, the corresponding seat will automatically become unavailable for further sale on the map.
To grant a partner access to tickets in a general admission area (GA area):
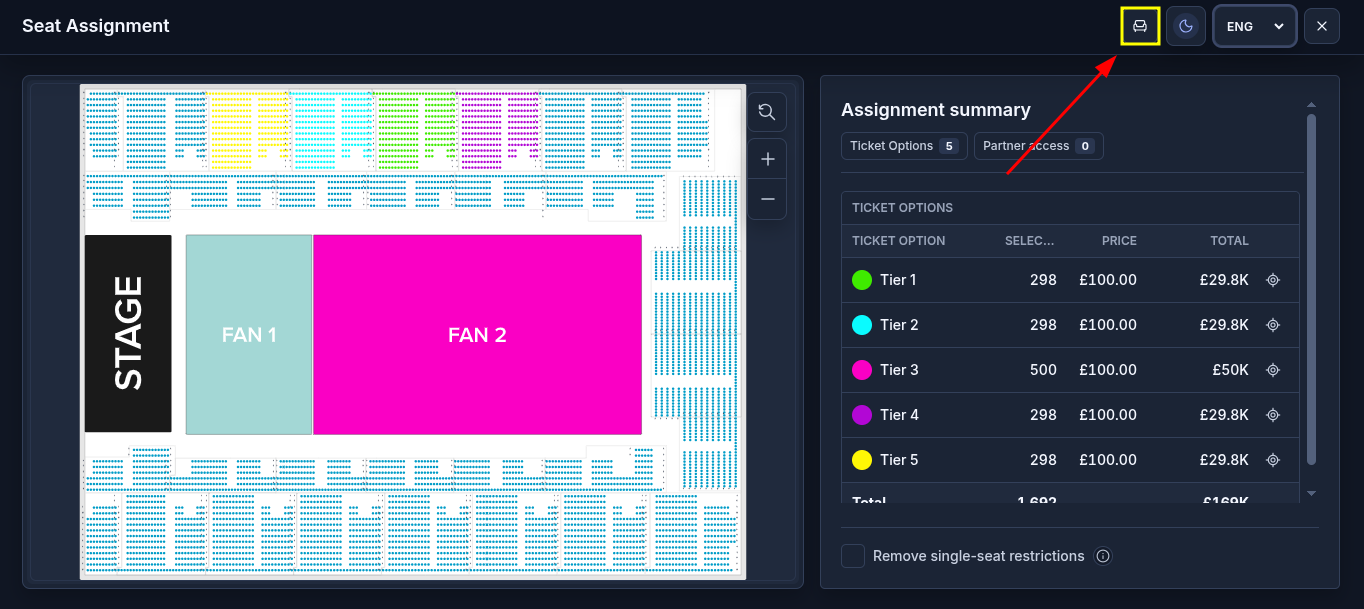
- In the open seating map editor, click the "Seats Inventory" icon in the upper-right corner.
- In the "Zone" field, select the required GA area;
- In the "Rows" field, select "GA";
- In the "Ticket option" field, select the ticket option to which you want to grant access.
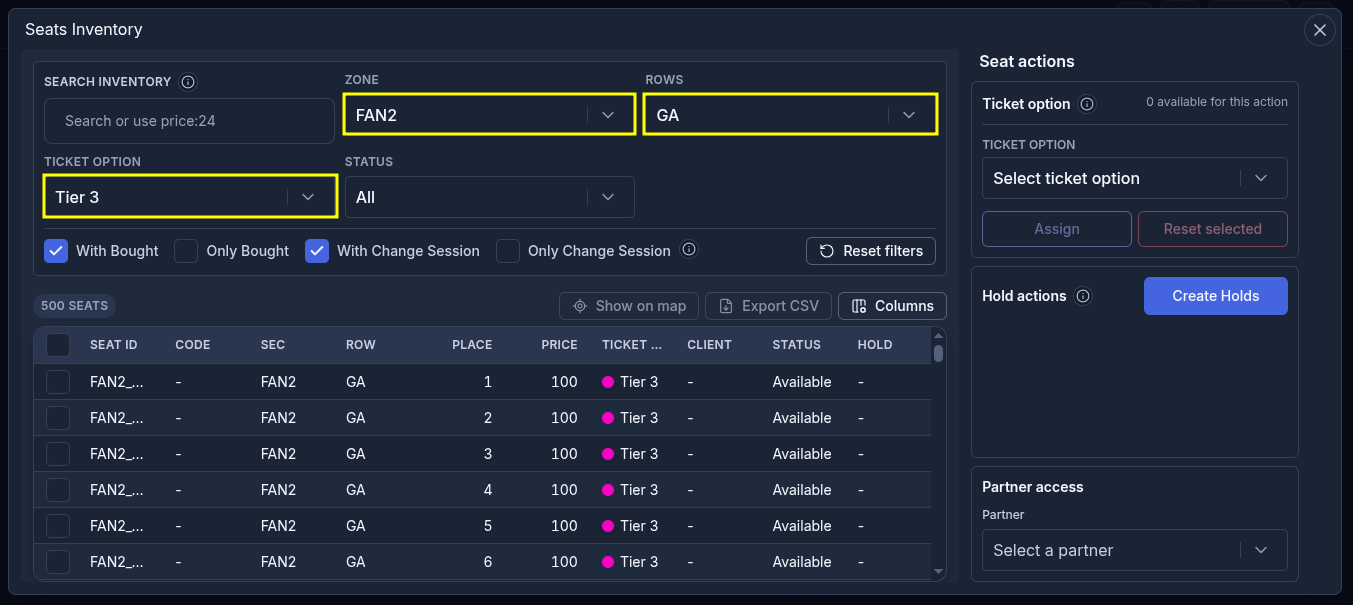
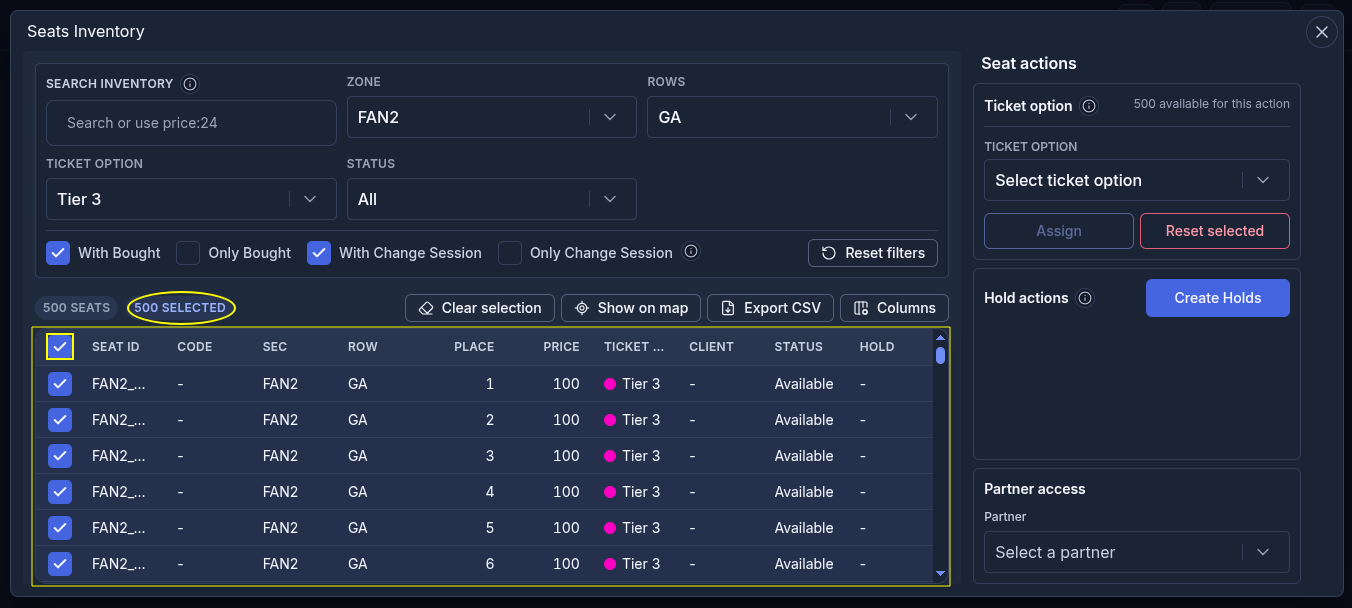
- Select the required tickets manually or select the checkbox in the table header to choose all tickets that match the applied filters.
The number of selected tickets will be displayed above the table.
- In the "Partner access" section, select the required partner;
- Click "Add". The button will display the number of selected tickets.
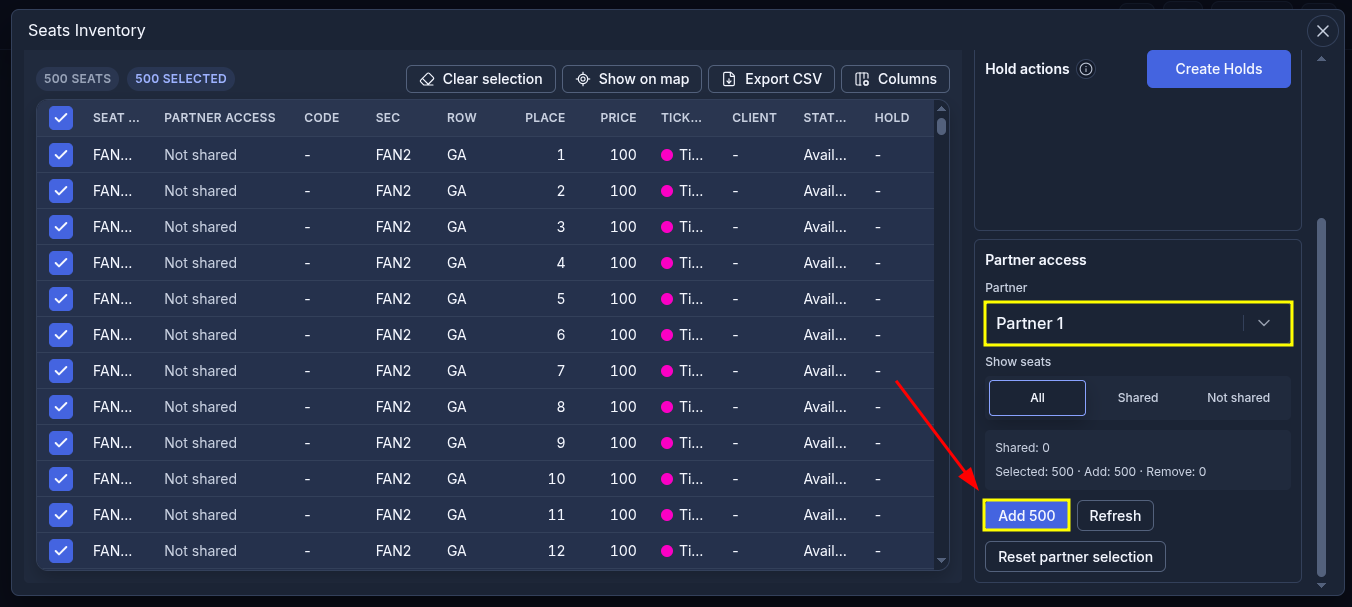
Access will be granted to the selected tickets in the GA area. These tickets are not reserved for the partner, so you can still sell them yourself.
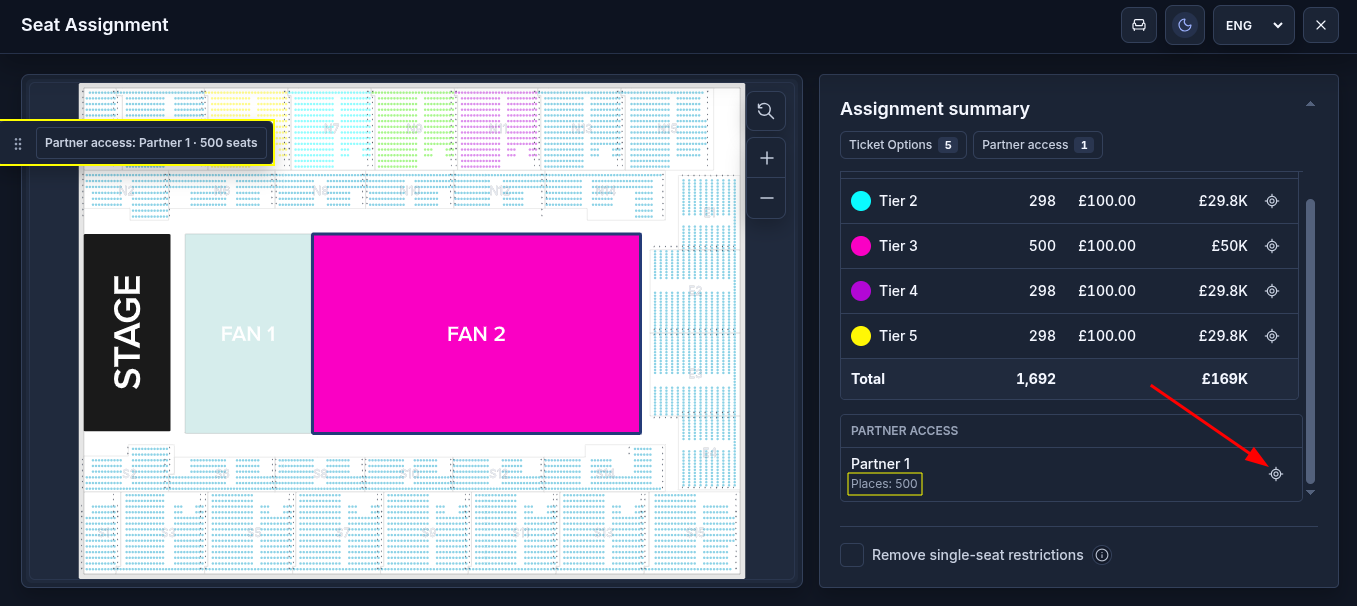
- Close the inventory and return to the full seating map. The "Partner access" section will display the partner and the number of tickets assigned to them;
- Click the view icon next to the partner - the GA area assigned to them will be outlined in blue on the map.
How to view partner sales:
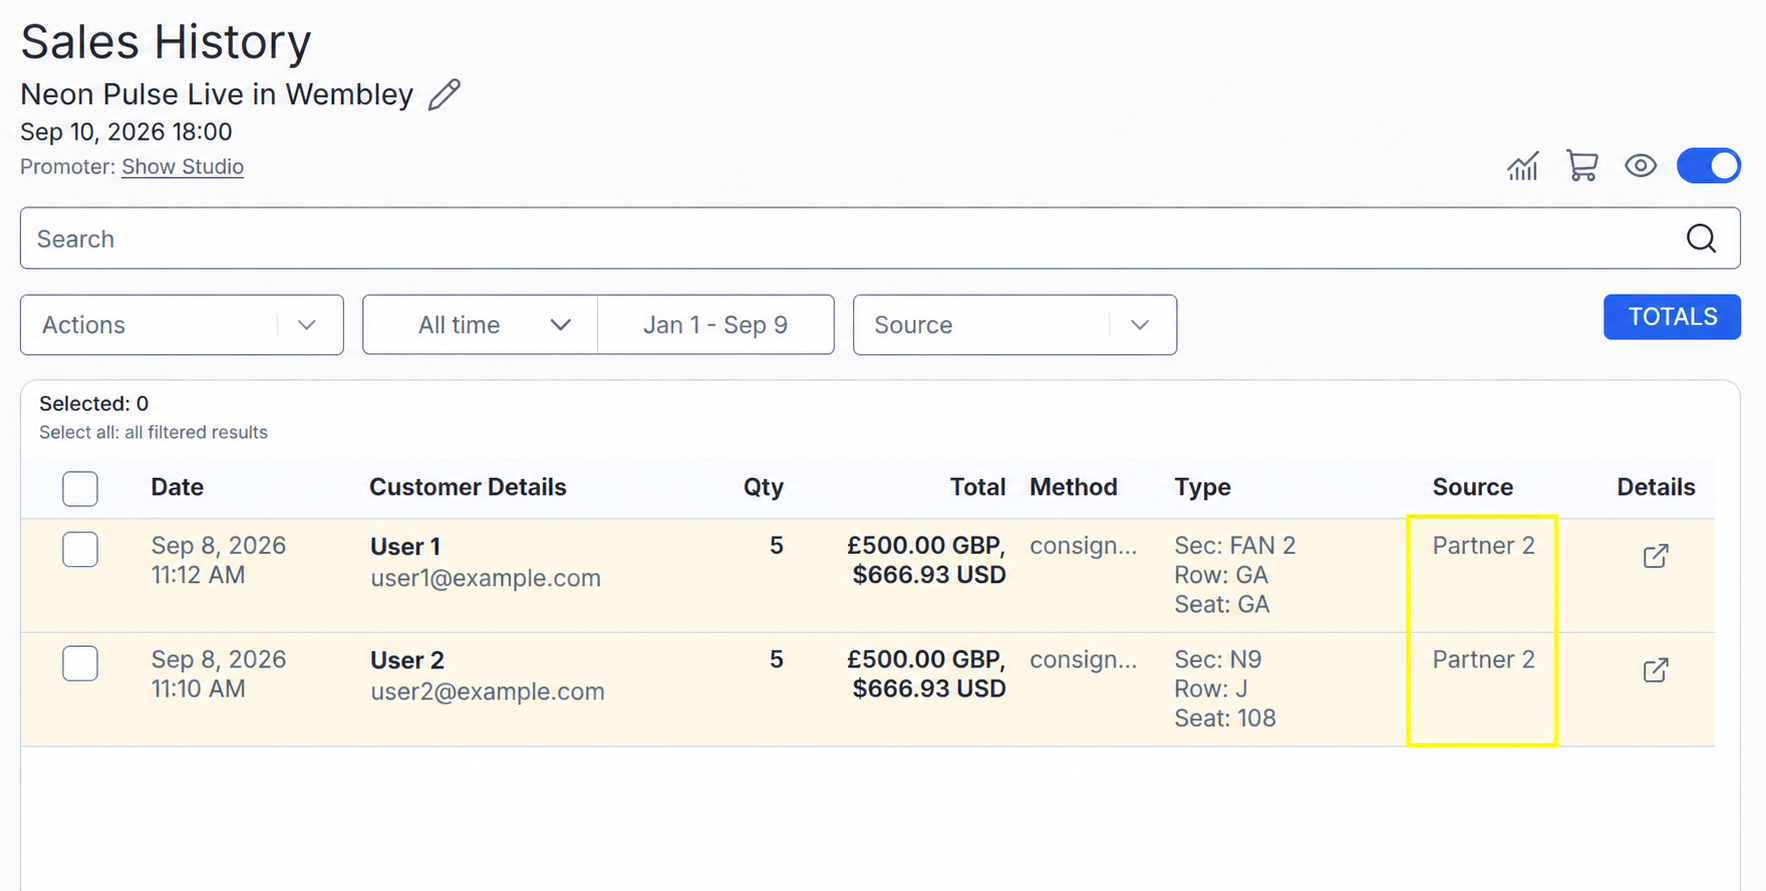
When a partner sells tickets to your event, information about such sales will be displayed in "Sales History".
In the "Source" column, you can see through which partner the sale was made.
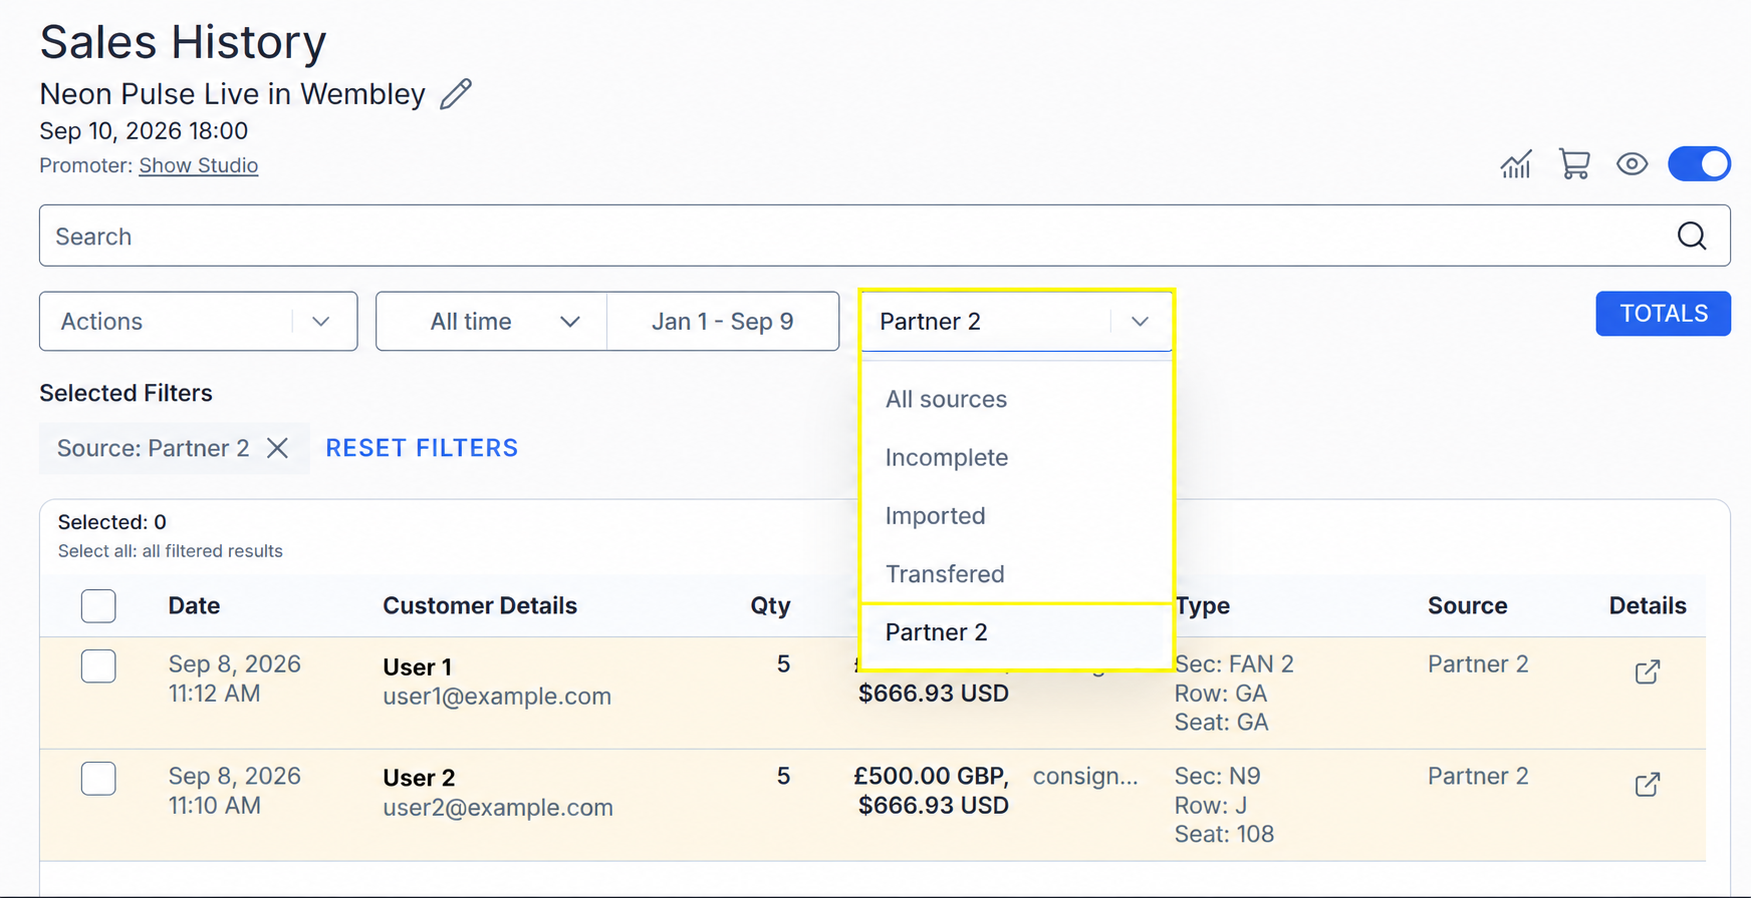
To view sales of a specific partner, open the "Source" filter and select the desired partner from the list.
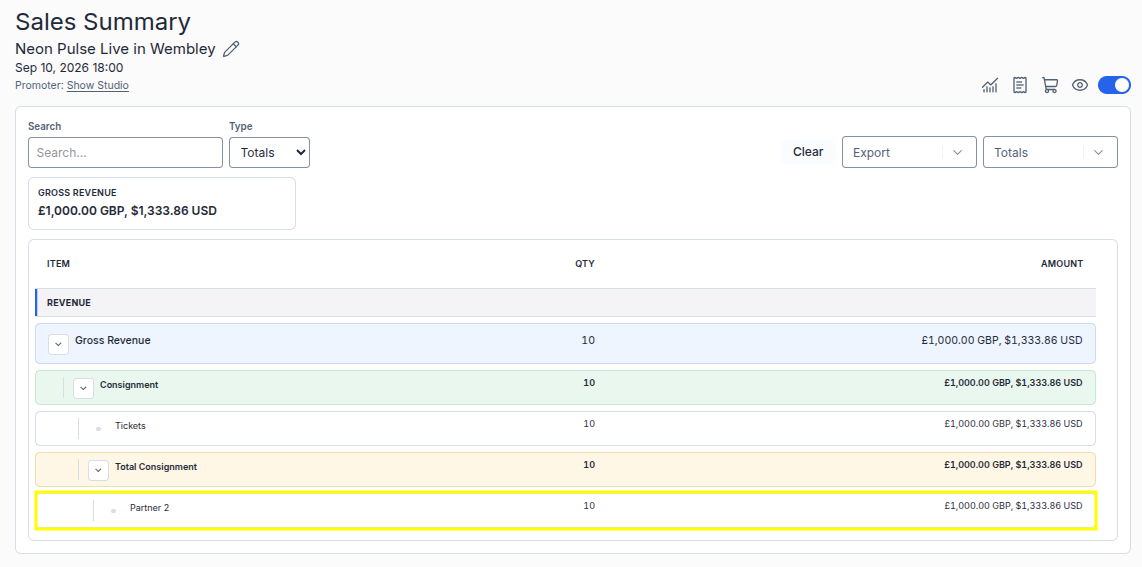
General information about partner sales can be viewed in "Sales Summary". Here, the partner, the number of tickets sold by them, and the total sales amount are displayed.
How to change or remove partner access:
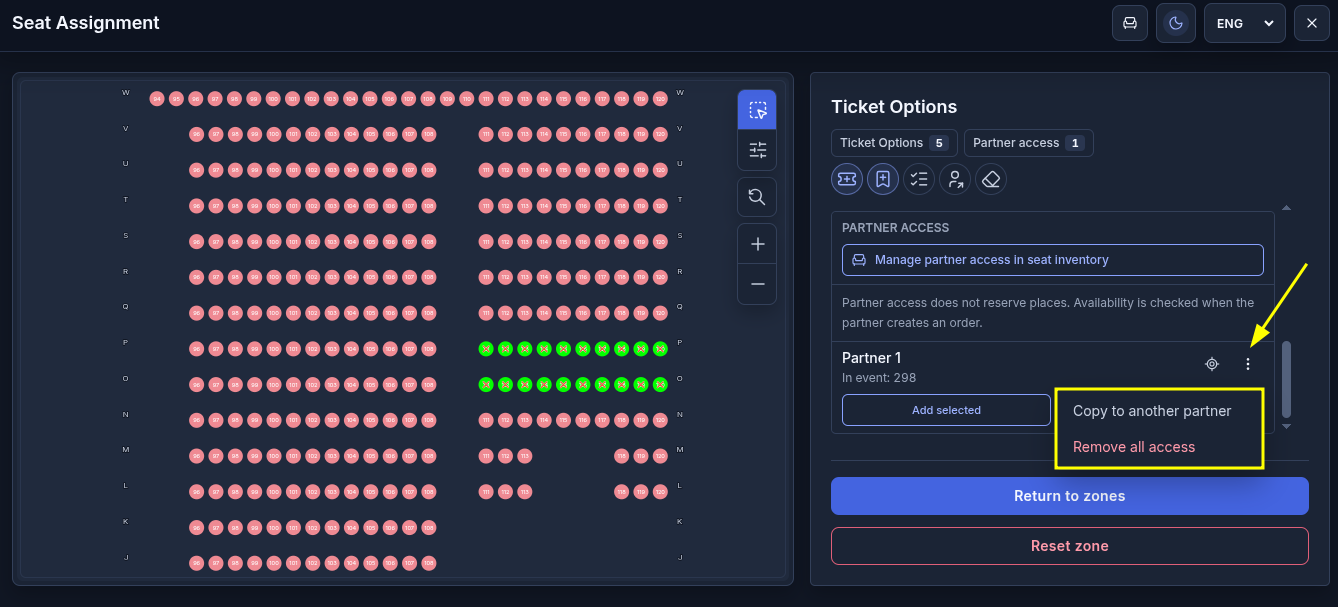
To add another partner, repeat the steps above. To copy existing access, click "⋮" next to the partner’s name and select "Copy to another partner".
Access to the same seats and tickets in the GA area can be granted to multiple partners. Sold tickets cannot be selected.
To remove access, select "Remove all access" from the same menu.