Sales History features
Aug 4, 2026Updated4 min read00
The "Sales History" section contains all event orders. Here, you can find a specific purchase, view buyer and ticket details, download or resend tickets, issue a refund, and perform other actions.
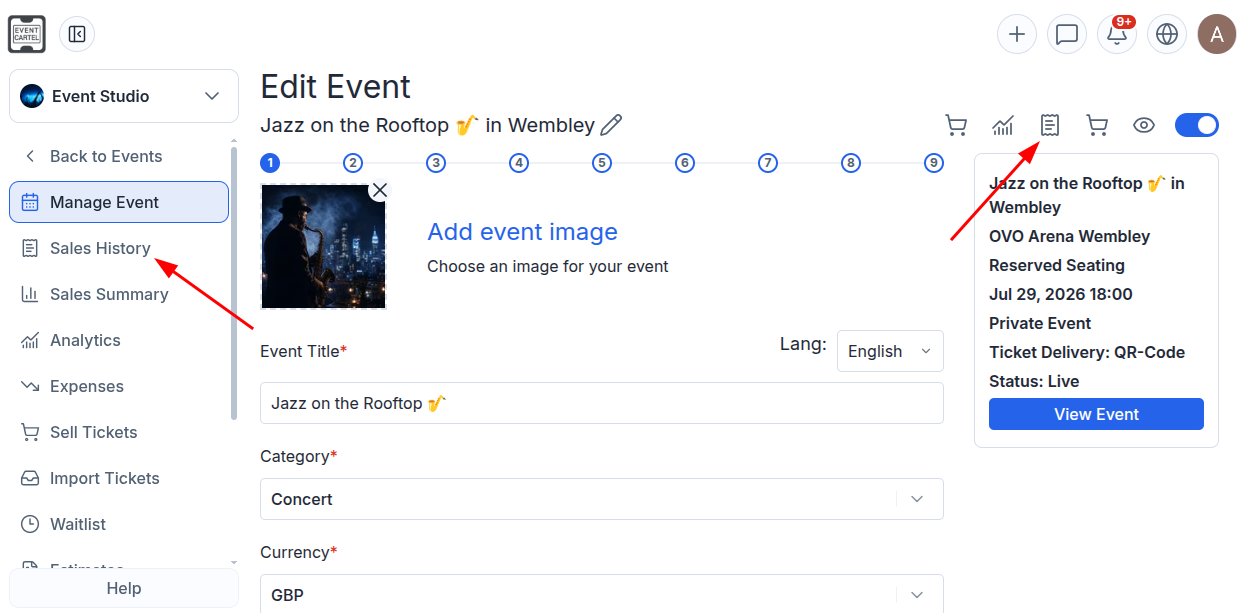
To open Sales History:
- Log in to "Business Manager";
- Go to the "Events" section;
- Open the desired event;
- In the left-hand menu, go to "Sales History", or click the 📄 icon at the top of the page.
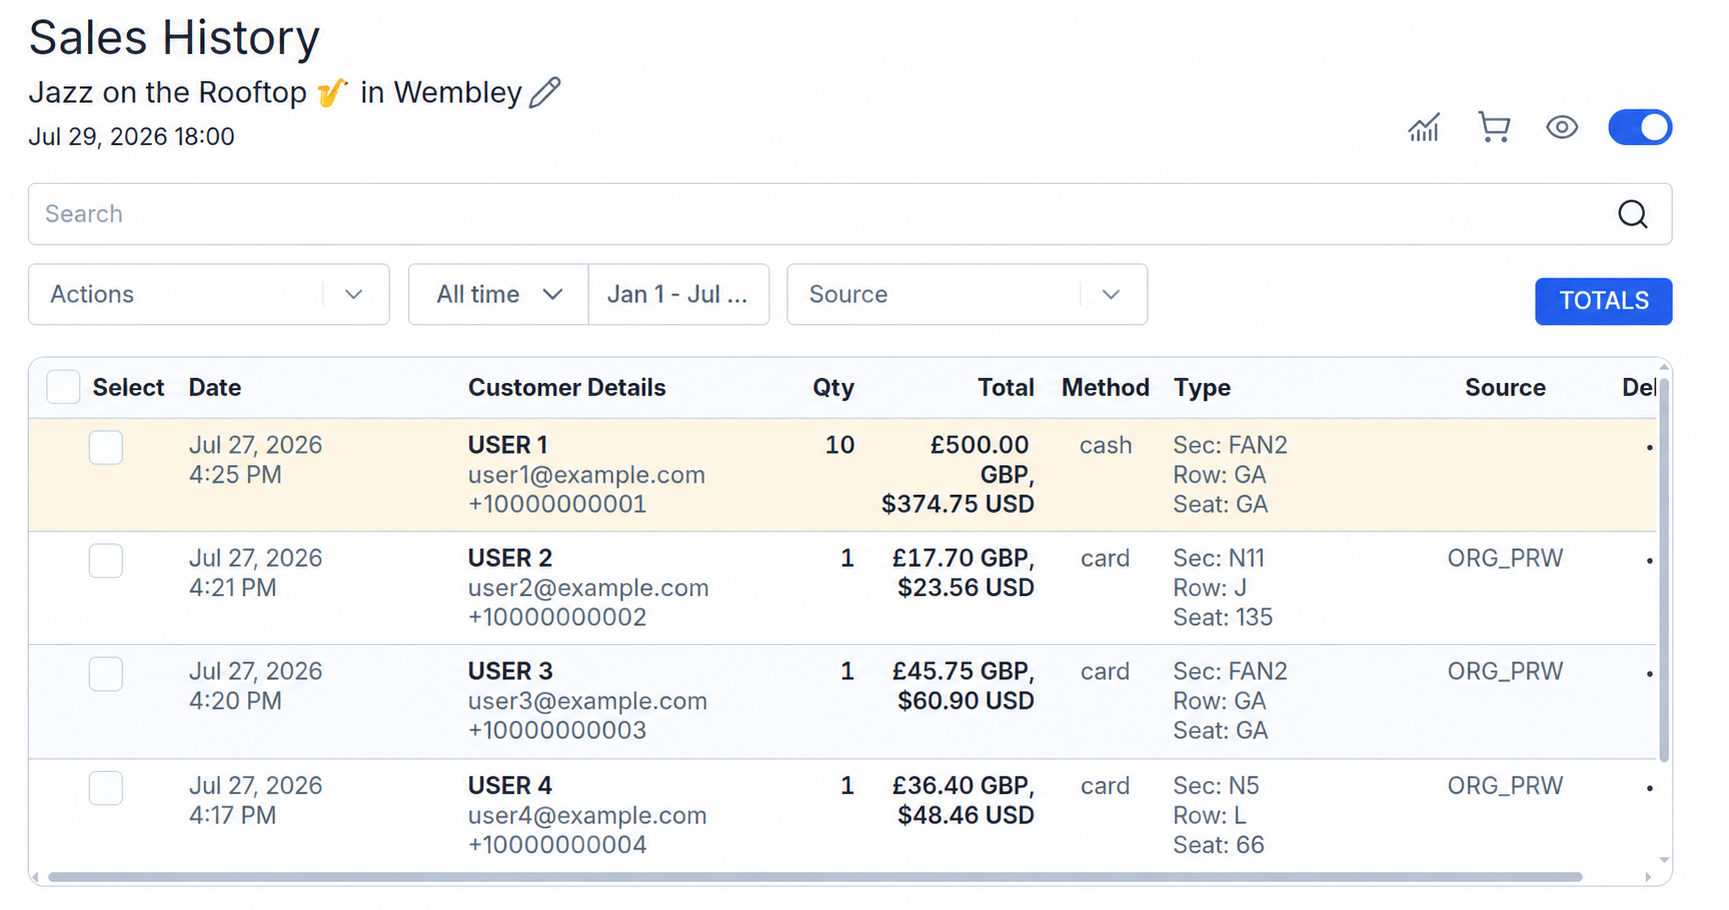
The "Sales History" section displays all purchases for the selected event, including tickets and add-ons. The table shows the purchase date and time in the event’s local time, buyer details, total amount, ticket type, section, row, and seat.
The "Qty" column shows the number of purchased items, while the "Method" column shows the payment method, such as credit card, cash, or buyer balance.
The purchase amount is displayed in both the event currency and US dollars.
Orders highlighted in color were created by you through Business Manager, such as cash sales or orders containing Complimentary tickets.
Finding an order:
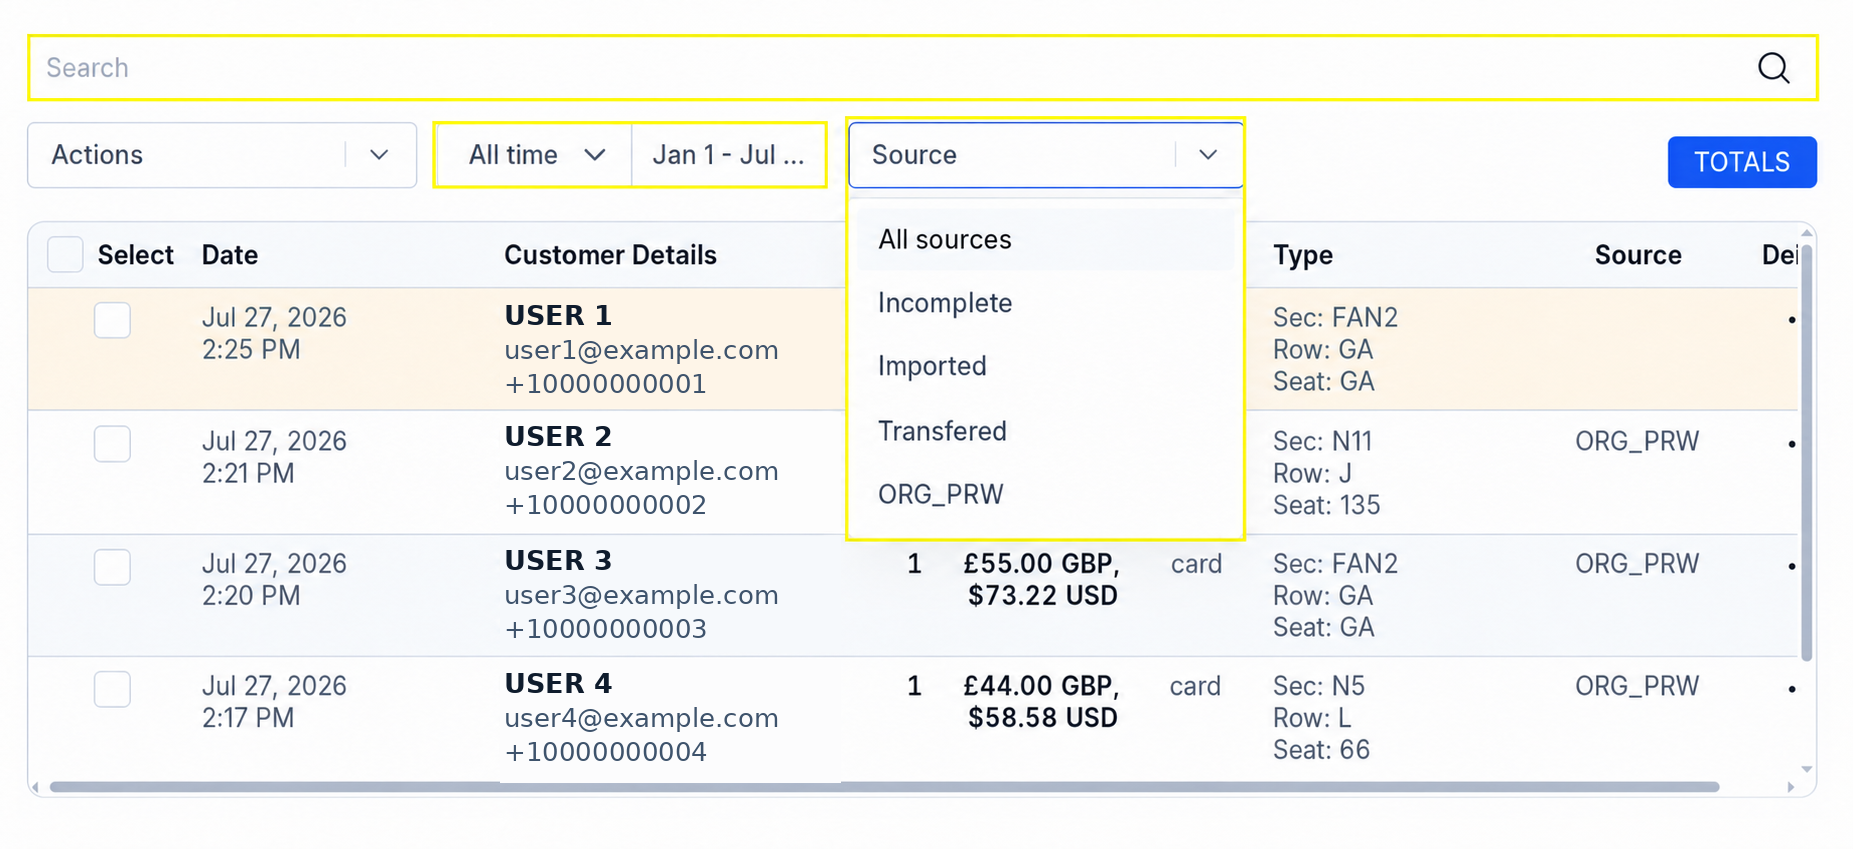
To search and filter purchases, use the tools at the top of the page.
In the "Search" field, enter the buyer’s name, email address, or phone number.
In the date range filter, select one of the following options:
• Today - the current day;
• 1 Week, 1 Month, 3 Months, or 12 Months - the selected period;
• All time - the entire sales history;
• Custom - a specific date range. Select the start and end dates in the adjacent field.
In the "Source" filter, select the required category:
• All sources - all orders;
• Incomplete - incomplete purchases;
• Imported - imported tickets;
• Transferred - tickets transferred to another user;
• ORG_PRW - purchases made after accessing the event page through Business Manager.
After you apply the filters, the "Selected Filters" section with the selected parameters will appear above the table. To remove an individual filter, click × next to it. To clear all filters, click "Reset Filters".
Actions for orders:
The "Actions" menu allows you to resend tickets, contact buyers, add them to groups, download sales information, and issue refunds.
To apply an action to one or more orders, select the checkboxes next to them. To select all orders in the table, select the checkbox next to "Select".
Then open the "Actions" menu and select an action:
• Email Tickets - resend the ticket email to the buyer;
• Text Tickets - resend the tickets to the buyer’s phone number;
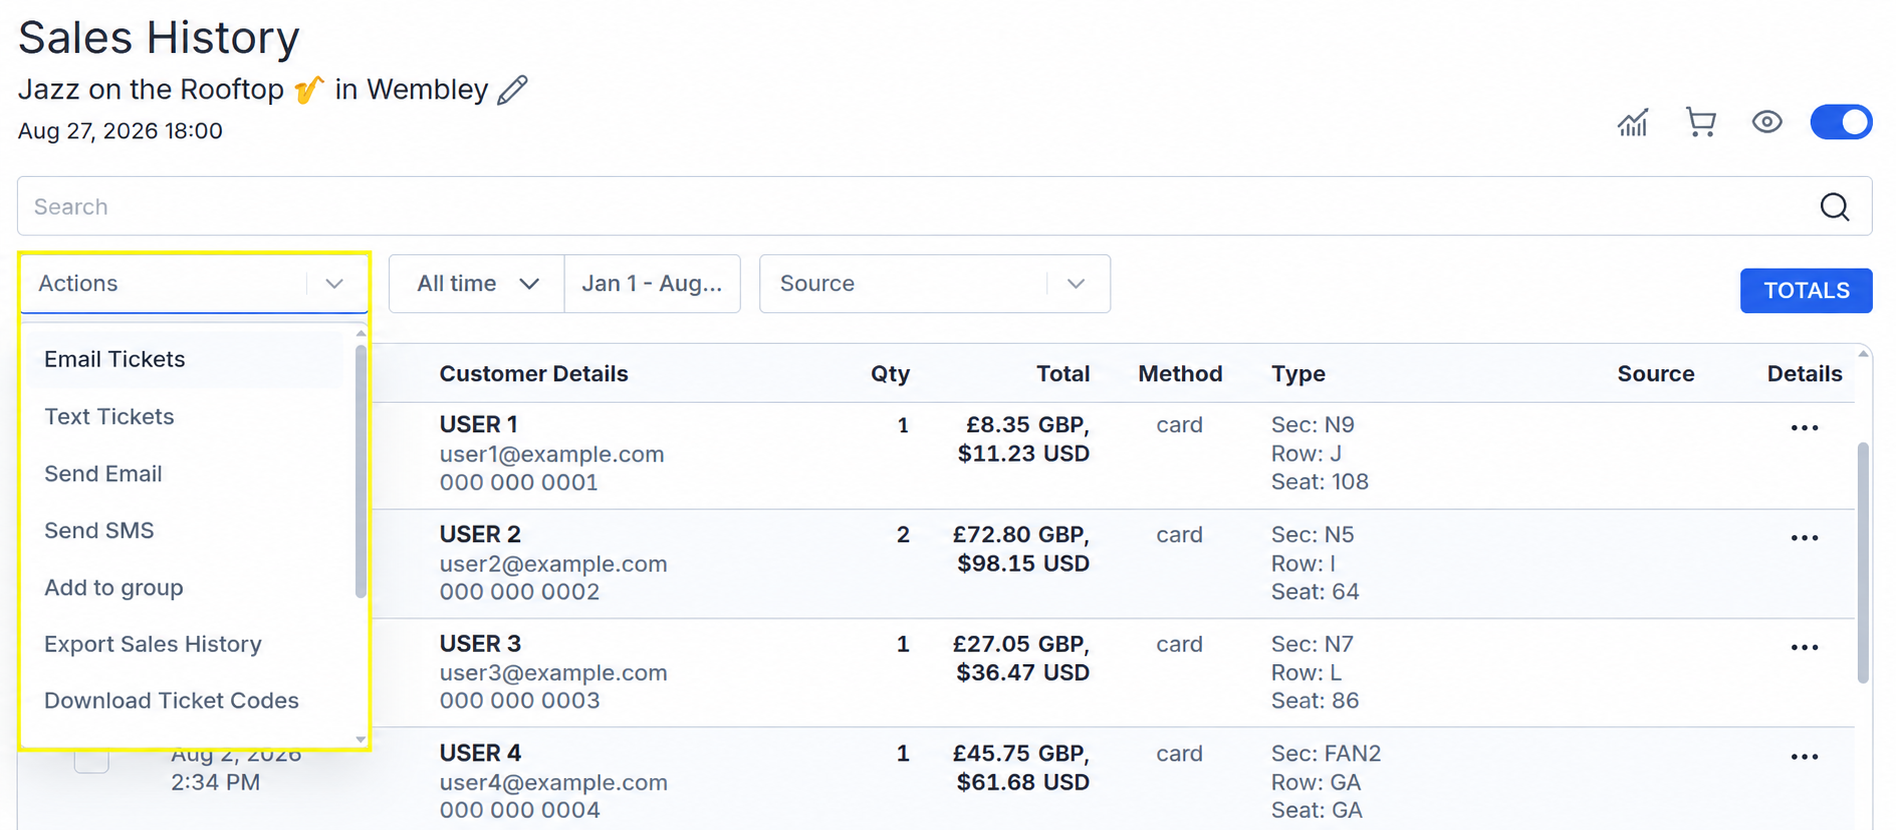
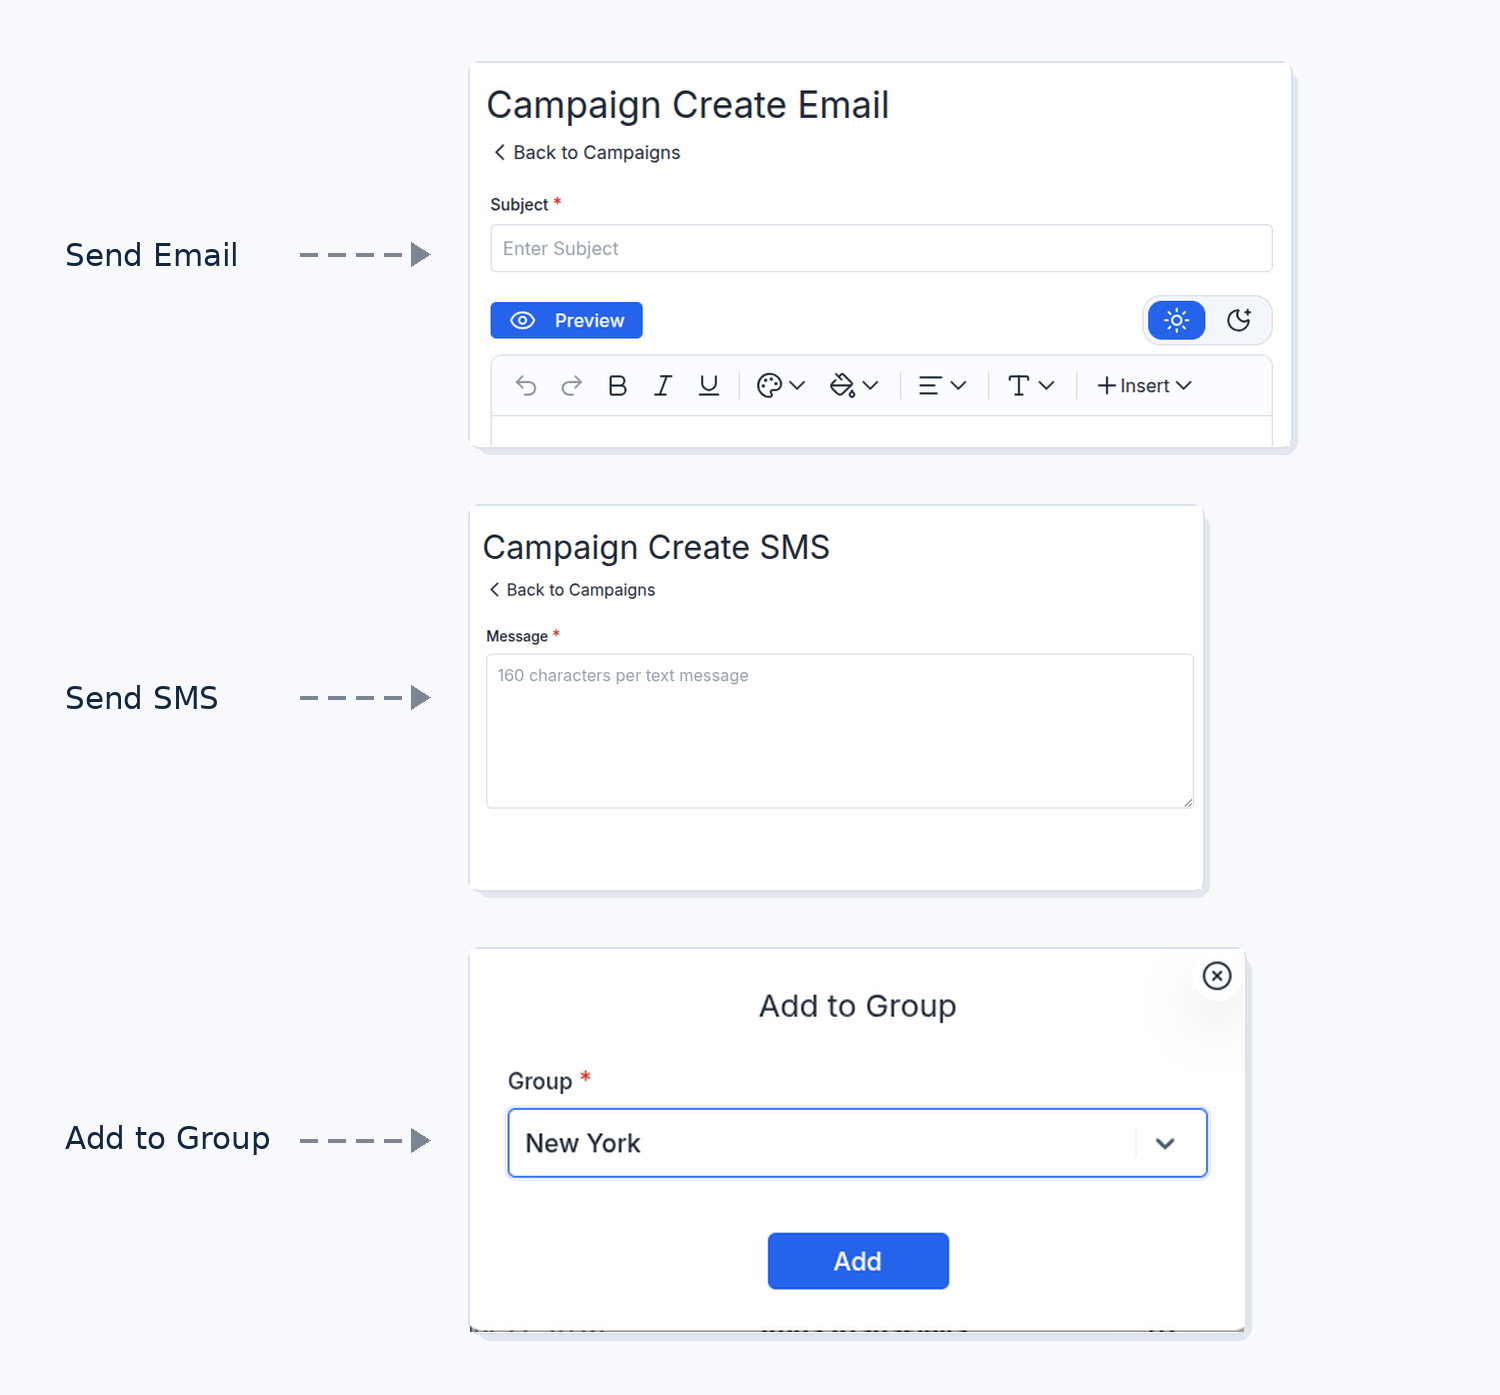
• Send Email - send a custom email to the selected buyers. This opens the "Campaign Create Email" page, where you can enter a subject, add your message, and send it to the selected recipients;
• Send SMS - send a custom text message to the selected buyers. This opens the "Campaign Create SMS" page;
• Add to group - add the selected buyers to an existing contact group;
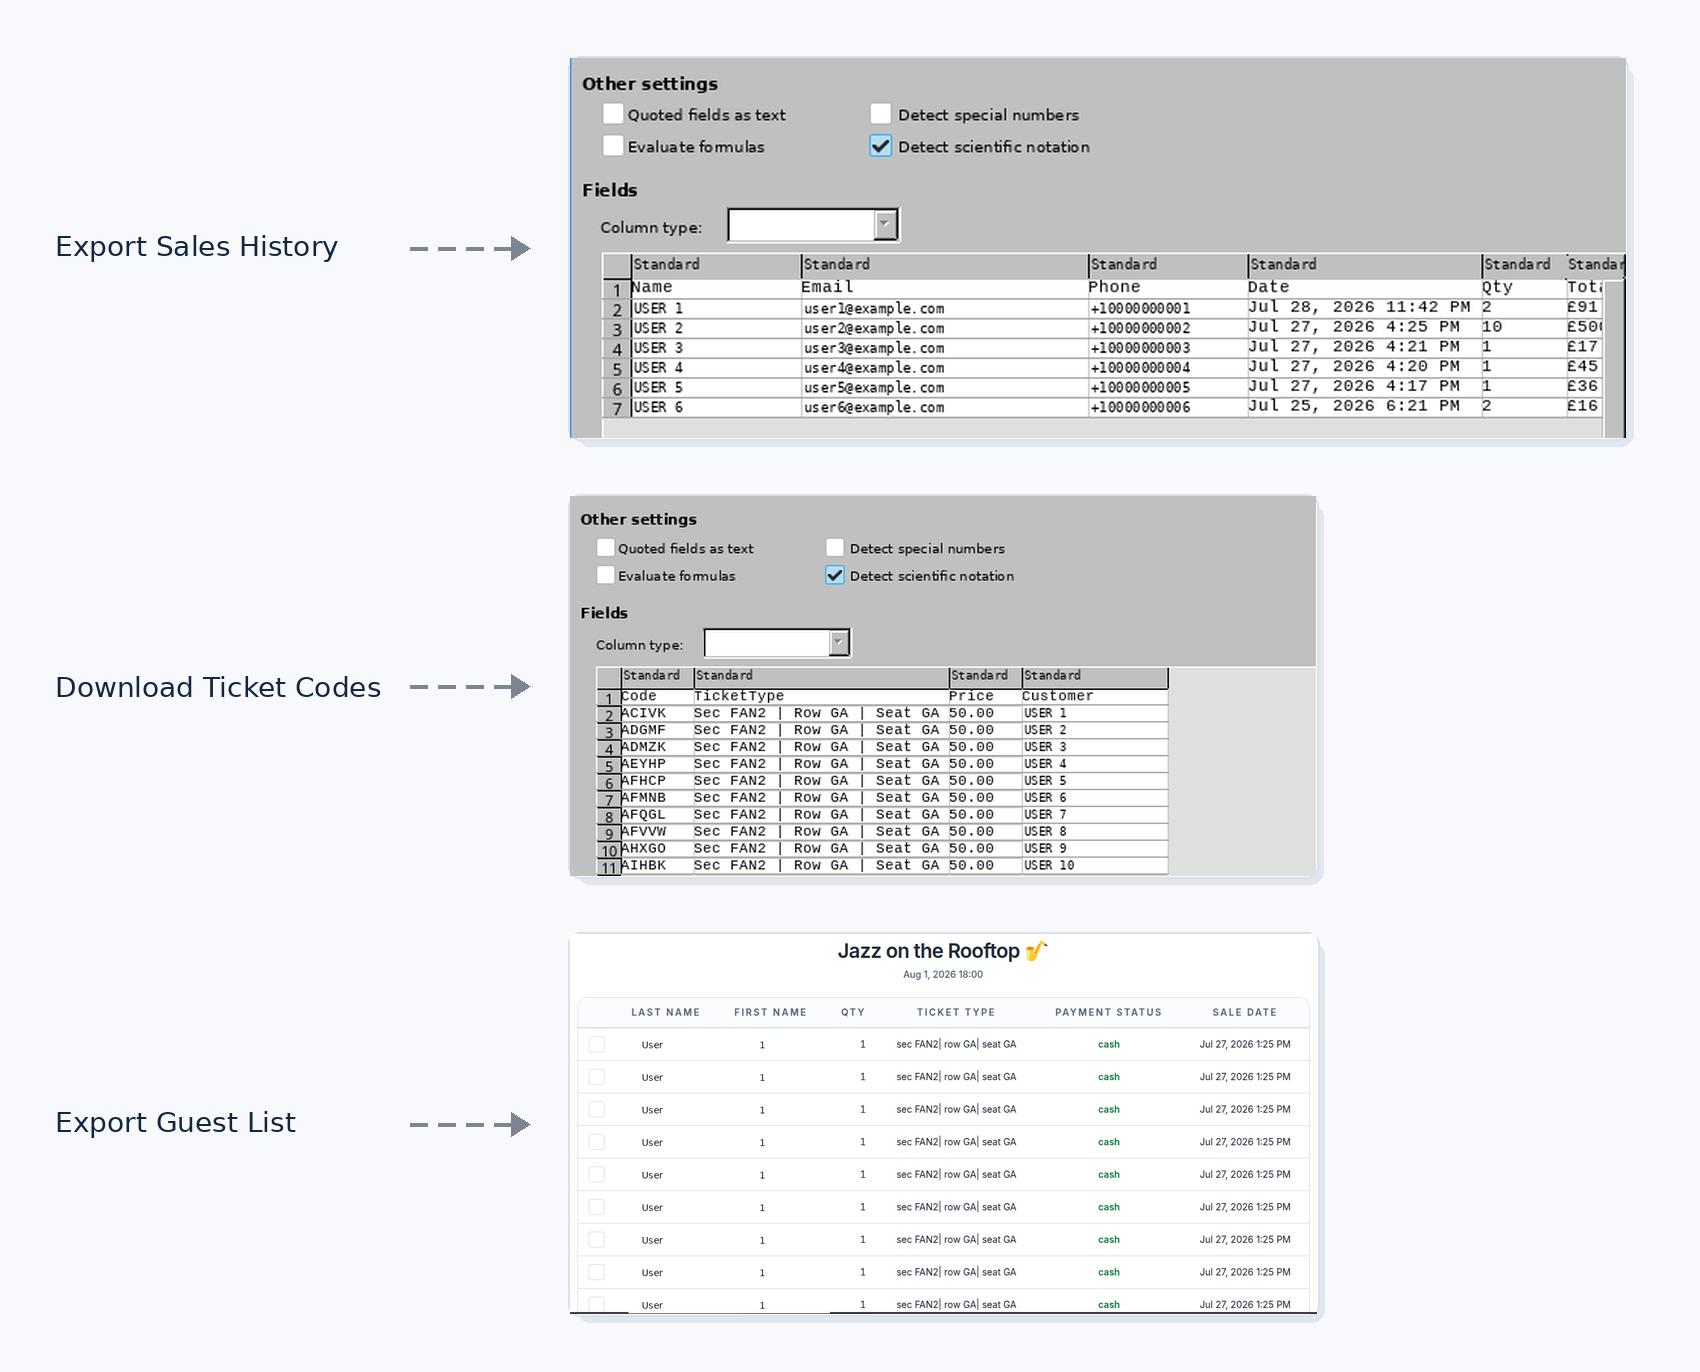
• Export Sales History - download a table containing purchase details, including buyer information, purchase date, number of items purchased, and total amount;
• Download Ticket Codes - download a table containing ticket codes. It also includes the ticket type and price, buyer’s name, and seat details;
• Export Guest List - open the guest list, which displays the buyer’s first and last name, ticket quantity and type, payment method, and purchase date;
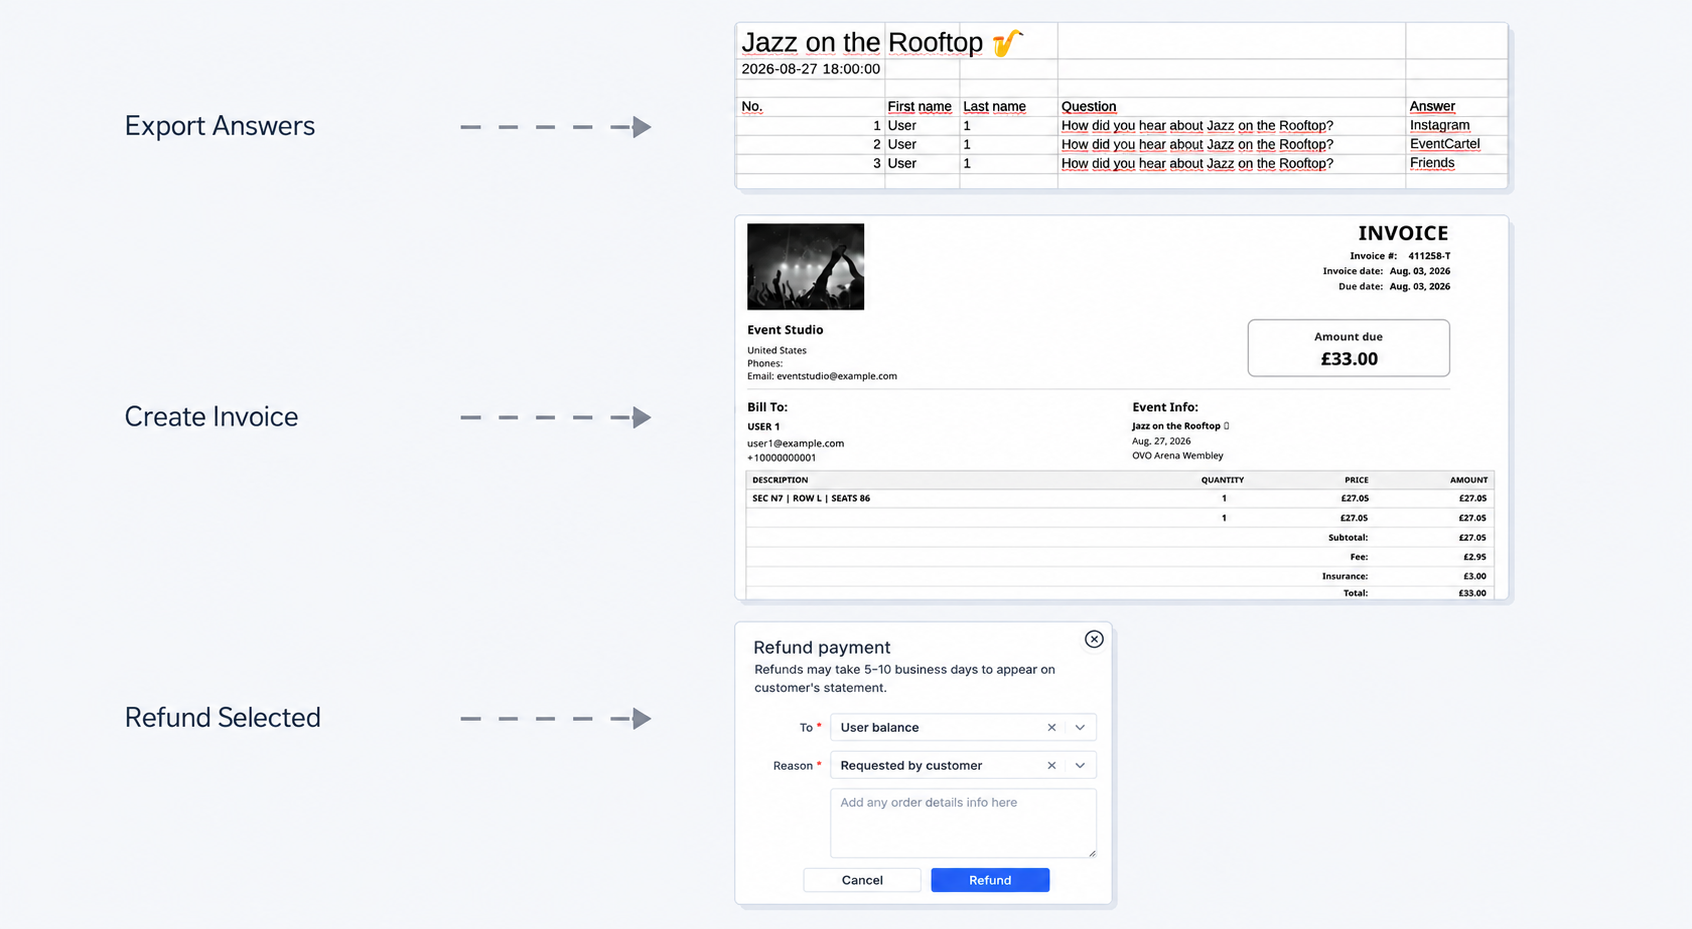
• Export Answers - download a table containing buyers’ responses to "Attendee Registration Questions", if you added them to the event;
• Create Invoice - create an invoice for the selected order;
• Refund Selected - issue a refund for the selected orders. In the window that opens, choose where to return the funds: to the buyer’s card or balance. Then select a refund reason, add a comment if necessary, and click "Refund".
Refunds to a bank card may take 5–10 business days.
Total sales:
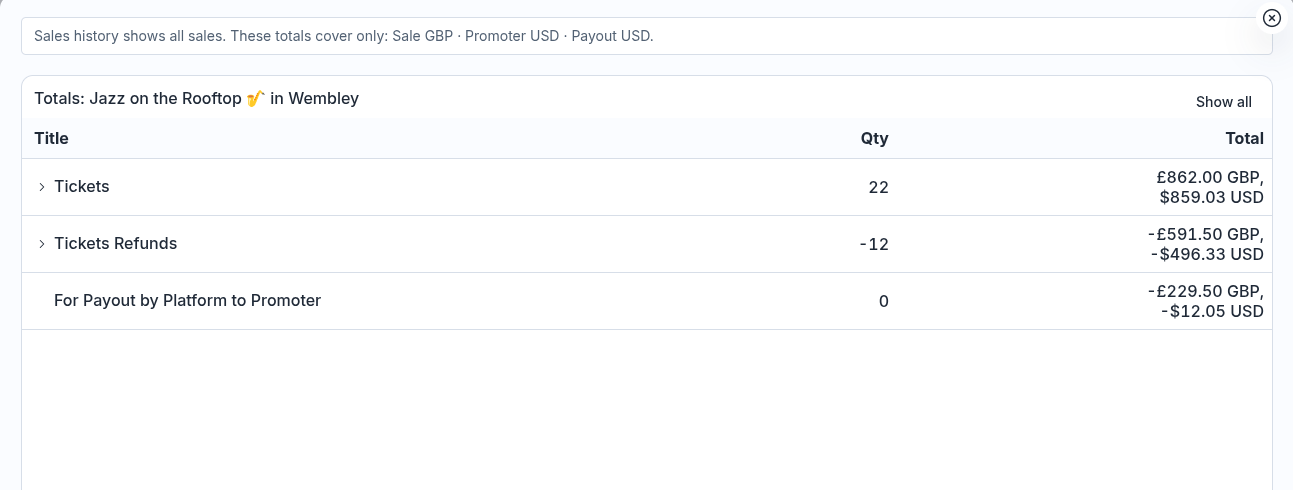
Click "TOTALS" in the upper-right corner to view the event summary:
• Tickets - the number of tickets sold and the total sales amount;
• Ticket Refunds - the number of refunded tickets and the total refund amount;
• For Payout by Platform to Promoter - the amount the platform must pay you.
Click the › arrow next to a row to view detailed information. Amounts may be displayed in both the event currency and US dollars.
How to view order details:
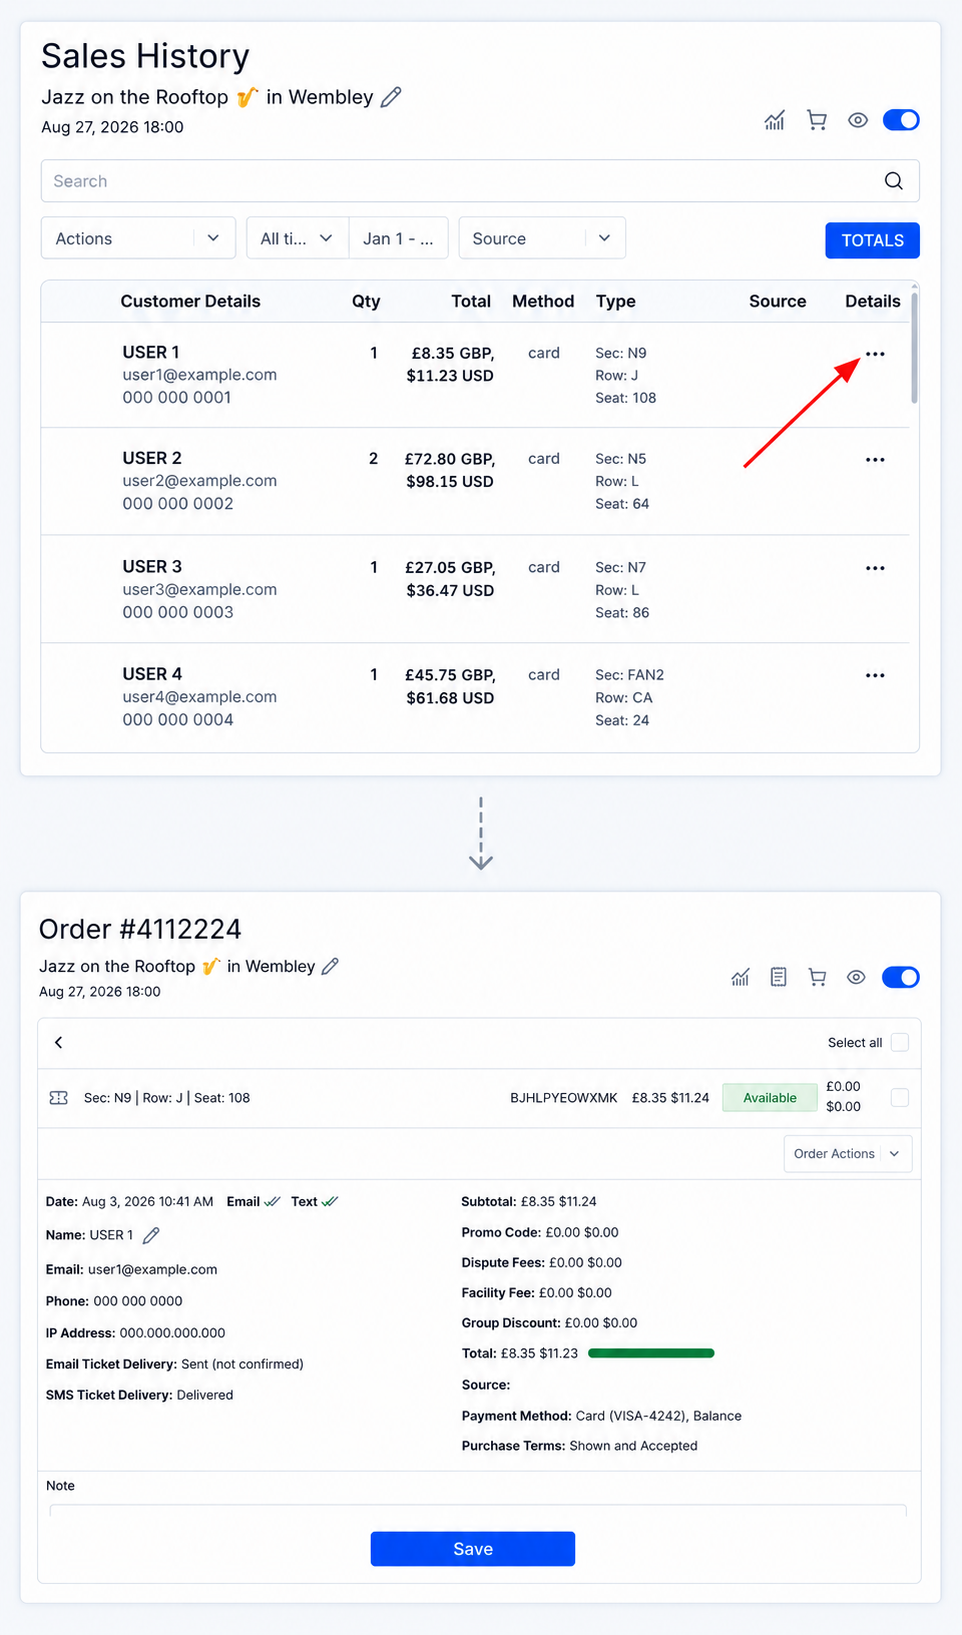
To open an order, scroll the table to the right and click the three dots ••• in the "Details" column.
The order page displays:
• Order number;
• Purchased tickets, their codes, prices, and current status;
• Section, row, and seat;
• Purchase date and buyer details;
• Ticket delivery status via email and SMS;
• Total order amount;
• Applied promo code and discount amount;
• Group discount;
• Additional fees;
• Payment method and purchase source;
• Information about whether the purchase terms were shown to and accepted by the buyer.
You can add a note to the order in the "Note" field. After entering the text, click "Save".
Actions available for tickets in an order:
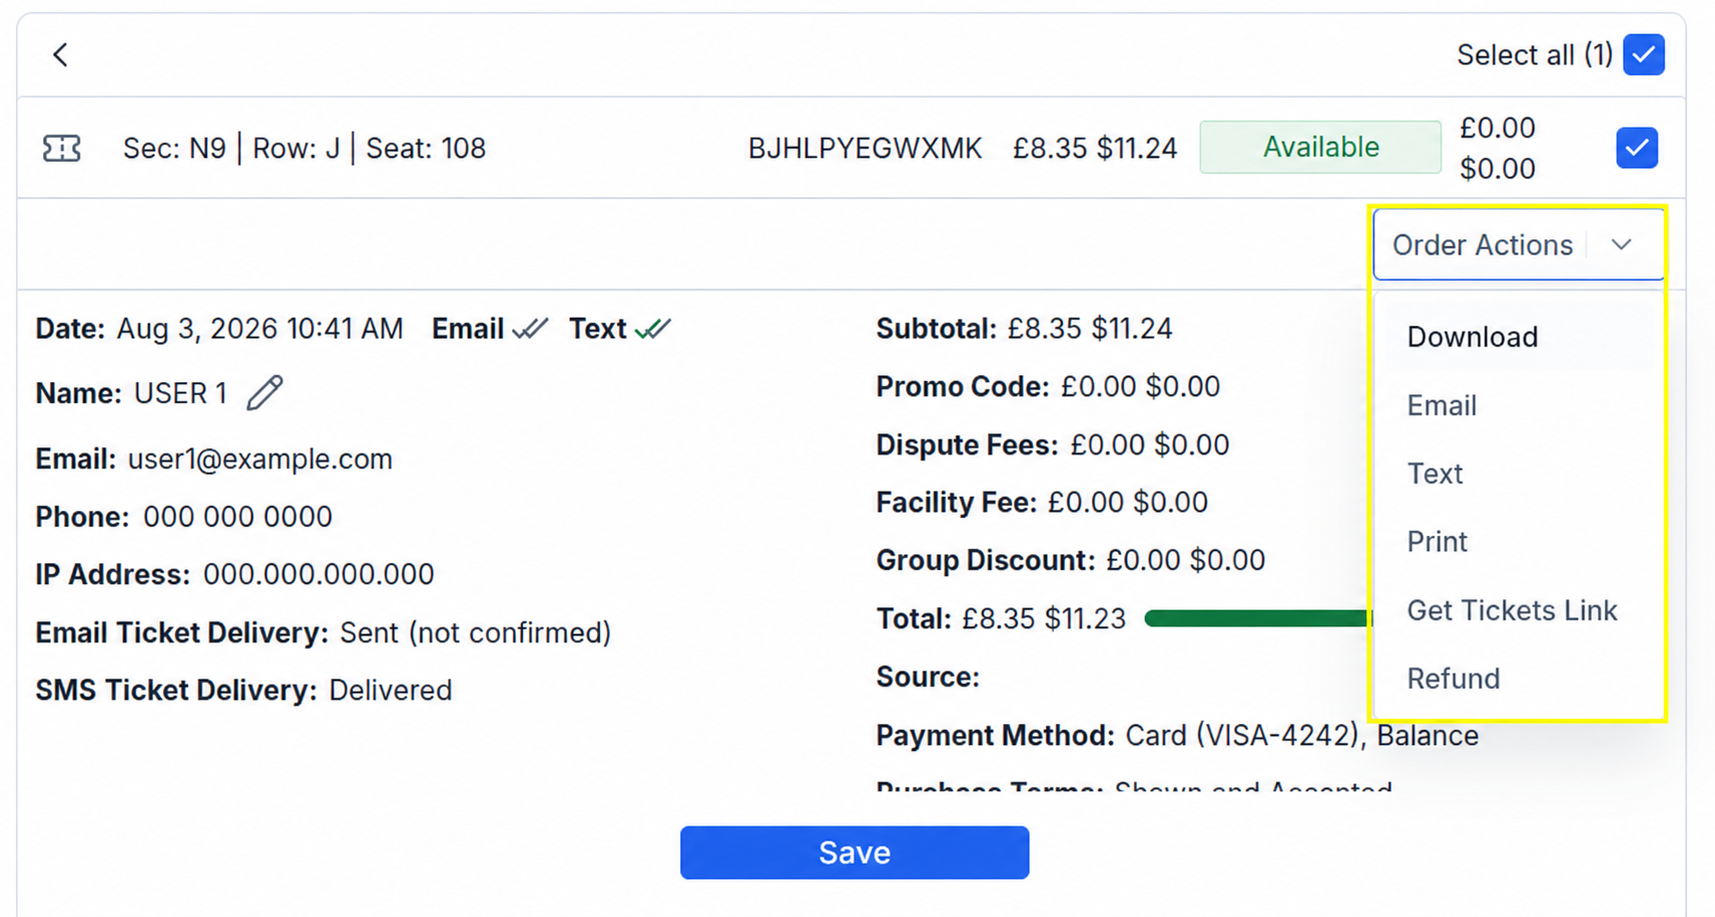
The "Order Actions" menu contains actions for the selected tickets. First, select the checkboxes next to the tickets, then choose an action:
• Download - download the tickets;
• Email - send the tickets to the buyer’s email address;
• Text - send the tickets to the buyer’s phone number;
• Print - open the tickets for printing;
• Get Tickets Link - open a separate page containing the tickets, event details, and QR codes. You can copy the link to this page and send it to the buyer;
• Refund - issue a refund for the selected tickets.
Additional tools:
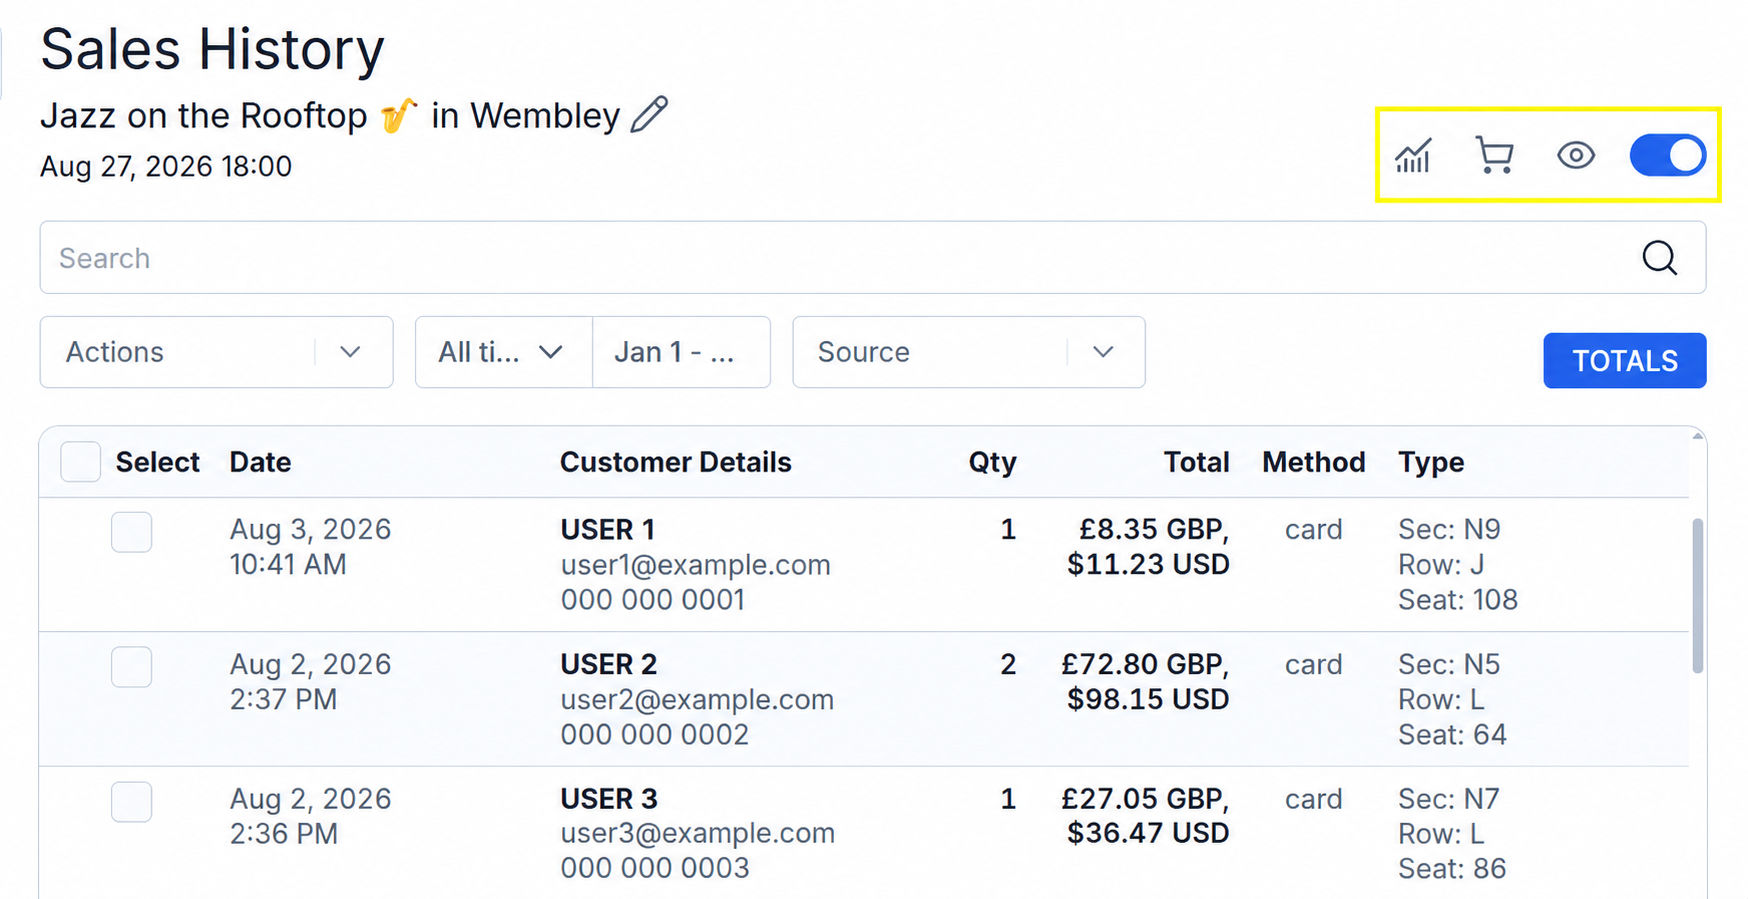
At the top of the "Sales History" page, you’ll find icons for quick access to other event features:
📈 — go to the "Analytics" section;
🛒 — go to ticket sales;
👁️ — open the event page;
🔘 — switch the event status between "Draft" and "Live".