Actions to take when canceling an event
Aug 31, 2026Updated1 min read00
If the event will not take place, cancel it in Business Manager, notify the buyers, and issue refunds for the purchased tickets.
1. Cancel the event:
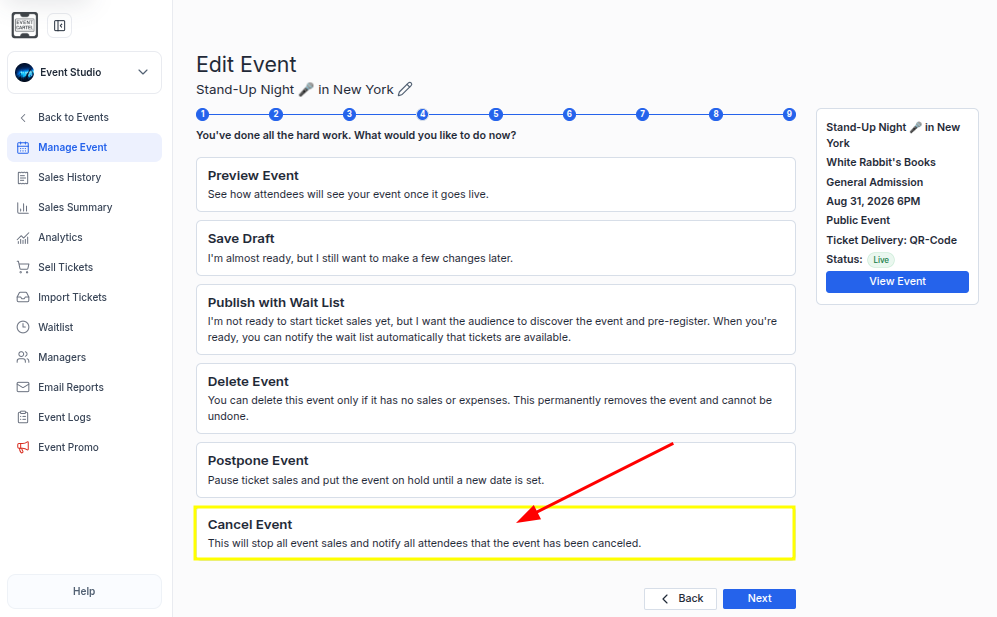
- Open the event you want to cancel and go to step 9.
- Select "Cancel Event".
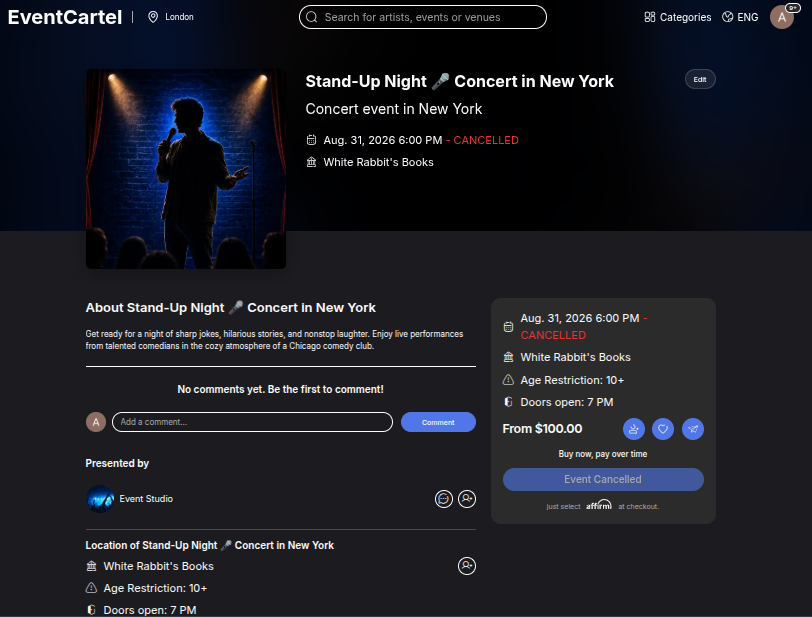
After cancellation, the event status will change to "Cancelled", and the sale of new tickets will be stopped.
- Select "Cancel Event".
After cancellation, the event status will change to "Cancelled", and the sale of new tickets will be stopped.
2. Notify the buyers:
After canceling the event, inform all buyers who purchased tickets.
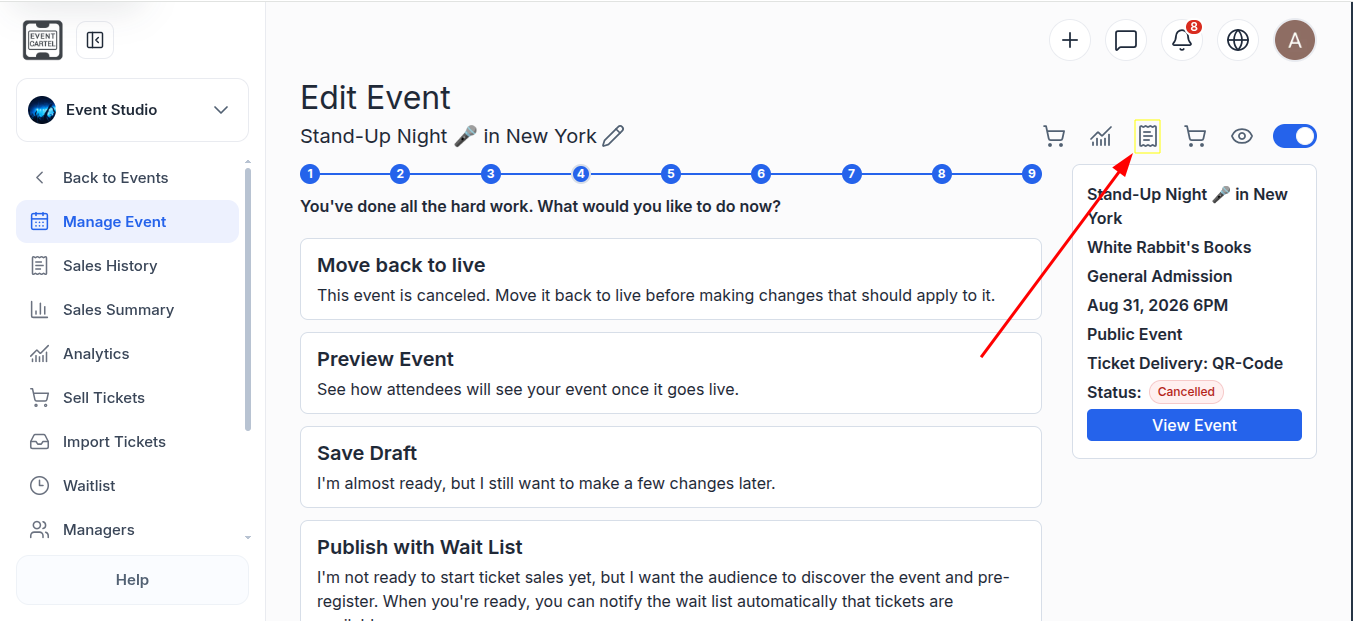
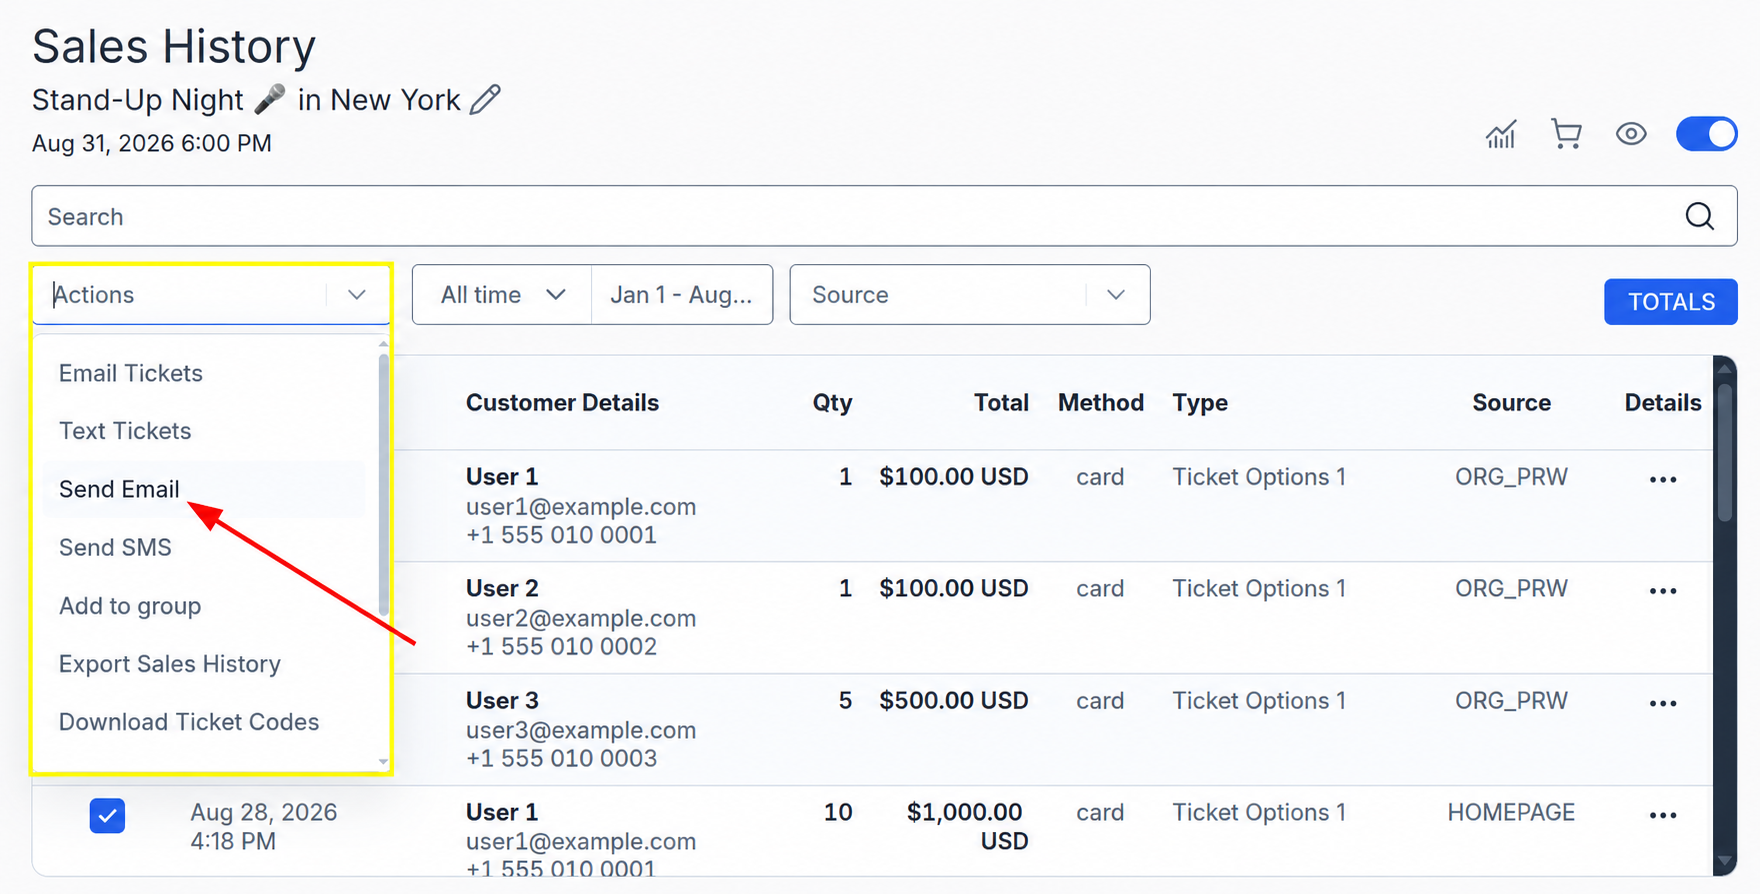
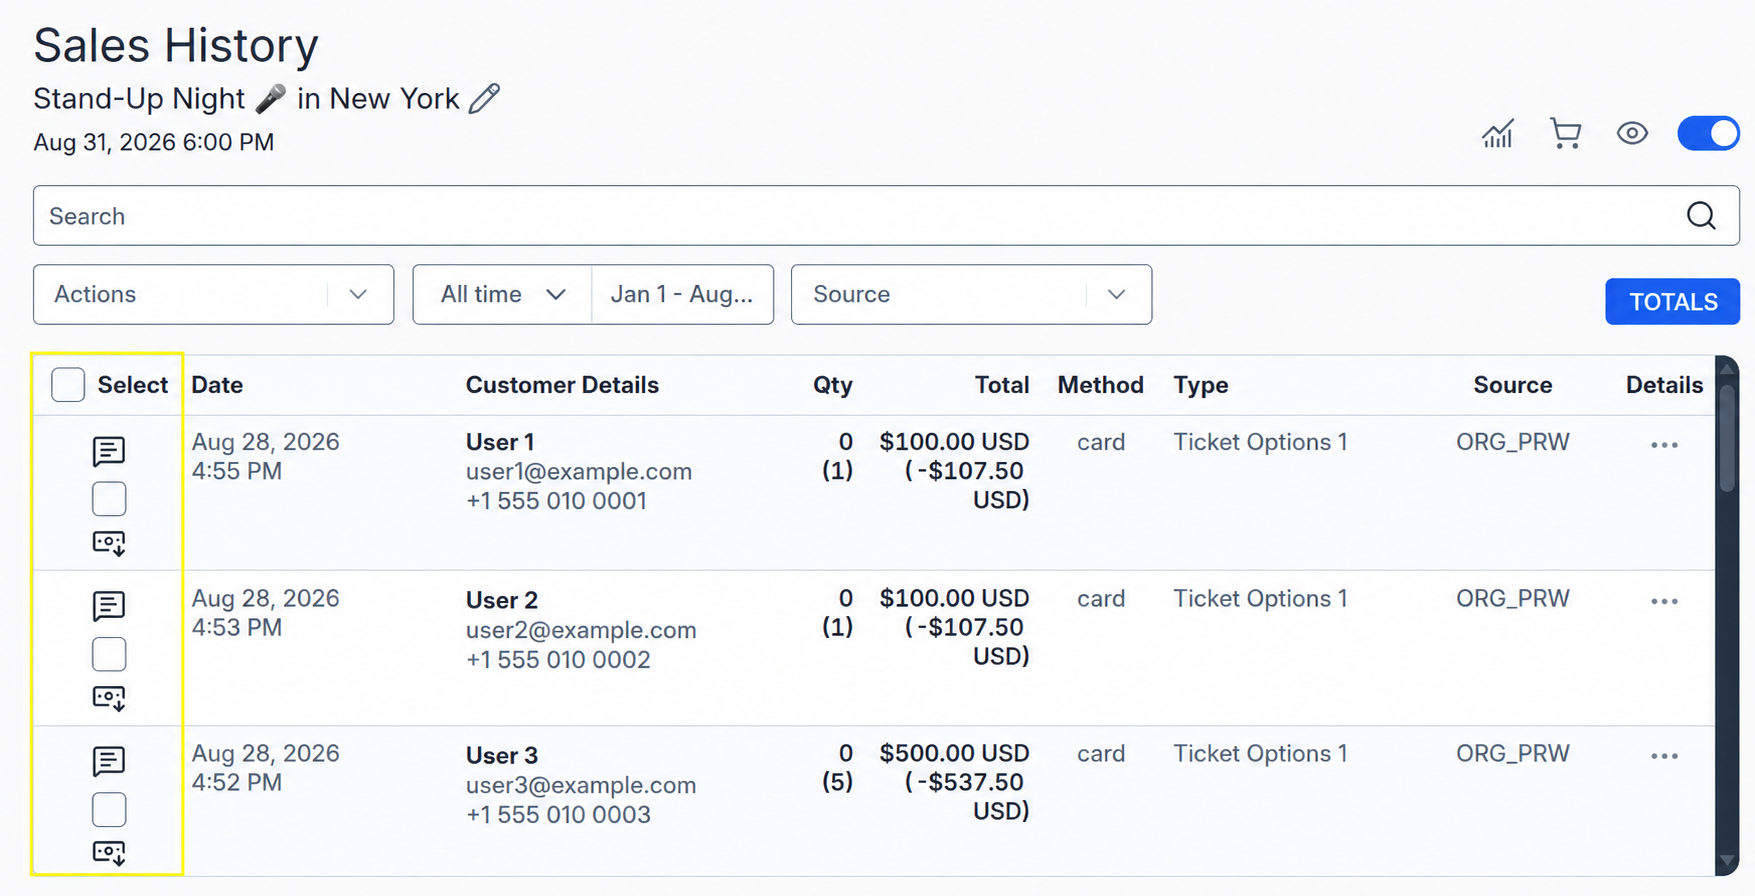
- Click the "Sales History" icon in the upper right corner of the page.
- Select the "Select" checkbox to choose all email recipients.
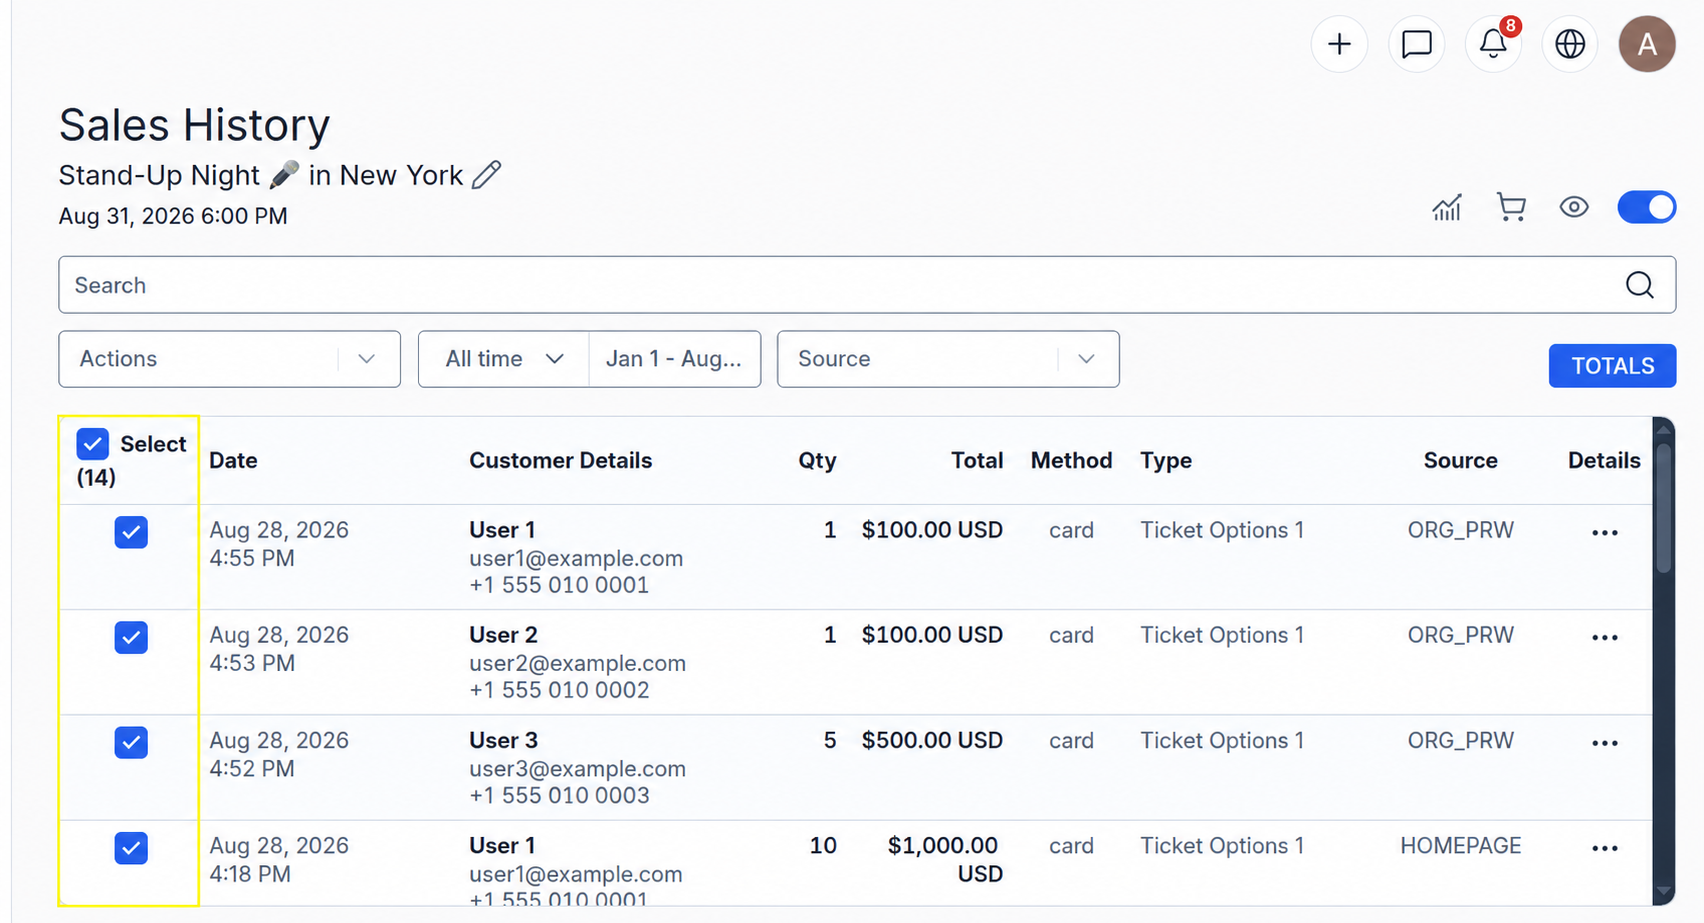
- Open the "Actions" list and select "Send Email".
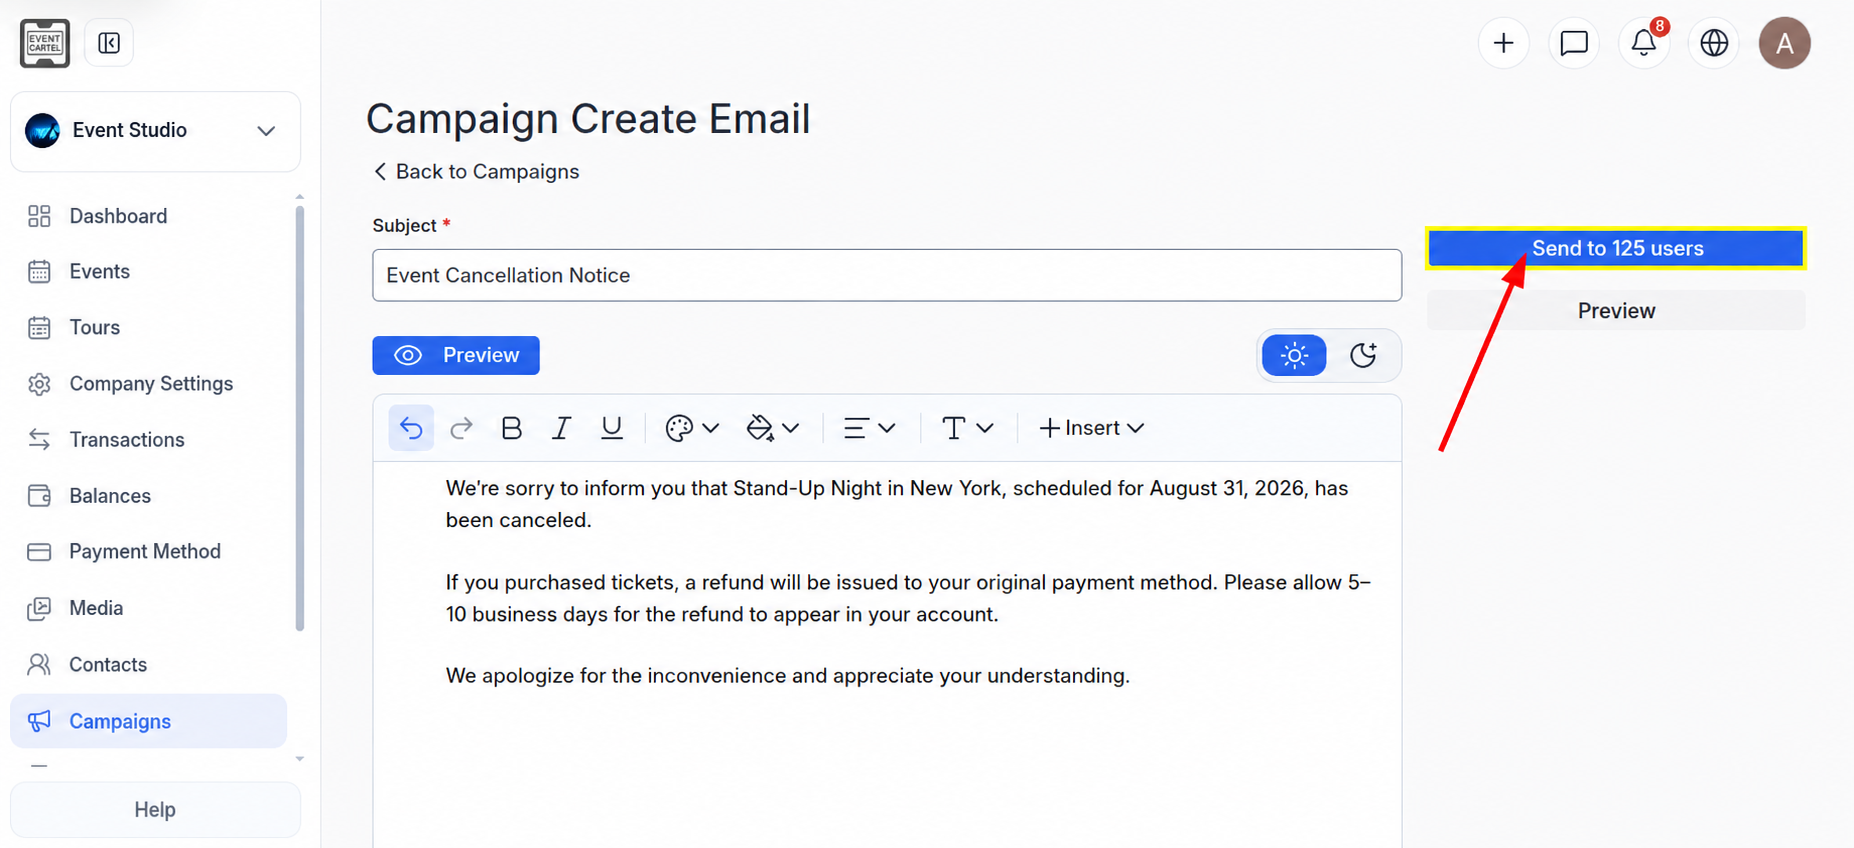
- Specify the email subject and write the notification text;
- Click "Send to users";
- Click "Send to users";
- In the window that appears, confirm that you want to send the email by clicking "Send now".
3. Process the refund:
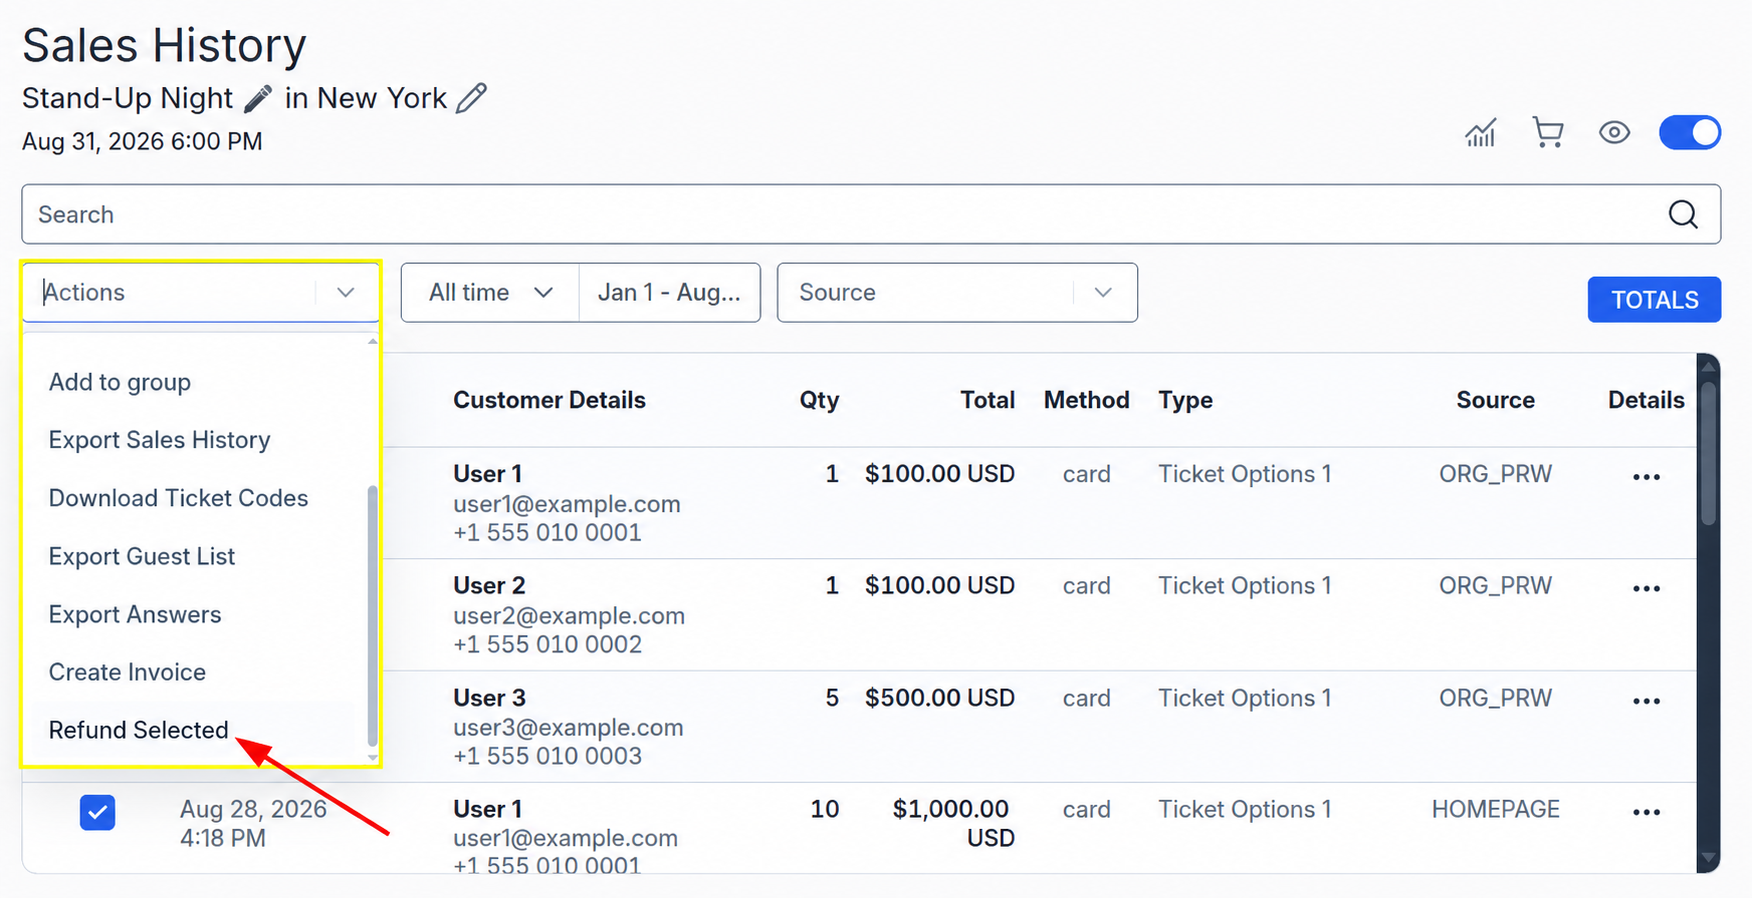
- Go to "Sales History";
- Select the "Select" checkbox to choose all purchases;
- Select the "Select" checkbox to choose all purchases;
- Open the "Actions" list and select "Refund Selected".
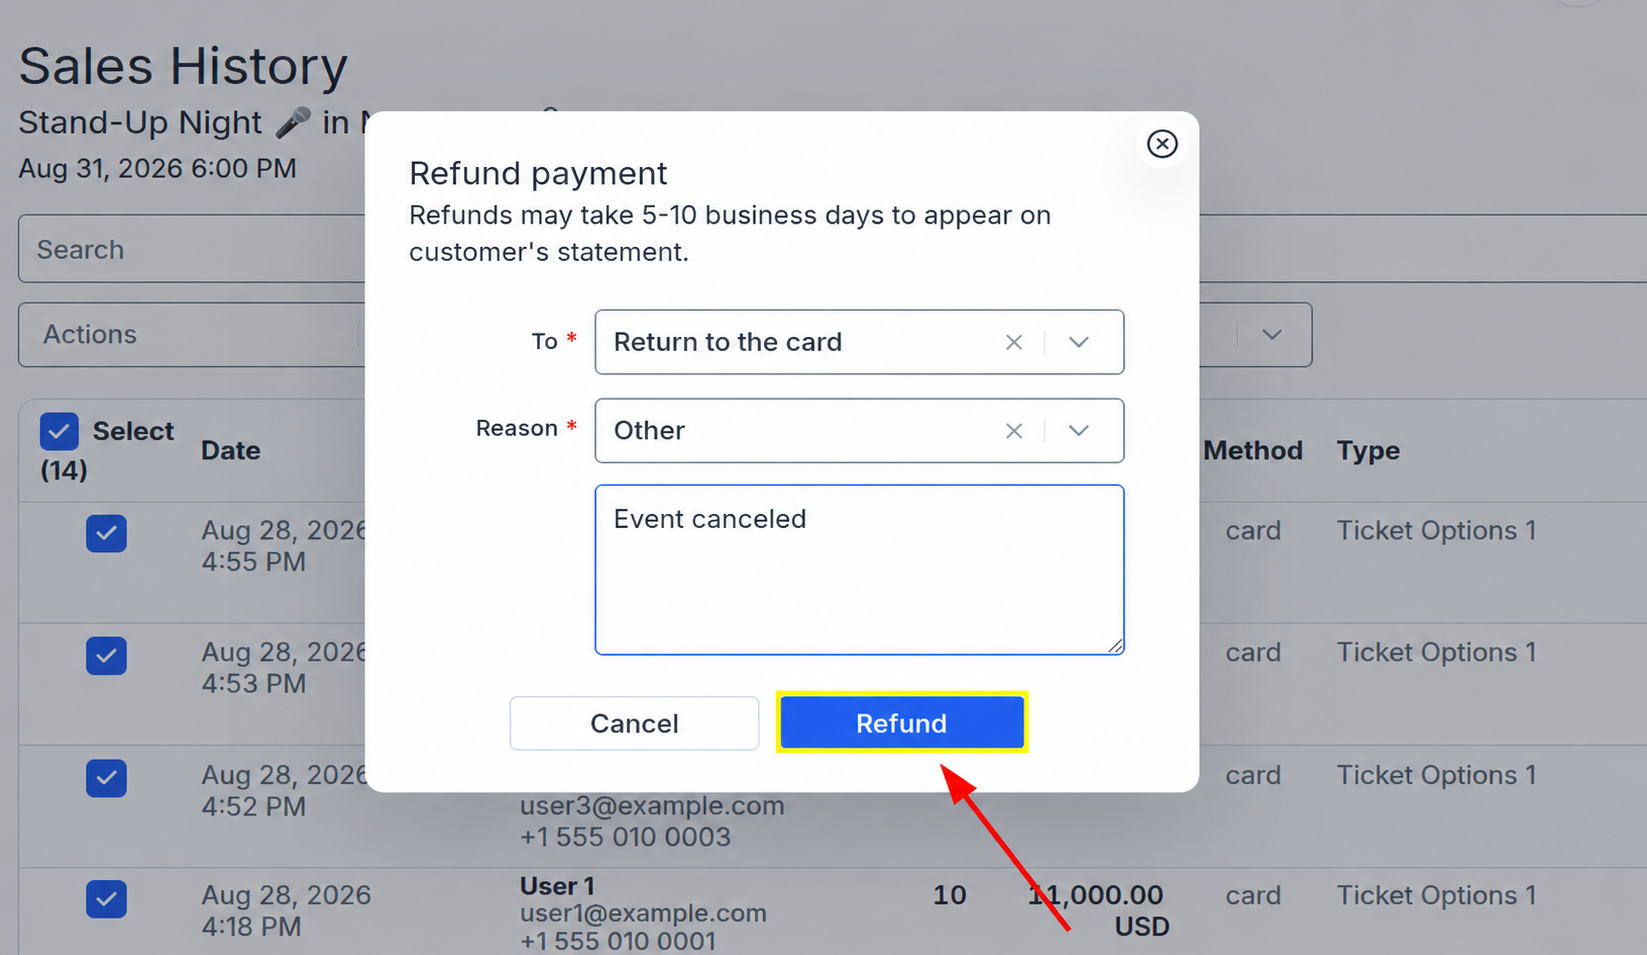
In the window that appears:
- In the "To" field, select "Return to the card" to return the funds to the card used for the purchase;
- In the "Reason" field, select "Other" and add a comment, for example, "Event canceled";
- Click "Refund".
After you submit the refund, it will be processed. The funds may take 5–10 business days to appear on the buyer’s card.
You can check the processed refunds in the "Sales History" section.
After cancellation, the event will be displayed on the website with the "Cancelled" status, and tickets will no longer be available for purchase.