How to create seat holds on a seating map?
Sep 9, 2026Updated3 min read00
Seat Holds allow you to temporarily block selected seats on your seating chart. Held seats cannot be purchased until you release the hold and make them available for sale.
To create a seat hold:
- Open the "Events" section;
- Find the event you need or create a new one.
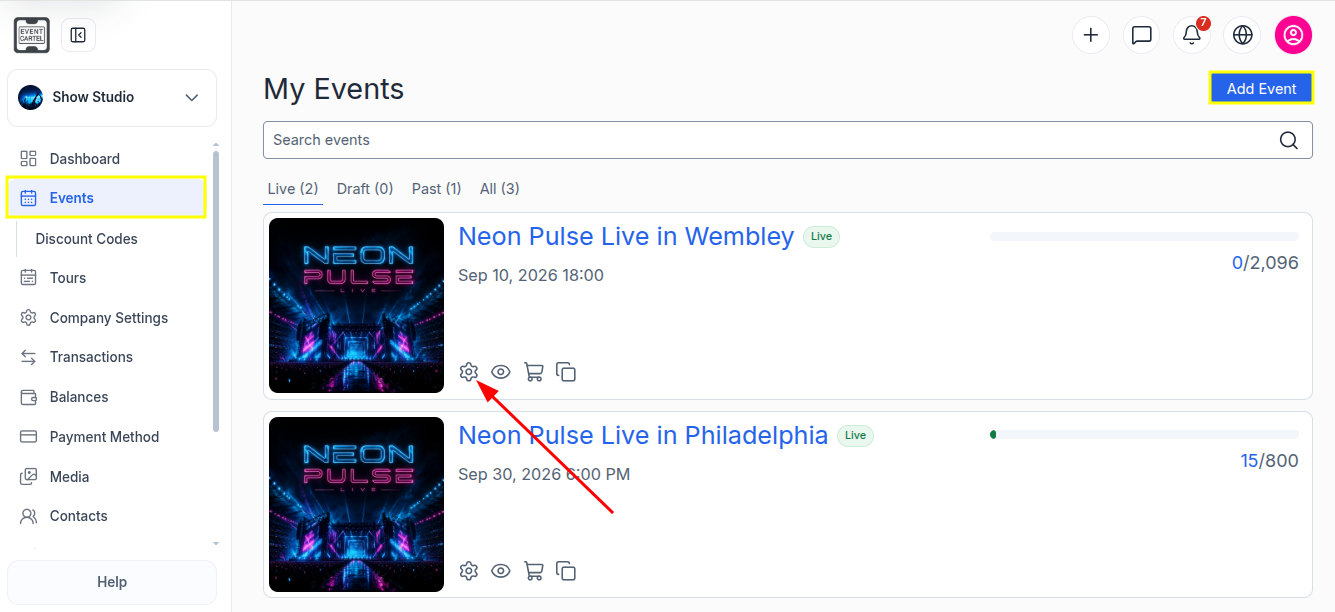
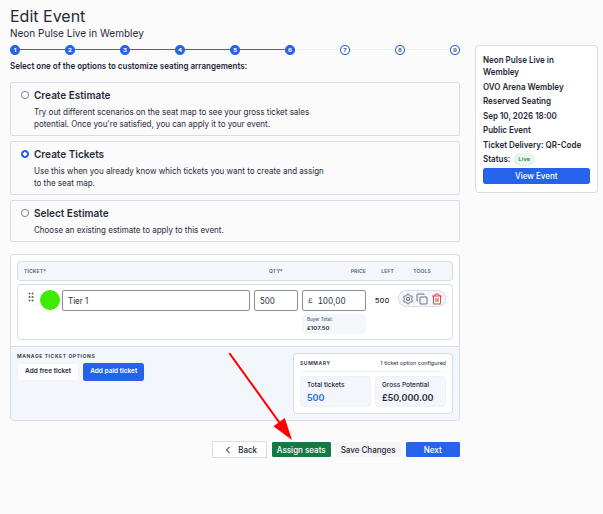
- Go to Step 6 of the event creation process;
- Click Assign Seats.
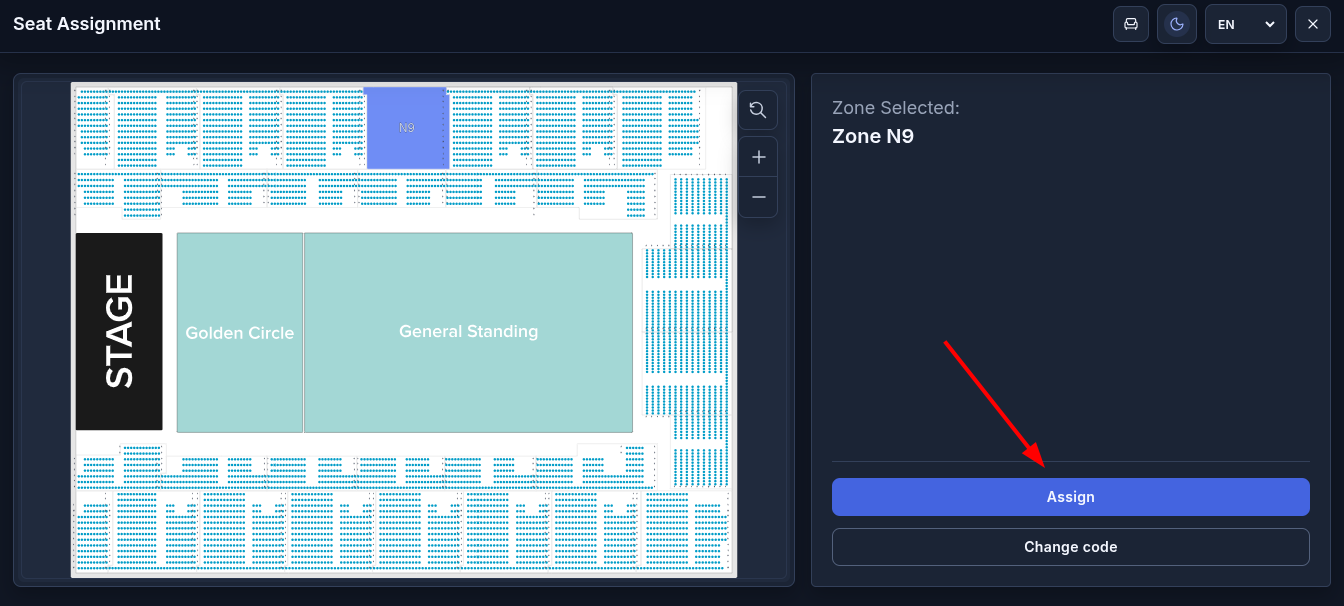
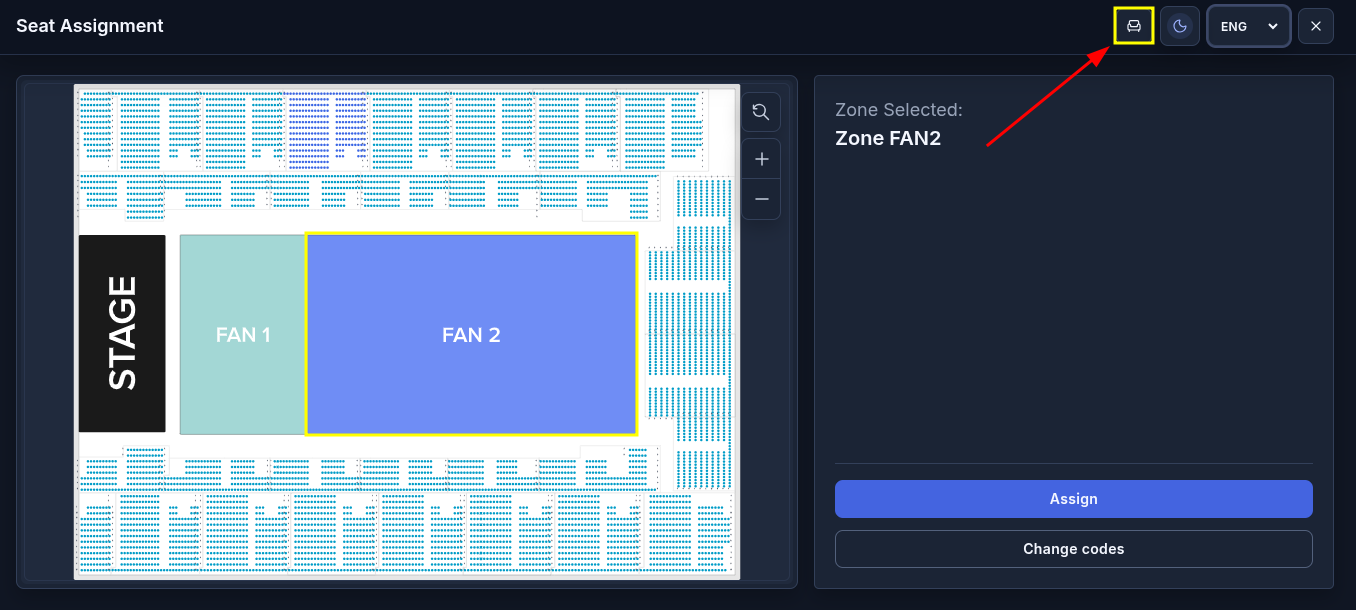
- Select the zone where you want to create a seat hold, then click "Assign".
- Select the seats you want to place on hold;
- Then click the "Create Hold" icon.
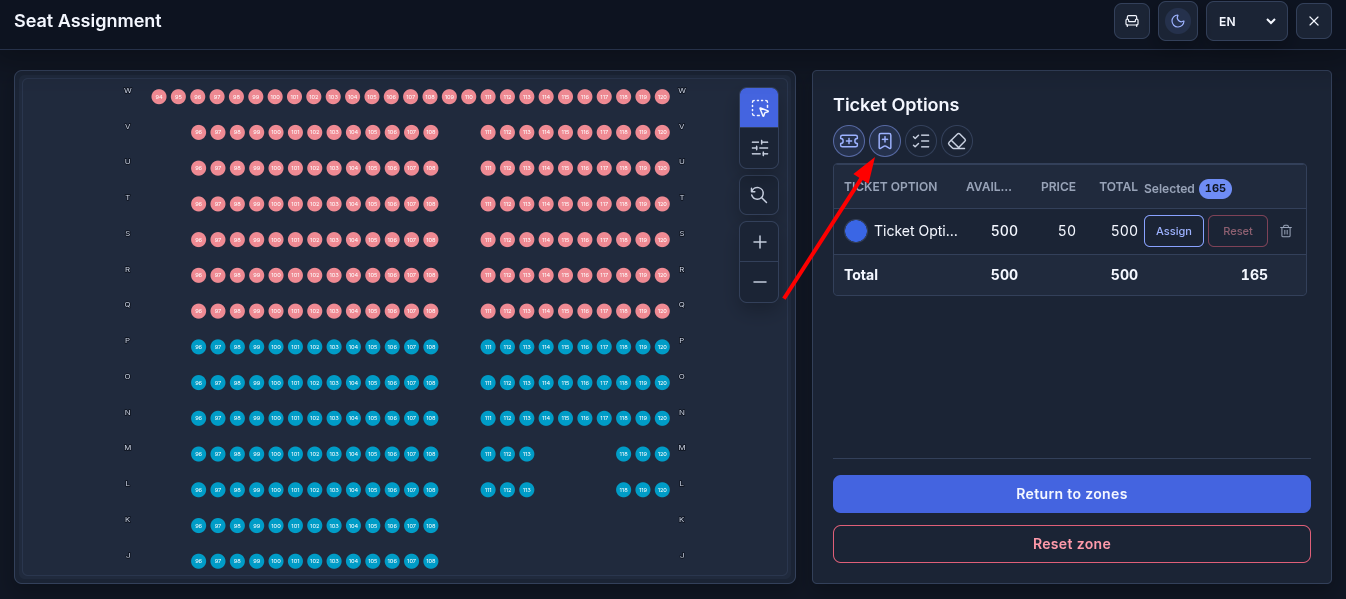
A new Hold will appear.
(Optional) Rename it if needed.
- To assign the Hold to the selected seats, click "Assign".
If you assigned extra seats by mistake, select them again and click "Release".
The selected seats will be removed from the Hold.
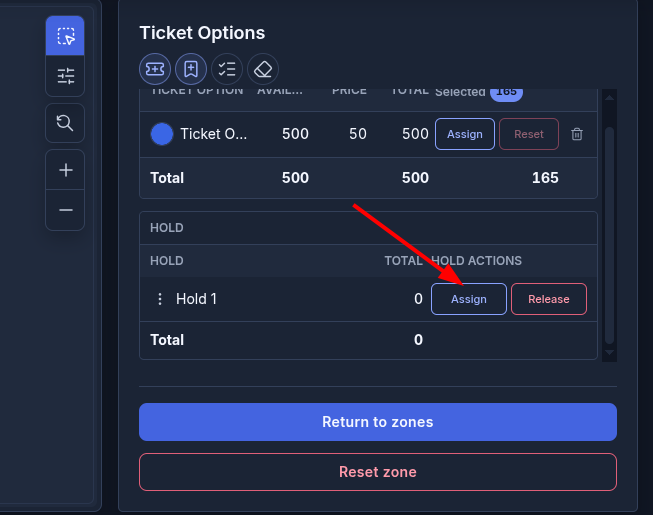
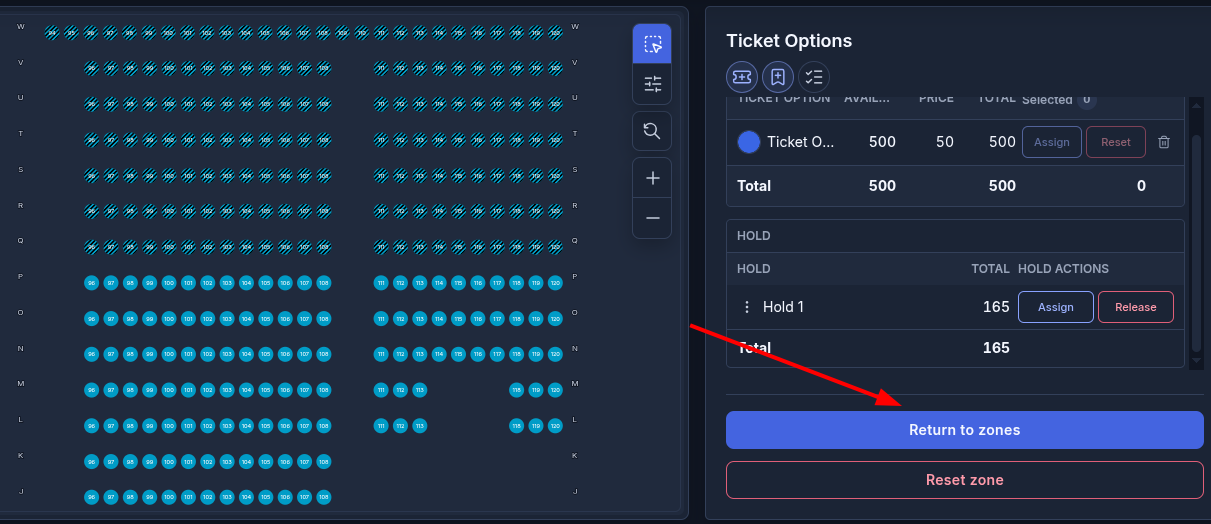
• Held seats will be displayed with diagonal hatching, indicating that they are temporarily blocked and unavailable for purchase.
• You can create multiple Holds.
- When you finish working with the current zone, click "Return to Zones".
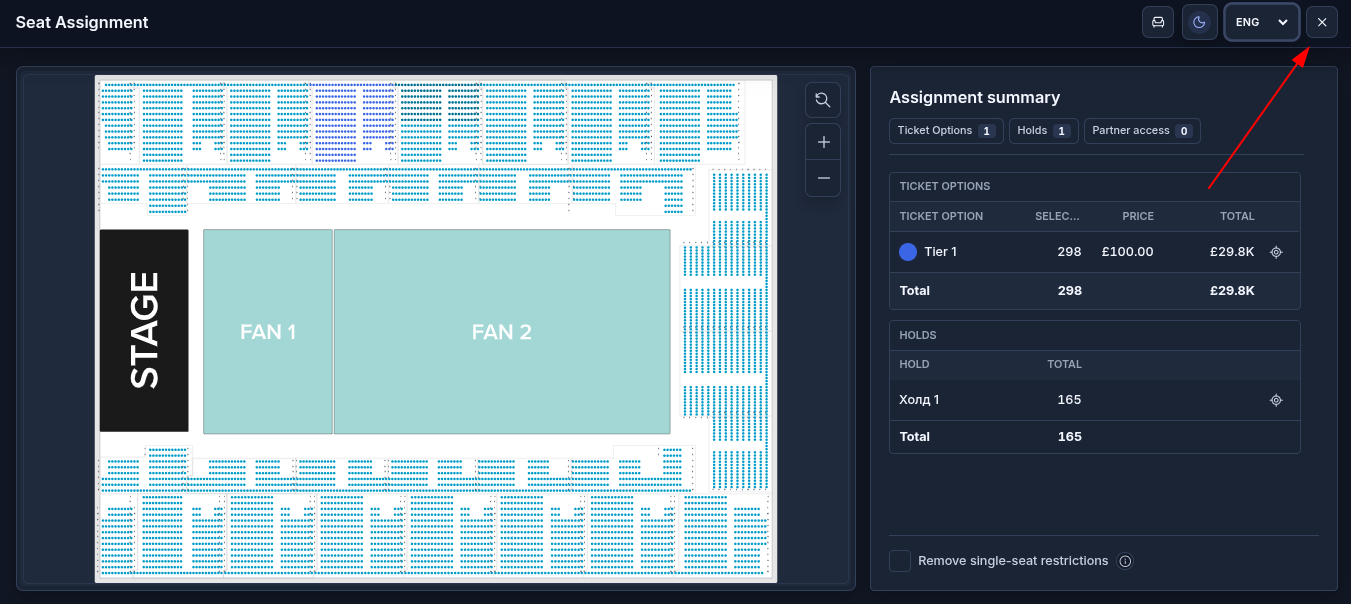
After you have assigned all ticket options and created the necessary Holds:
- Close the editor by clicking ✕ in the upper-right corner;
Held seats will appear as unavailable to customers, just like seats that have already been sold, so they cannot be purchased.
How to create a hold in a general admission (GA) zone:
- Select the desired GA zone on the map;
- Click the "Seats Inventory" icon in the upper-right corner.
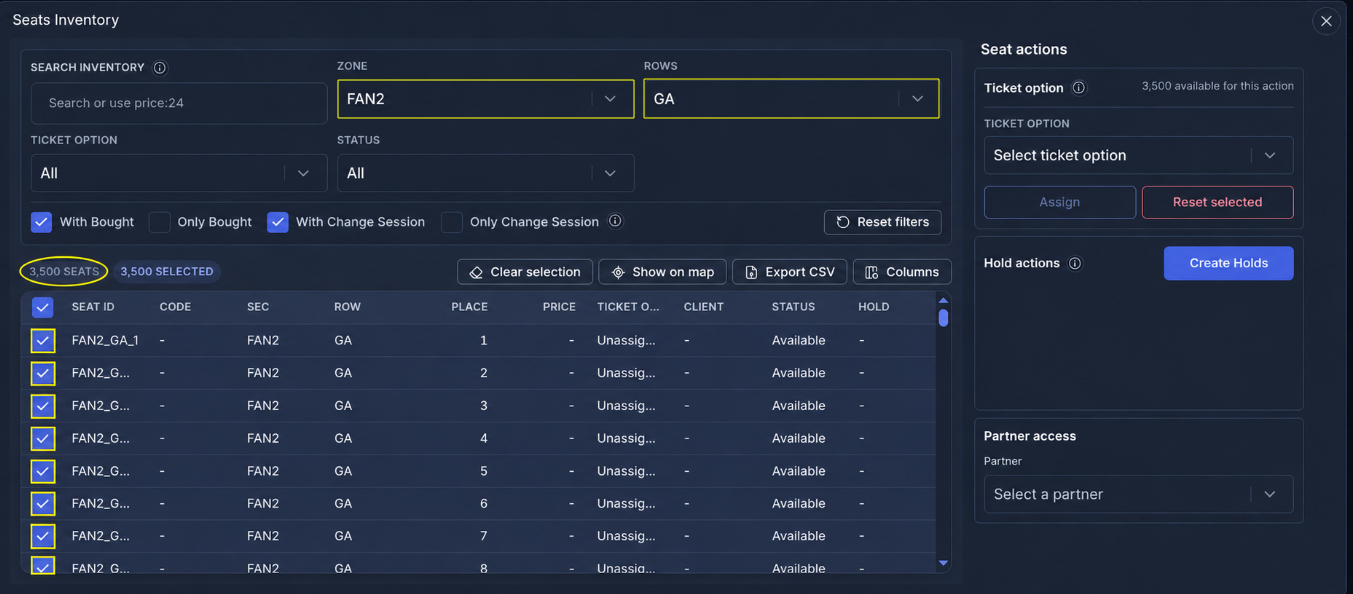
If ticket options have not been assigned yet:
- In the "Zone" field, select the desired GA zone;
- In the "Rows" field, select "GA";
- Leave "All" selected in the "Ticket Option" field;
- Select the required number of seats in the table.
To select all displayed seats, select the checkbox at the top of the table.
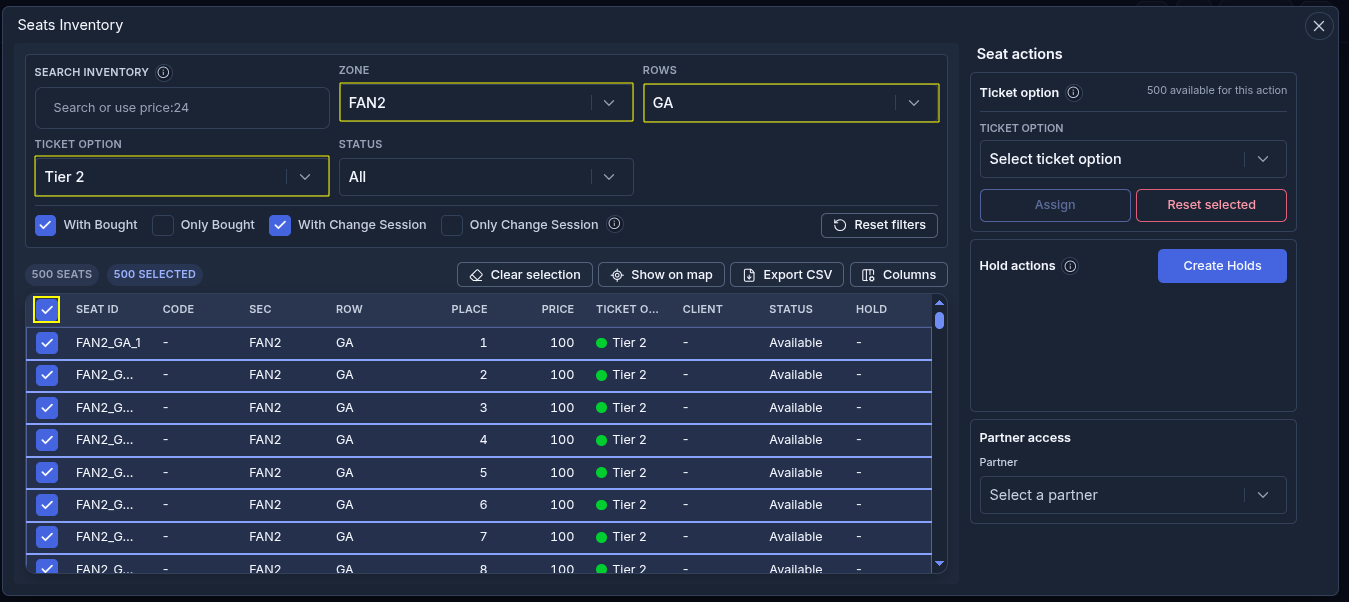
If ticket options have already been assigned:
- In the "Zone" field, select the desired GA zone;
- In the "Rows" field, select "GA";
- In the "Ticket Option" field, select the ticket option for which you want to create a hold;
- Select the required number of seats in the table.
To select all seats assigned to the selected ticket option, select the checkbox at the top of the table.
After selecting the seats:
- In the "Hold actions" section, click "Create Holds".
If necessary, click the name of the newly created hold to change it.
- Click "Assign". The number of seats selected in the table will be added to the hold.
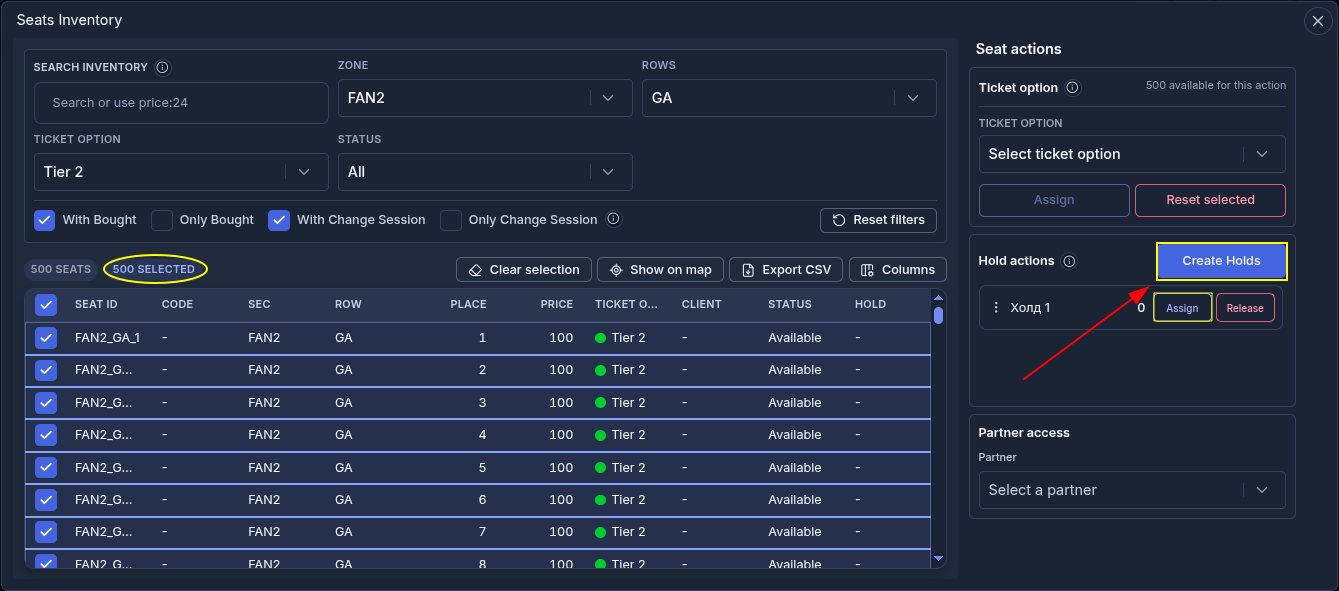
- Close the inventory by clicking ✕ in the upper-right corner.
On the main map, the hold in the GA zone will appear as a gray bar with diagonal stripes.
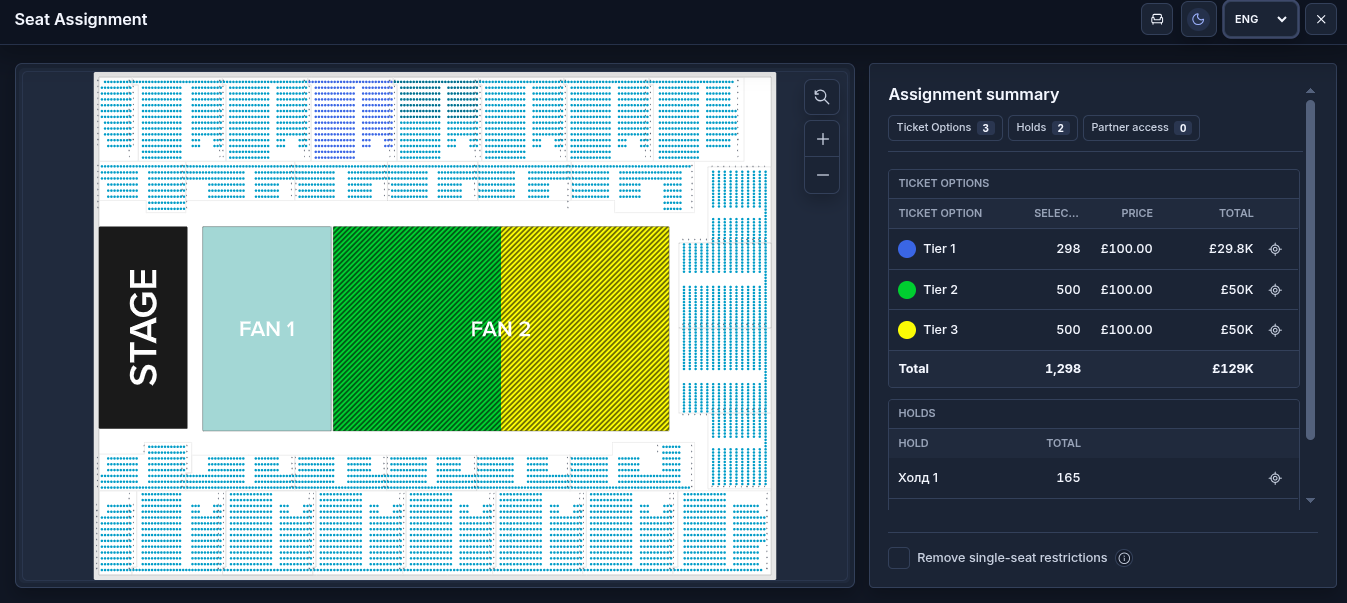
How to remove a hold:
From individual seats:
- Open the seating map editor for the desired event;
- Select the zone;
- Select the seats you want to release from the Hold;
- Click "Release";
- Return to the main seating map by clicking "Return to Zones";
- Close the seat map editor by clicking ✕;
- Click "Save Changes".
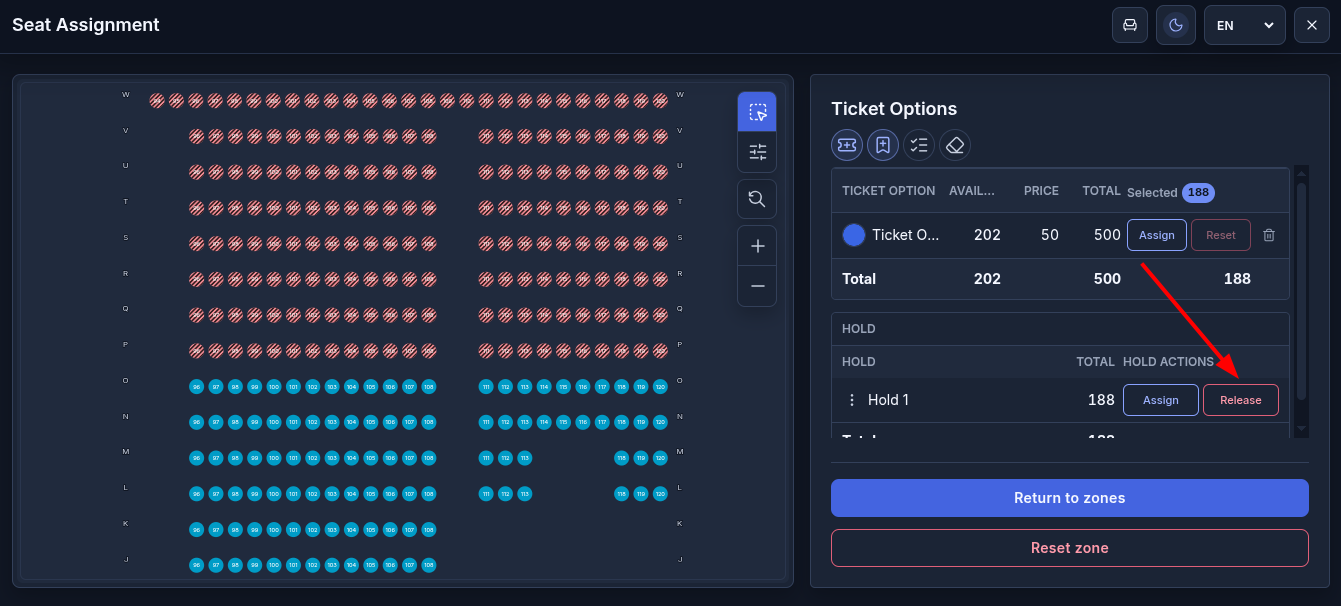
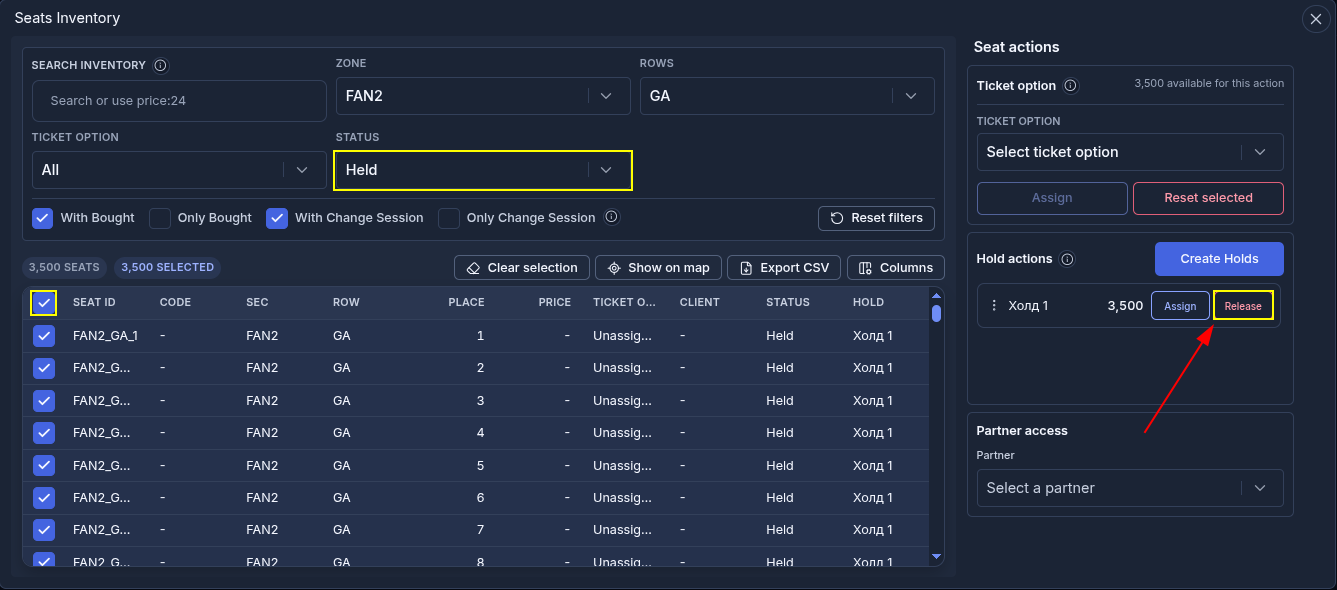
In a GA zone:
- Open the seating map editor for the desired event;
- Click the "Seats Inventory" icon in the upper-right corner;
- In the "Zone" field, select the desired zone;
- In the "Rows" field, select "GA";
- In the "Status" field, select "Held".
To further filter the seats, select "Held + Ticket Option" or "Held + No Ticket Option."
- Select the seats you want to release from the hold.
To select all seats in the hold, select the checkbox at the top of the table.
- Click "Release" next to the desired hold;
- Close the inventory by clicking ✕ in the upper-right corner.