How to sell additional services and products at an event?
Aug 25, 2026Updated2 min read00
You can add additional products or services to an event that customers can purchase along with their tickets during checkout. For example, these can include merchandise, Meet & Greet, parking, or other add-ons.
Products and add-ons are added separately for each event:
- Open the event you need;
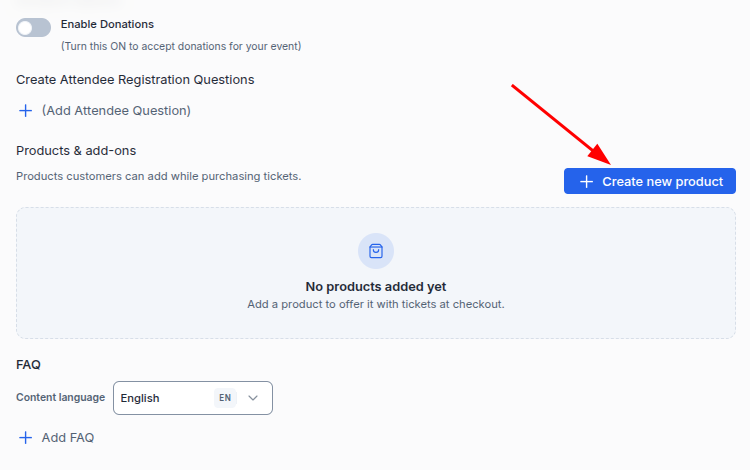
- Go to Step 8;
- Find the "Products & add-ons" section;
- Click "Create new product".
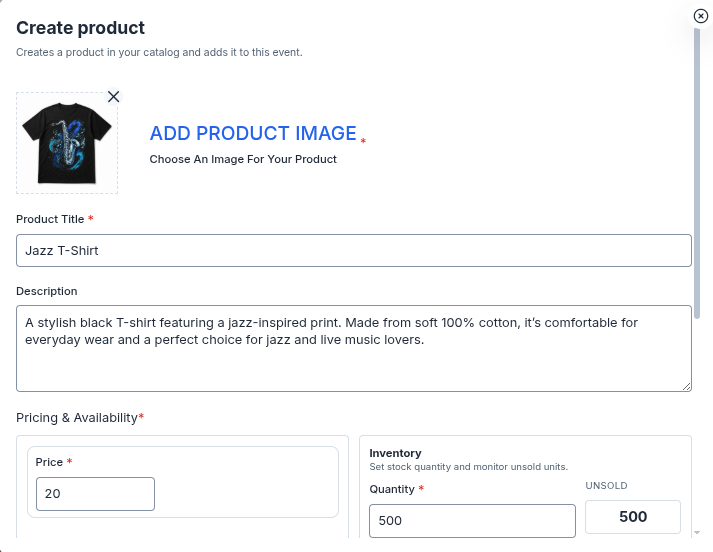
In the "Create product" window, fill in the product information:
Add Product Image - upload a product image;
Product Title - enter the product name;
Description - add a description;
Price - enter the price;
Quantity - enter the number of available items.
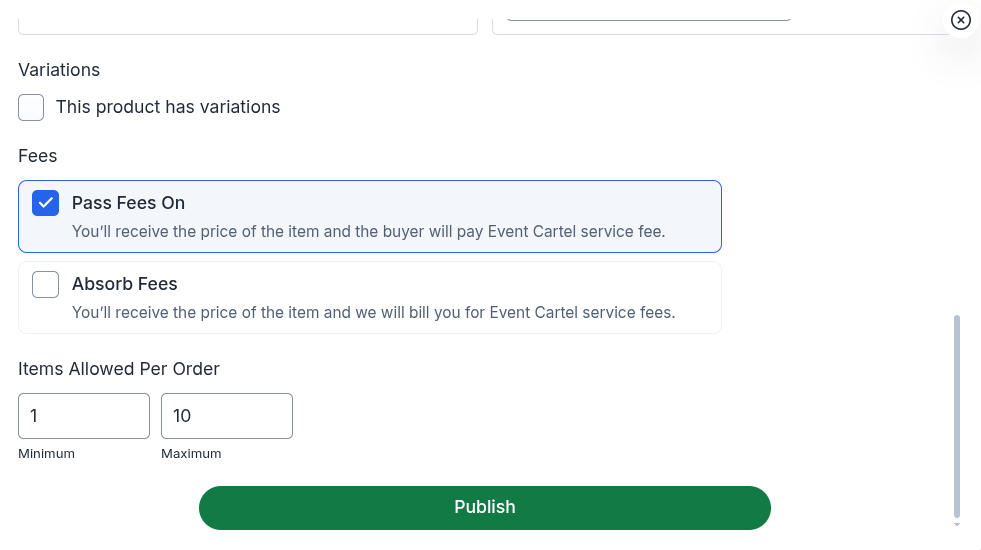
In the "Variations" section, specify whether the product has variations. We’ll explain how to create and configure variations at the end of this article.
In the "Fees" section, choose how the fees will be paid:
Pass Fees On - the organizer receives the full product price, while the EventCartel service fee is paid by the customer;
Absorb Fees - the service fee is paid by the organizer.
In the "Items Allowed Per Order" section, specify the minimum and maximum number of items a customer can add to a single order.
After filling in all the information, click "Publish".
After saving, the product will appear in the "Products & add-ons" section of the selected event.
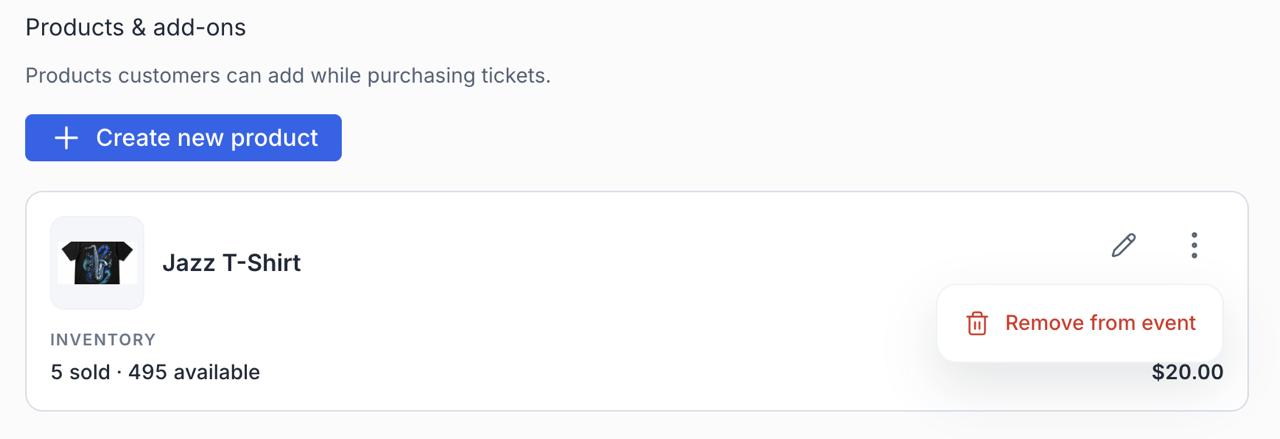
Here you can see the product name and image, its price, and the number of sold and remaining items.
To edit the product, click the pencil icon.
To remove the product from the event, click ⋮ and select "Remove from event".
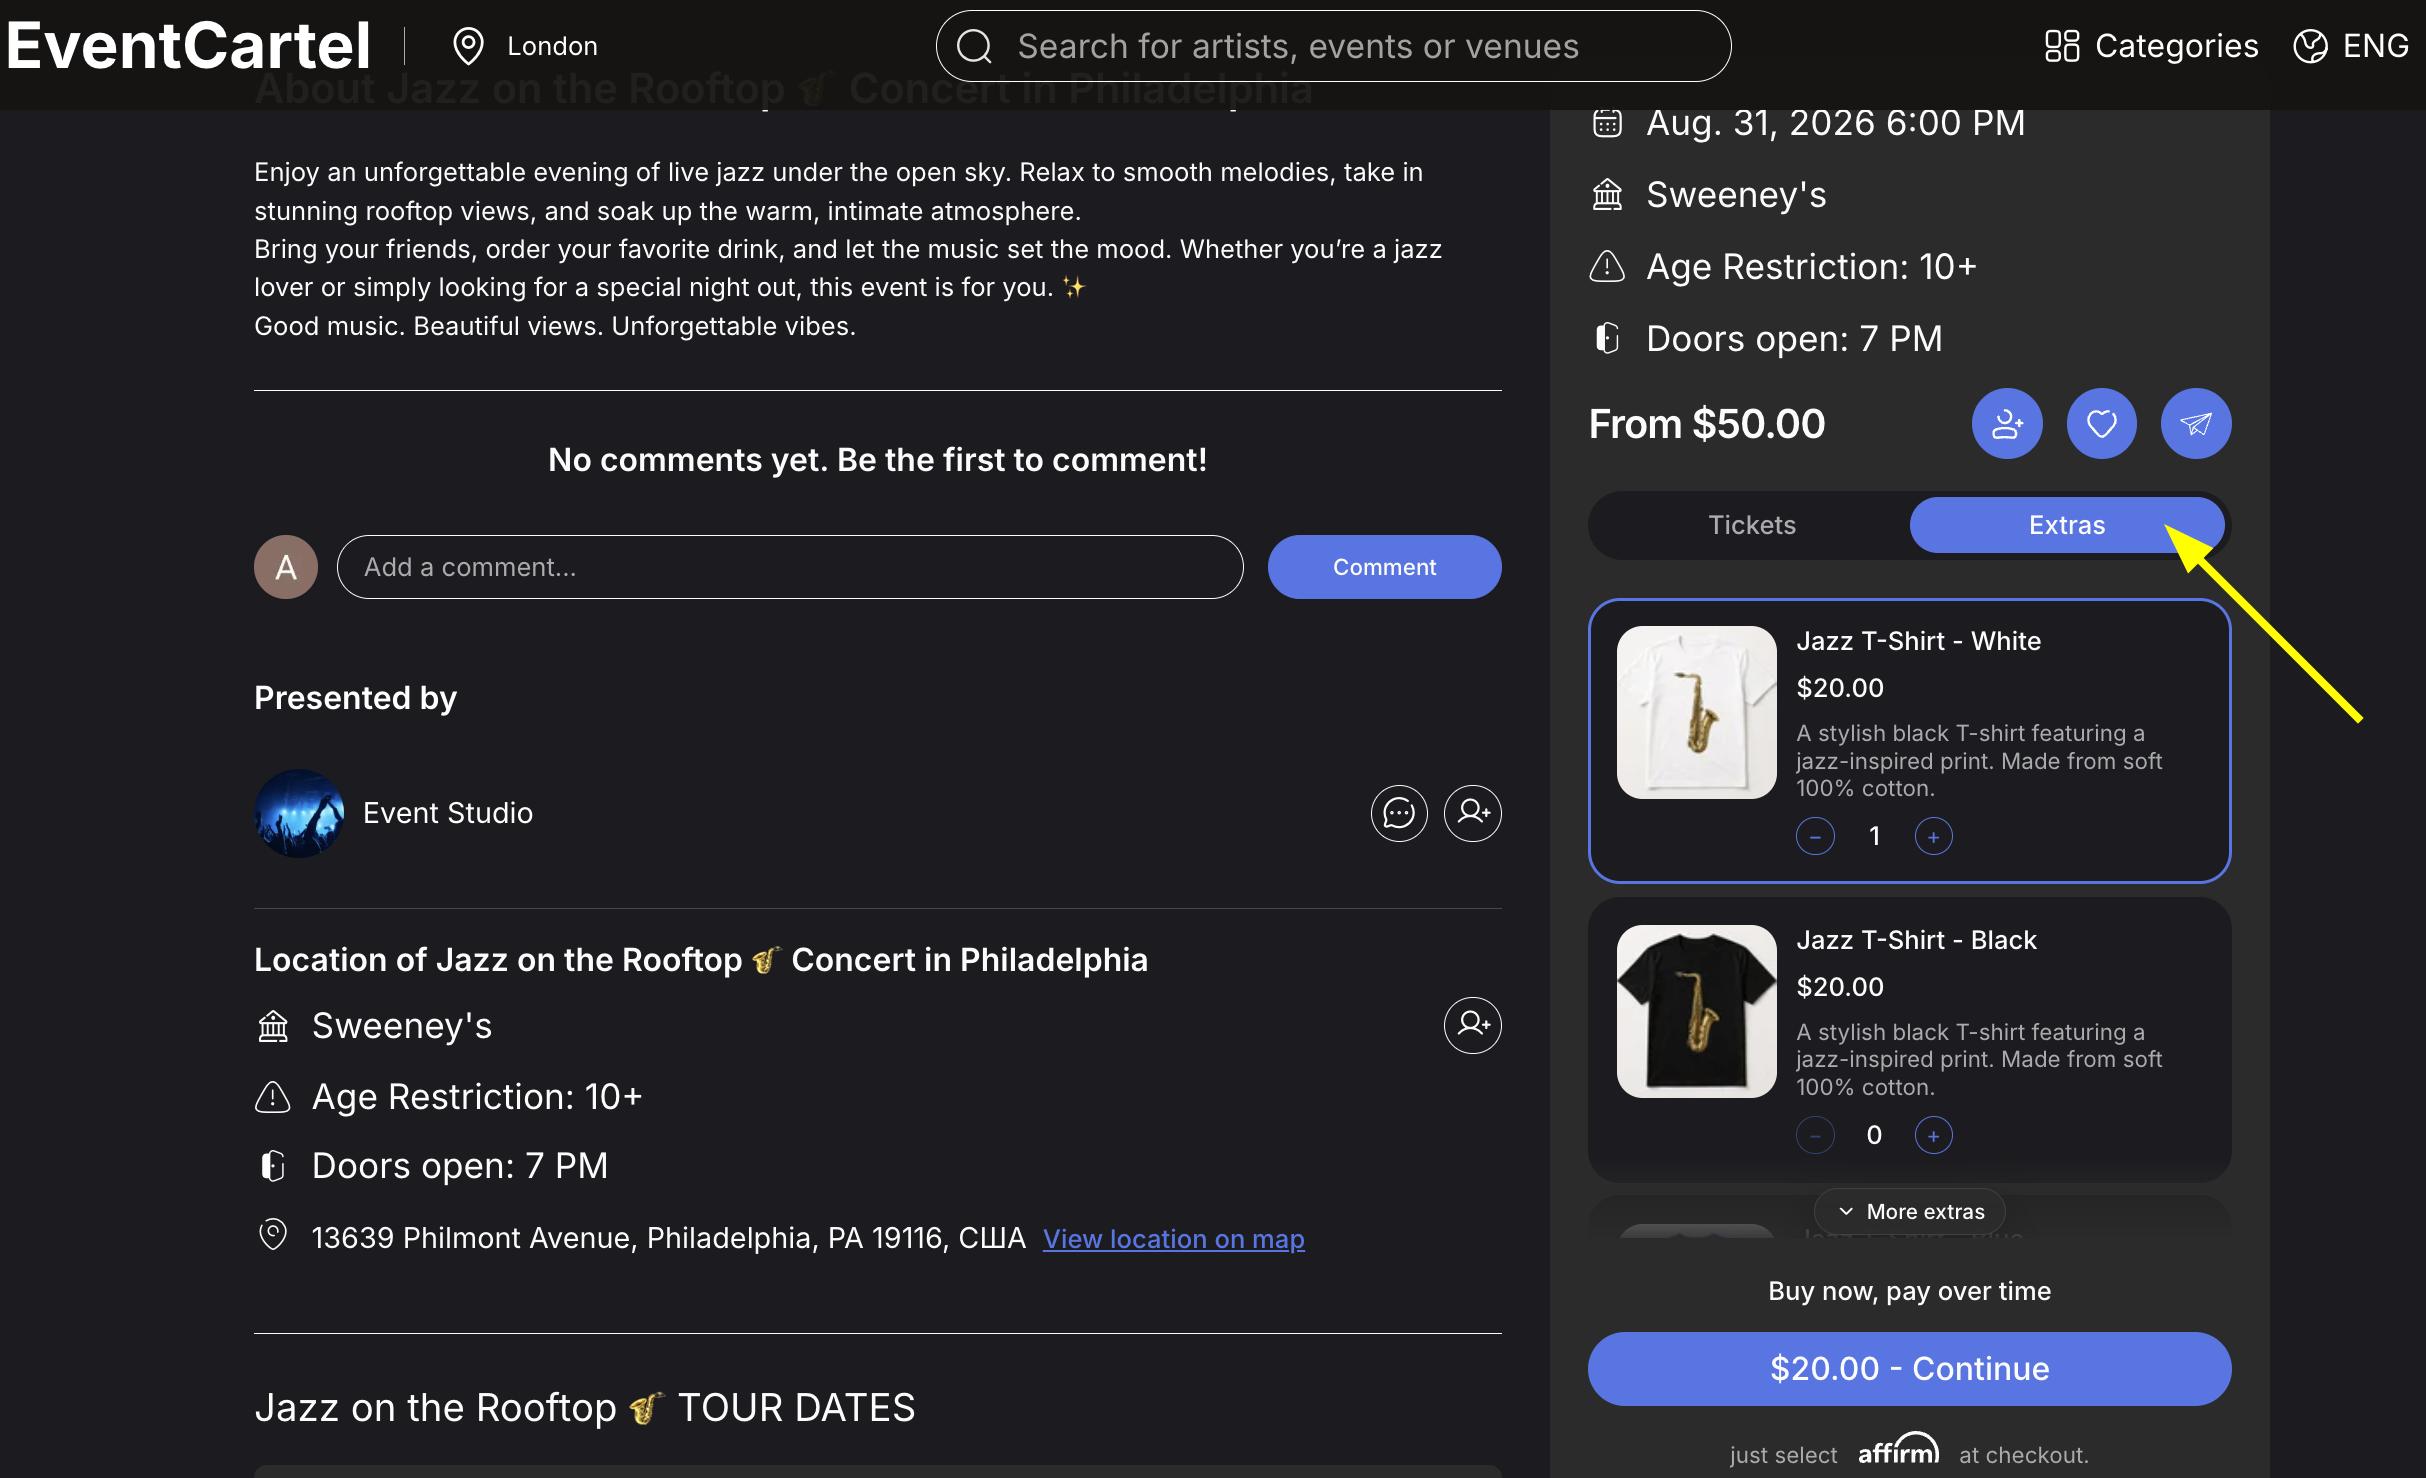
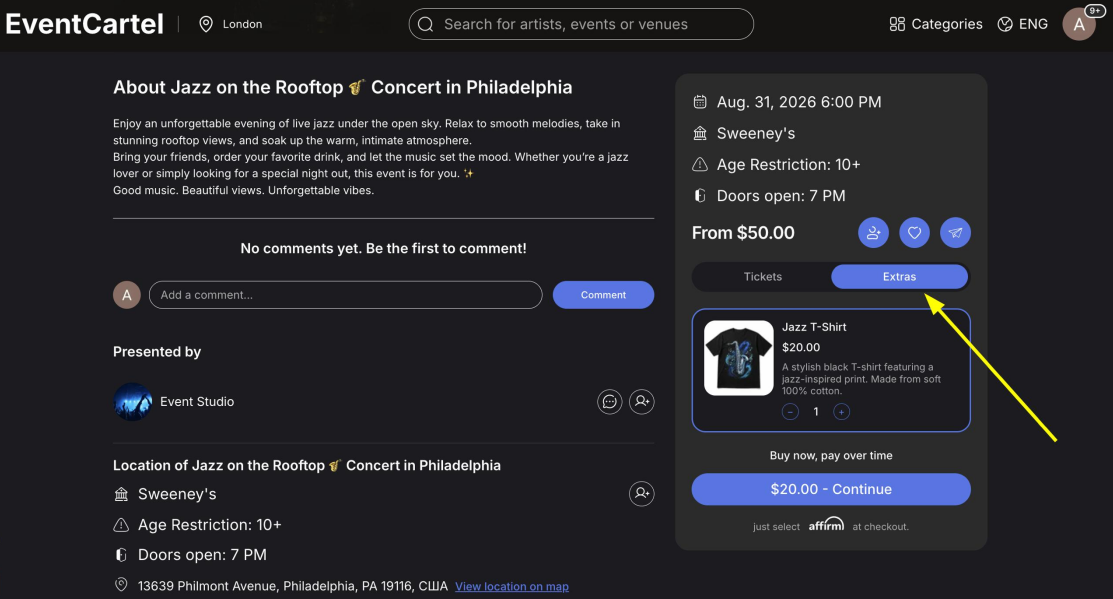
After being added to the event, the product will be available to customers on the event page under the "Extras" tab.
Customers can select the desired quantity and add the product to their order along with tickets or purchase it separately.
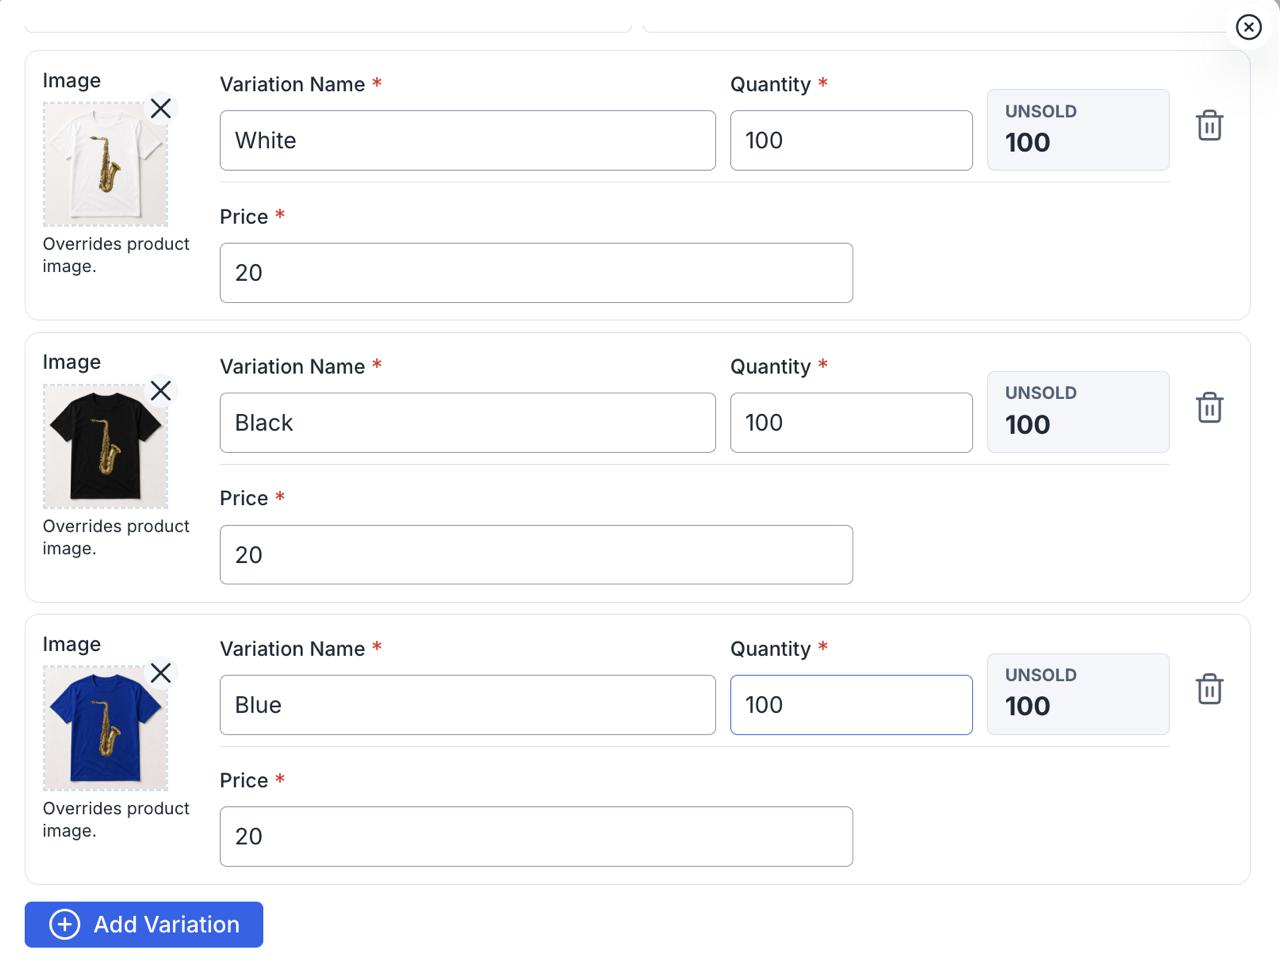
If the product has multiple variations:
- Check "This product has variations";
- In the "Variation Name" field, enter the variation name, for example, White, Black, or Blue;
- In the "Quantity" field, enter the available quantity;
- In the "Price" field, enter the price;
- If necessary, upload a separate image for the variation;
- To add another variation, click "Add Variation";
- After adding all variations, click "Save".
If no image is added for a variation, the main product image will be used. Separate images are not required if the variations differ only by size, for example. In this case, it is enough to upload one main product image.
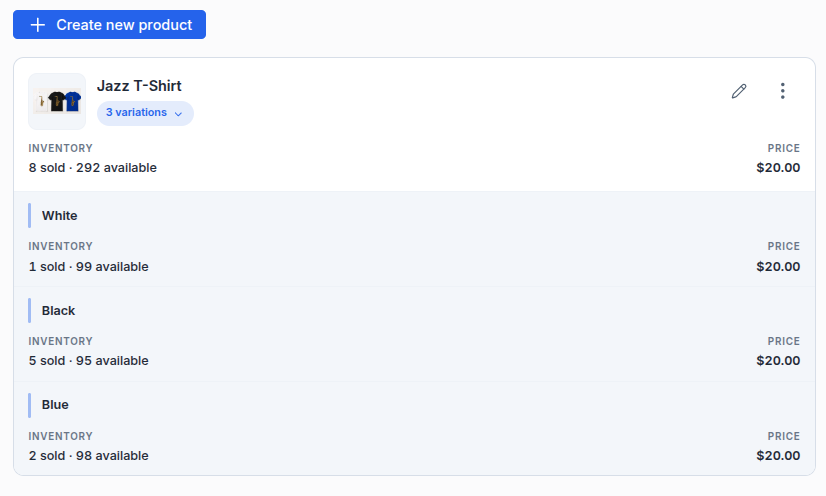
After saving, all variations will be combined into a single product. The "Products & add-ons" section displays the total number of sold and available items across all variations.
Click the number of variations, for example, "3 variations", to view the statistics for each one separately, including the number of sold and remaining items.
If the product has multiple options, each one is displayed separately to customers under the "Extras" tab. The main product itself is not displayed separately.
The option name is added to the product name, for example, "Jazz T-Shirt - White" or "Jazz T-Shirt - Black".
The description remains the same and is displayed for all options.