How to Create a Tour?
Jul 8, 2026Updated2 min read10
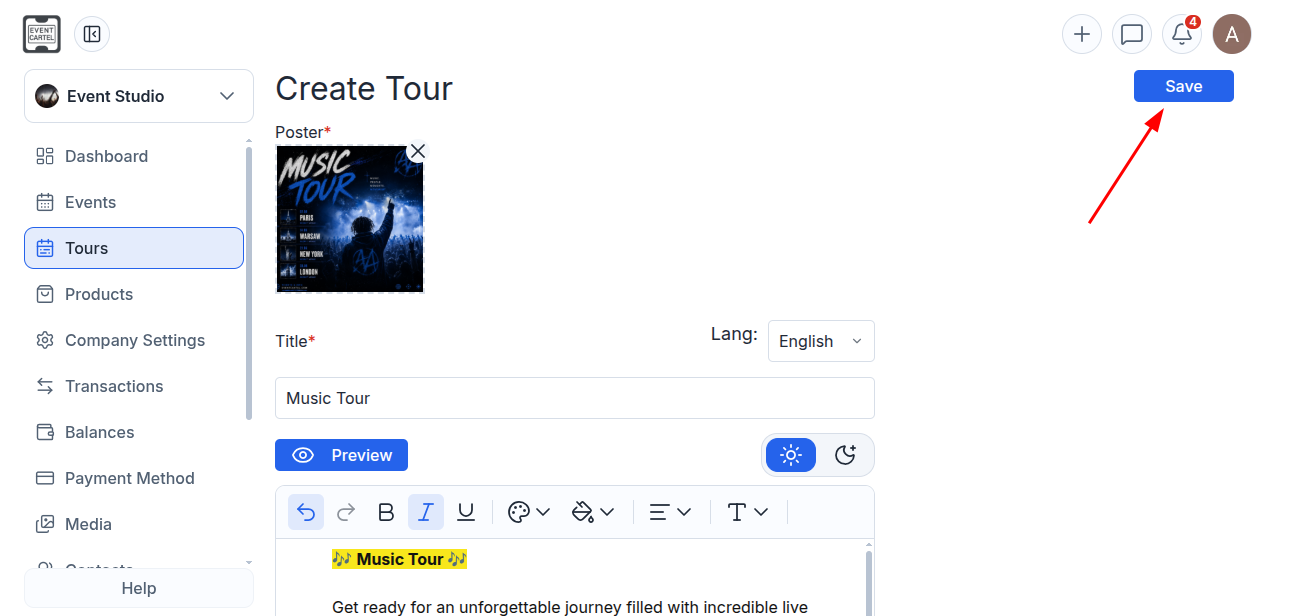
If you're hosting events in different cities, you can group them into a single tour. To do this, first create all events, then either put tickets on sale or add the events to the waitlist. After that, create a tour:
- Sign in to your EventCartel account;
- Open the "Organizer Dashboard";
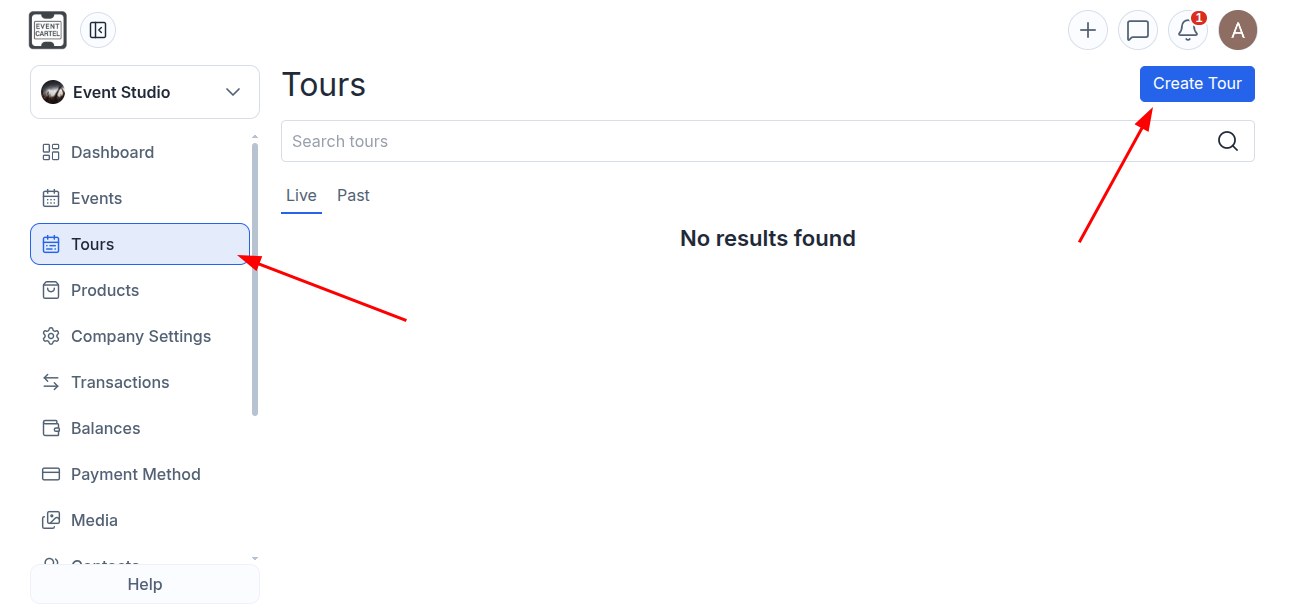
- Go to "Tours";
- Click "Create Tour".
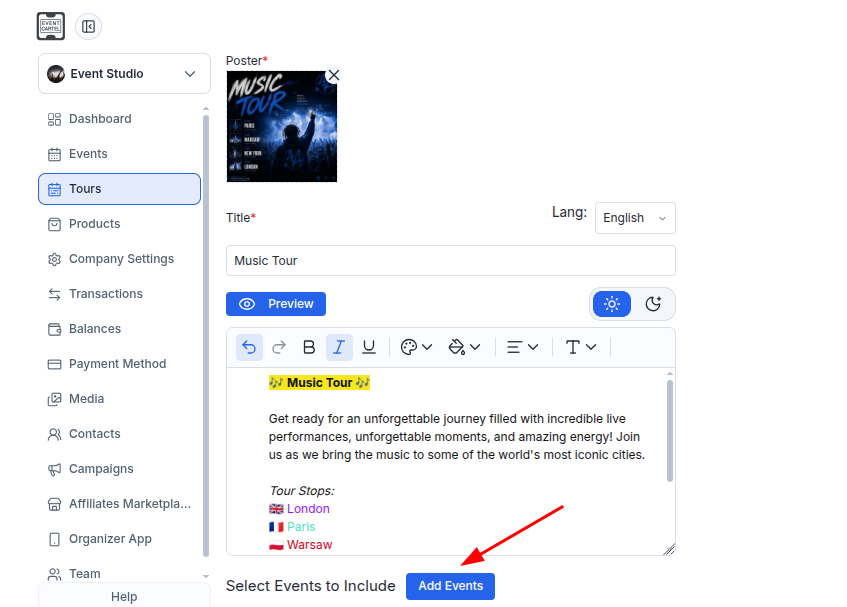
- Upload a tour poster;
- Enter the tour name and description;
(You can enter the information in English, Russian, or just one of these languages. After saving, the remaining language versions will be translated automatically).
- Click "Add Events" to add events to the tour.
Tip: You can make your description more engaging using the built-in editor. Change the font, highlight important text, choose different text colors and text highlight colors, and switch the editor to dark mode for a more comfortable editing experience.
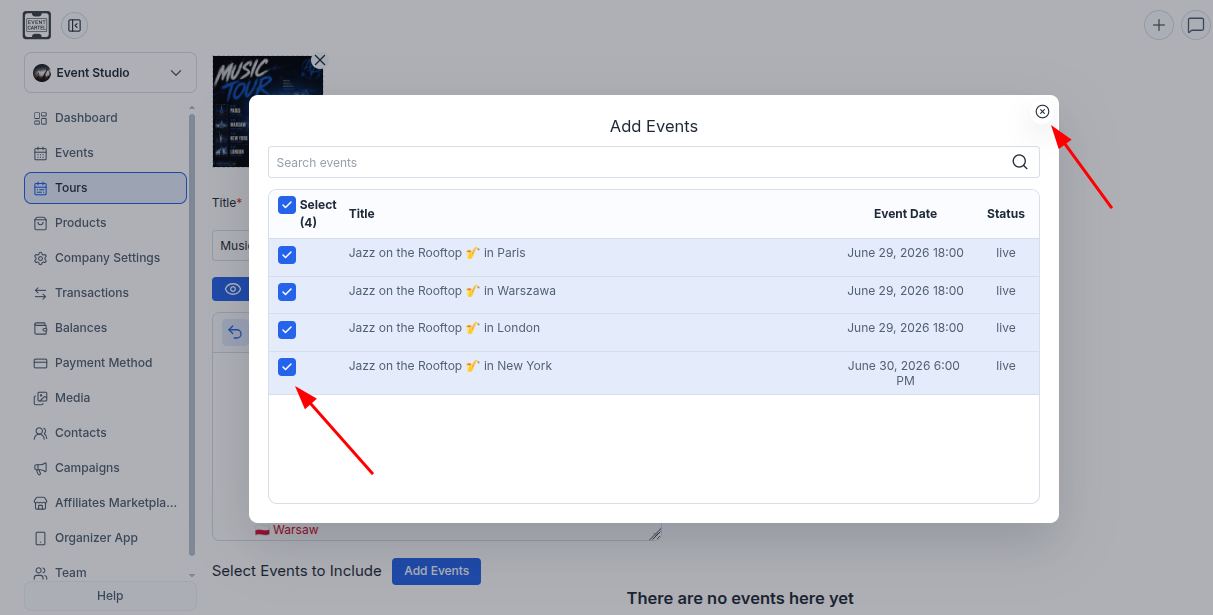
- Select the events you want to add to the tour (you can use the search bar to find them by name if needed);
- Close the pop-up window.
- Click "Save".
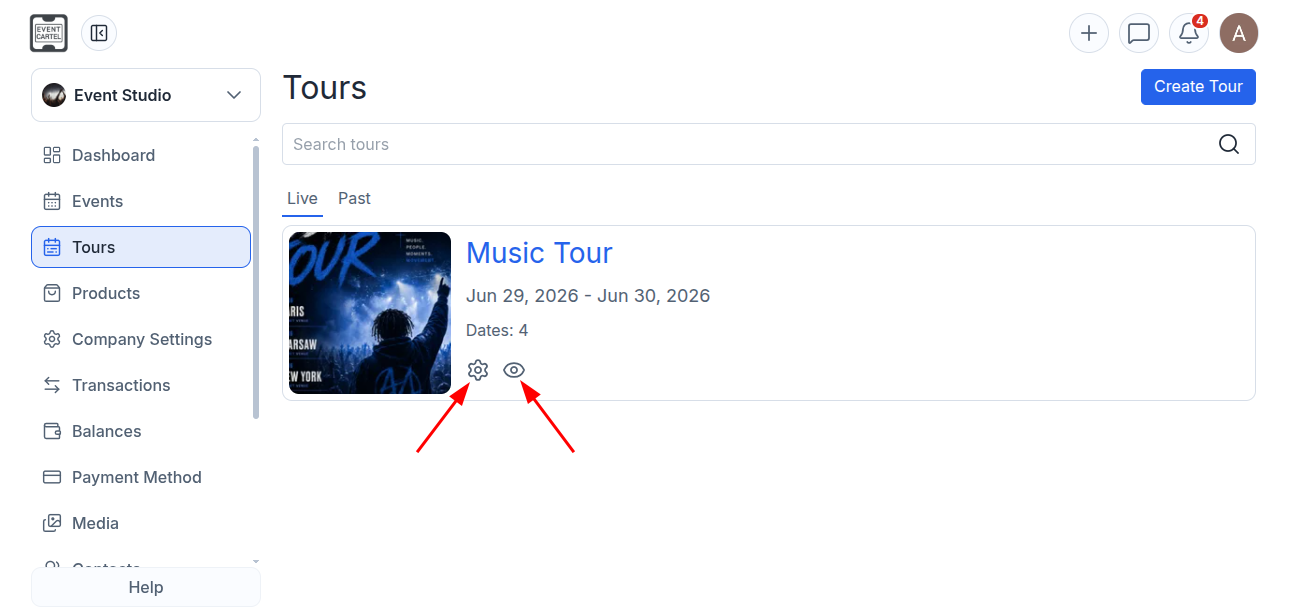
After saving, it will appear in the "Tours" section, where all your upcoming and past tours are displayed.
- 👁 Click the eye icon to open the tour page;
- ⚙️ Click the gear icon to edit the tour.
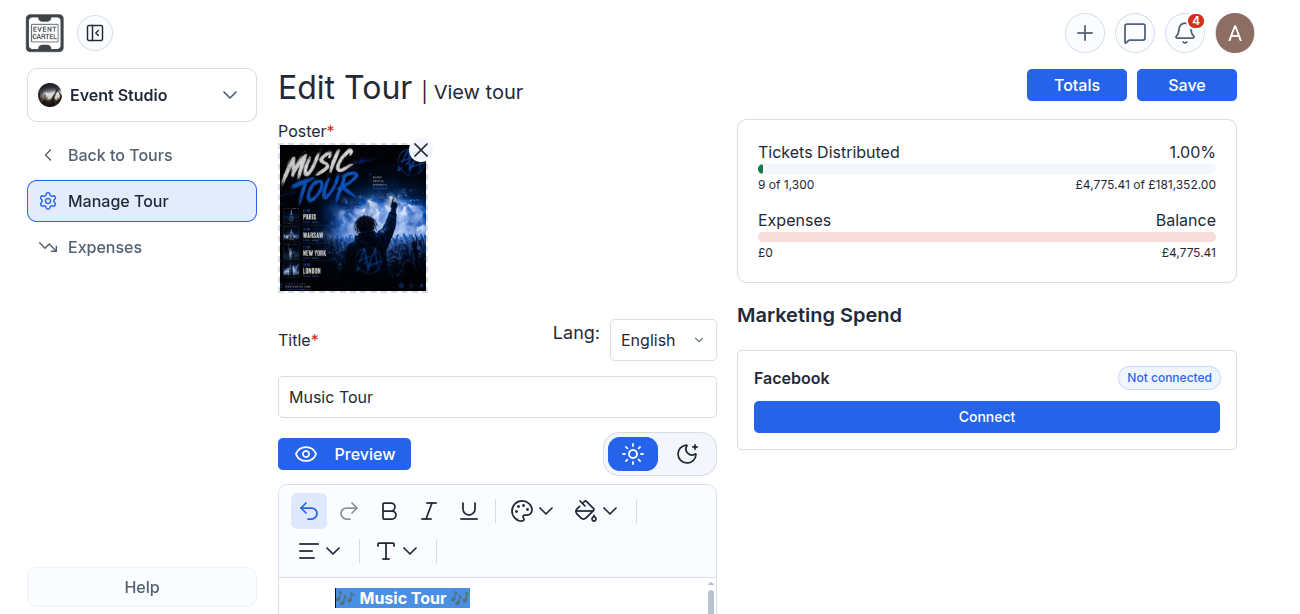
You can also use the edit page to track ticket sales, expenses, and the current balance, as well as connect marketing tools when needed:
Tickets Distributed – shows the number of tickets sold, the total sales amount, and the percentage of tickets sold out of the total available;
Expenses – displays expenses associated with the tour;
Balance – shows your current earnings after expenses have been deducted;
Marketing Spend – lets you connect advertising platforms (such as Facebook) to track the performance of your marketing campaigns;
Totals – opens a summary of ticket sales, revenue, and other tour statistics.
Click "Totals" to view the overall sales summary:
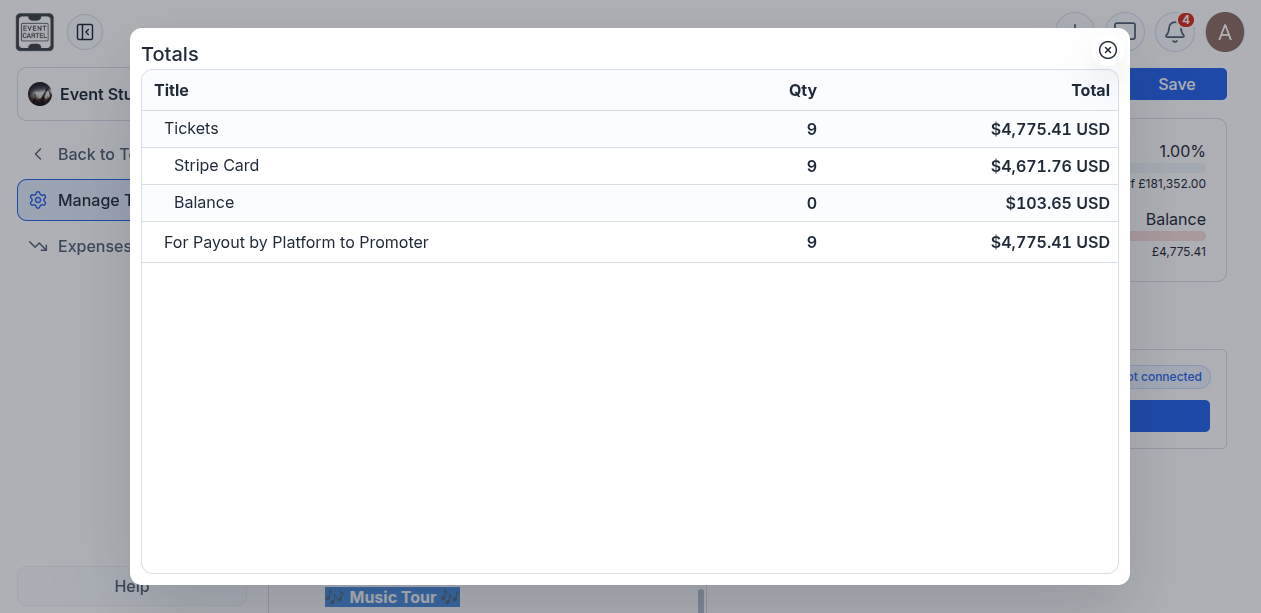
Tickets – the total value of ticket sales;
Stripe Card – sales paid by credit or debit card through Stripe;
Balance – sales paid using the account balance;
For Payout by Platform to Promoter – the amount the platform will pay out to the promoter.
If your account is set up to receive payouts directly to your bank account, the "For Payout by Platform to Promoter" line will be replaced with "Promoter Revenue".
If your account is set up to receive payouts directly to your bank account, the "For Payout by Platform to Promoter" line will be replaced with "Promoter Revenue".