Creating a Multi-Event
Sep 8, 2026Updated3 min read12
A Multi-Event allows you to combine multiple event dates under a single event listing. This is useful for concerts, performances, workshops, and other events that take place more than once.
Creating a Multi-Event follows the same process as creating a regular event. You can review these steps in the articles Creating an Event Without Assigned Seating and Creating an event with a seating map.
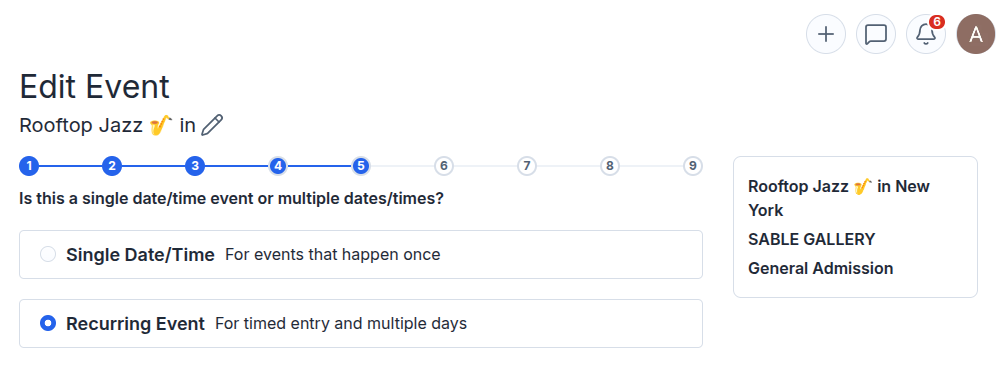
The only difference is Step 5, where you configure the Multi-Event settings. Let's take a closer look:
At this stage, select Recurring Event (For timed entry and multiple days).
You will see a calendar where you can select the dates for your event.
(The dates can be consecutive or spread across any time period)
For convenience, two date selection modes are available:
Range – allows you to select multiple dates at once by choosing a start date and an end date;
Single – allows you to add dates one at a time.
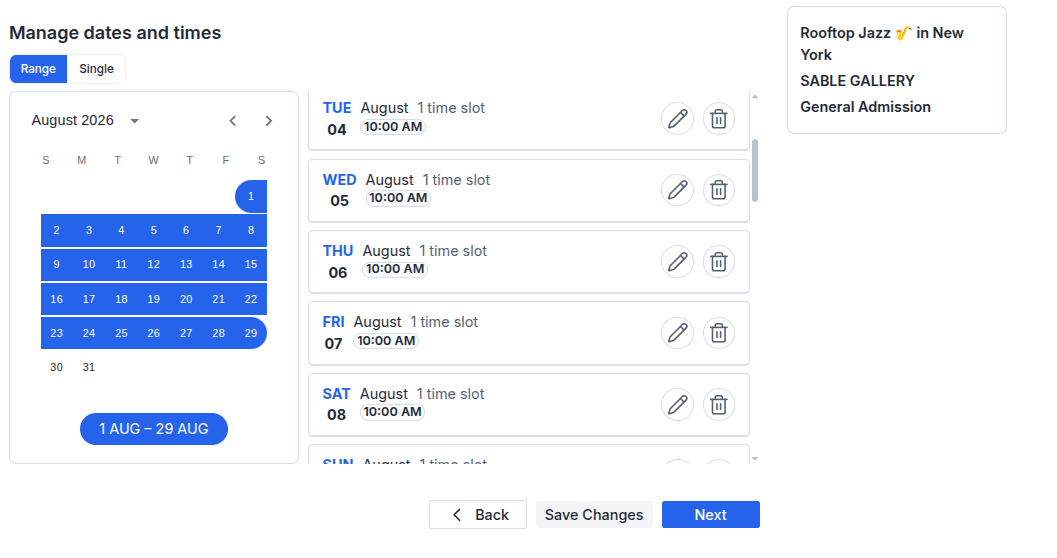
After selecting your dates, you can configure the event times.
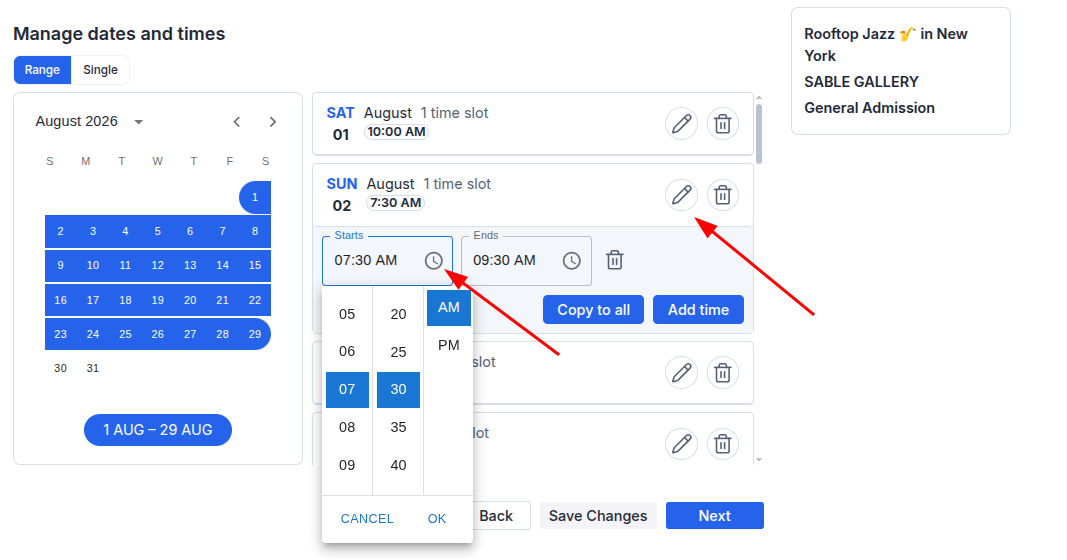
If you need to set different times for each date, click the pencil icon next to the desired date. You will then be able to specify the event start and end times.
Clicking Copy to All will apply the selected time settings to all added dates.
If you click Add Time, an additional time slot will be added to the selected date. This allows the event to take place multiple times on the same day.
If necessary, you can remove any event date. This can be done both before and after the event is published, provided that no tickets have been purchased for that date.
Once you have finished configuring your dates and times, click Next to proceed to the next step.
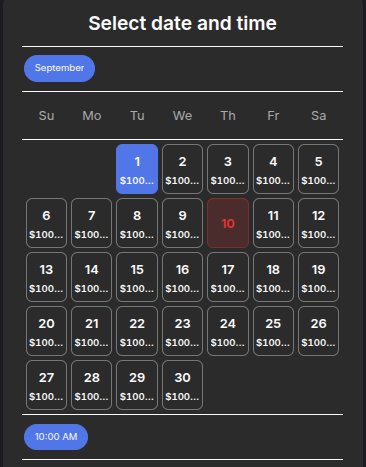
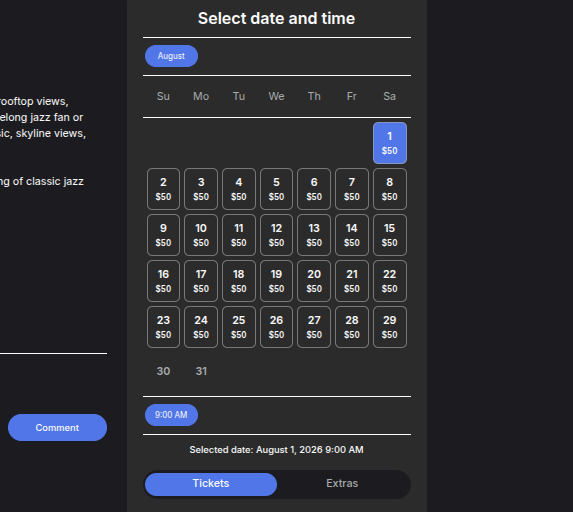
After the event is published, attendees will see a list of available dates and will be able to select their preferred date and time before purchasing a ticket.
How to manage a specific event date in a multi-event:
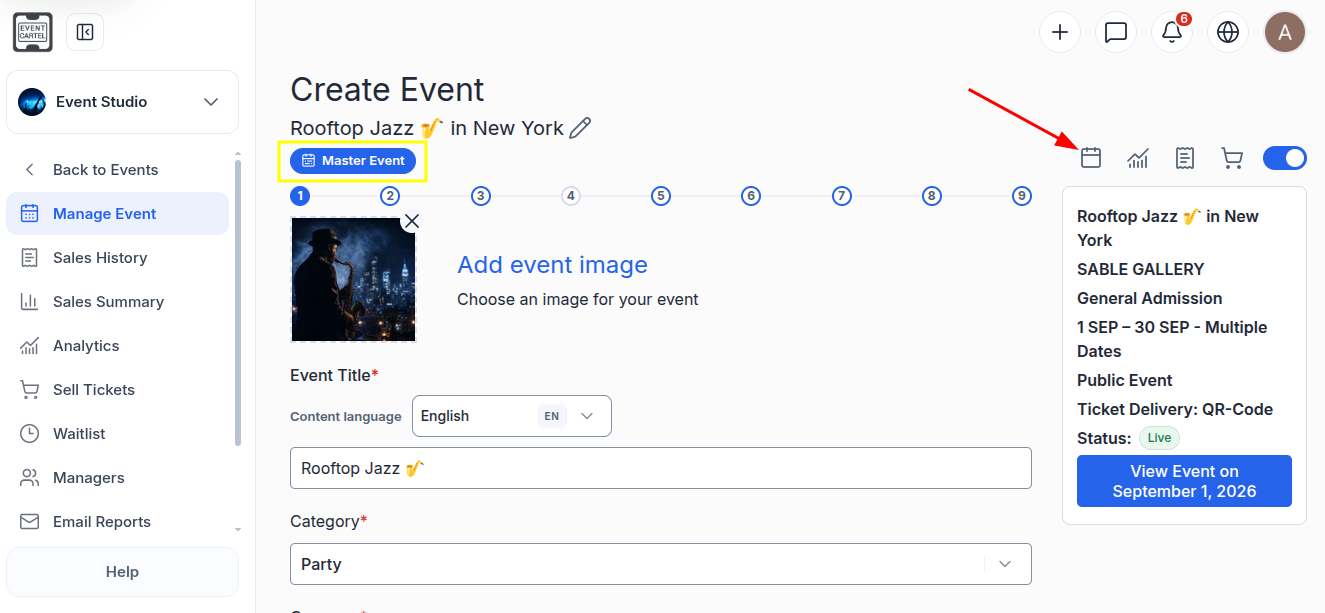
After creating a multi-event, opening it in edit mode will take you to the Master Event — the main event that combines all added dates and time slots.
Changes made to the Master Event apply to all dates in the multi-event. To view information or change settings for a specific date only, you first need to select it.
- Open the multi-event in the "Events" section;
- Click the calendar icon 📅 in the upper-right corner of the page.
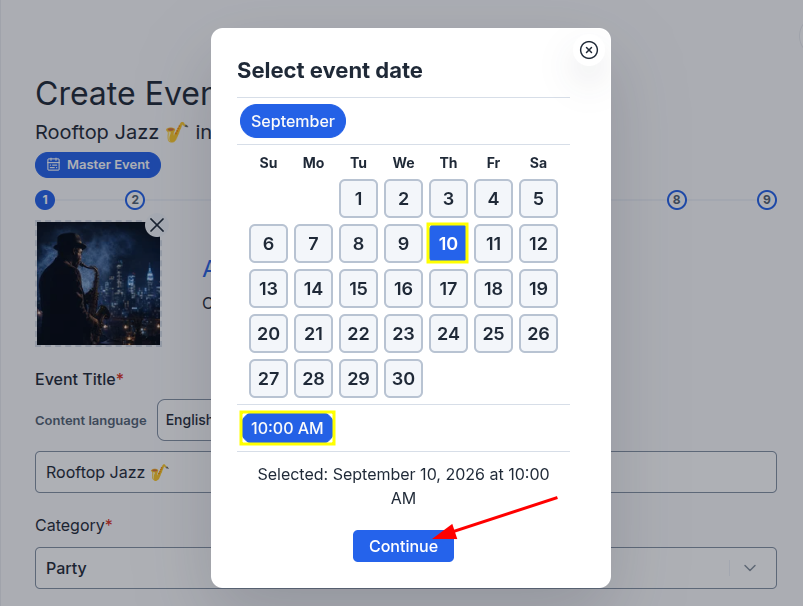
- In the window that opens, select the required date and time;
- Click "Continue".
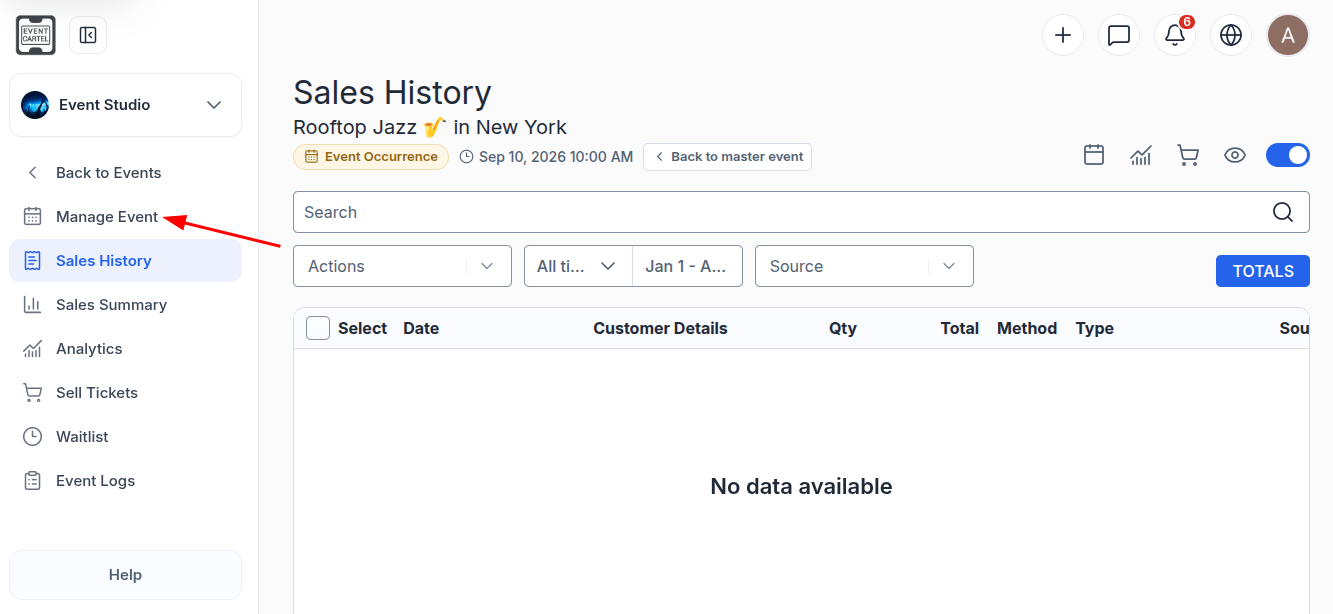
After selecting a date, the "Sales History" section will open, where you can view purchases associated with that date.
The selected date will be marked as "Event Occurrence" at the top of the page. To return to the main event, click "Back to master event".
The following sections are available separately for the selected date:
Manage Event - change the event settings;
Sales History - view and manage purchases;
Sales Summary - view general sales information;
Analytics - view statistics;
Sell Tickets - create orders;
Waitlist - view users who joined the waitlist for the selected date;
Event Logs - view the change history.
To change the settings for the selected date, click "Manage Event" in the menu on the left.
The event editor will open. Only Step 9 is available for an individual date.
Select the required action:
Go Live! - publish the selected date and start ticket sales;
Preview Event - see how the event appears to buyers;
Save Draft - save the selected date as a draft;
Publish with Wait List - publish the selected date with a waitlist without opening ticket sales;
Postpone Event - postpone the selected date. Ticket sales will be paused;
Cancel This Occurrence - cancel the selected date.
The action will apply only to the selected date and time. Settings shared across all dates in the multi-event can be changed through the Master Event.
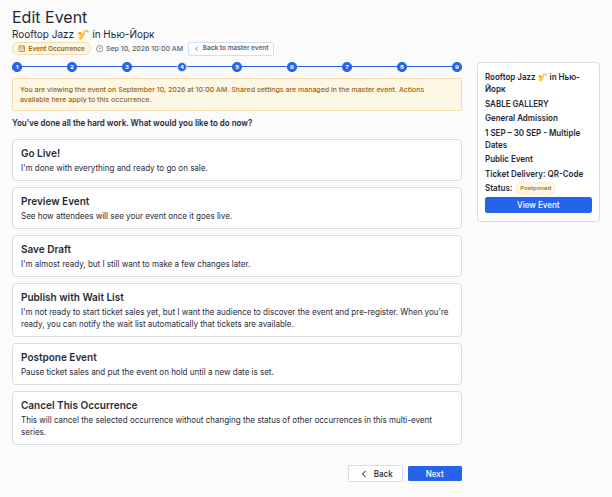
For example, if you select "Cancel This Occurrence", the selected occurrence will be canceled. It will be highlighted in red in the calendar on the event page, and buyers will not be able to select it when purchasing tickets. All other dates in the multi-event will remain available.