What should I do if the event venue changes?
Sep 24, 2026Updated4 min read00
If you need to change the venue or expand an event, make sure buyers receive new tickets and are informed of all changes. This article explains what to do in this situation.
Working with the old and new events:
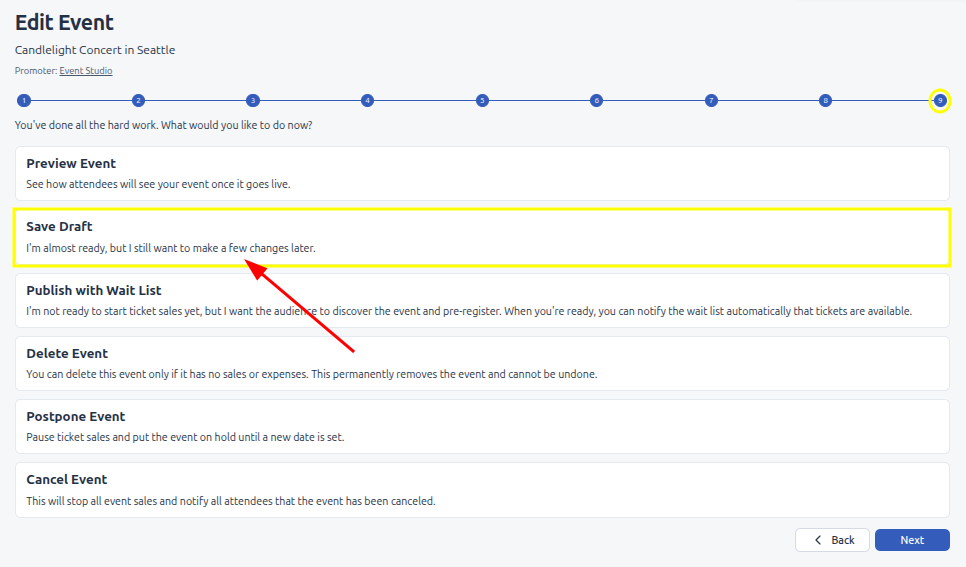
First, move the original event to "Draft" so buyers can no longer purchase tickets for the old venue:
- Open the original event.
- Go to Step 9.
- Click "Save Draft".
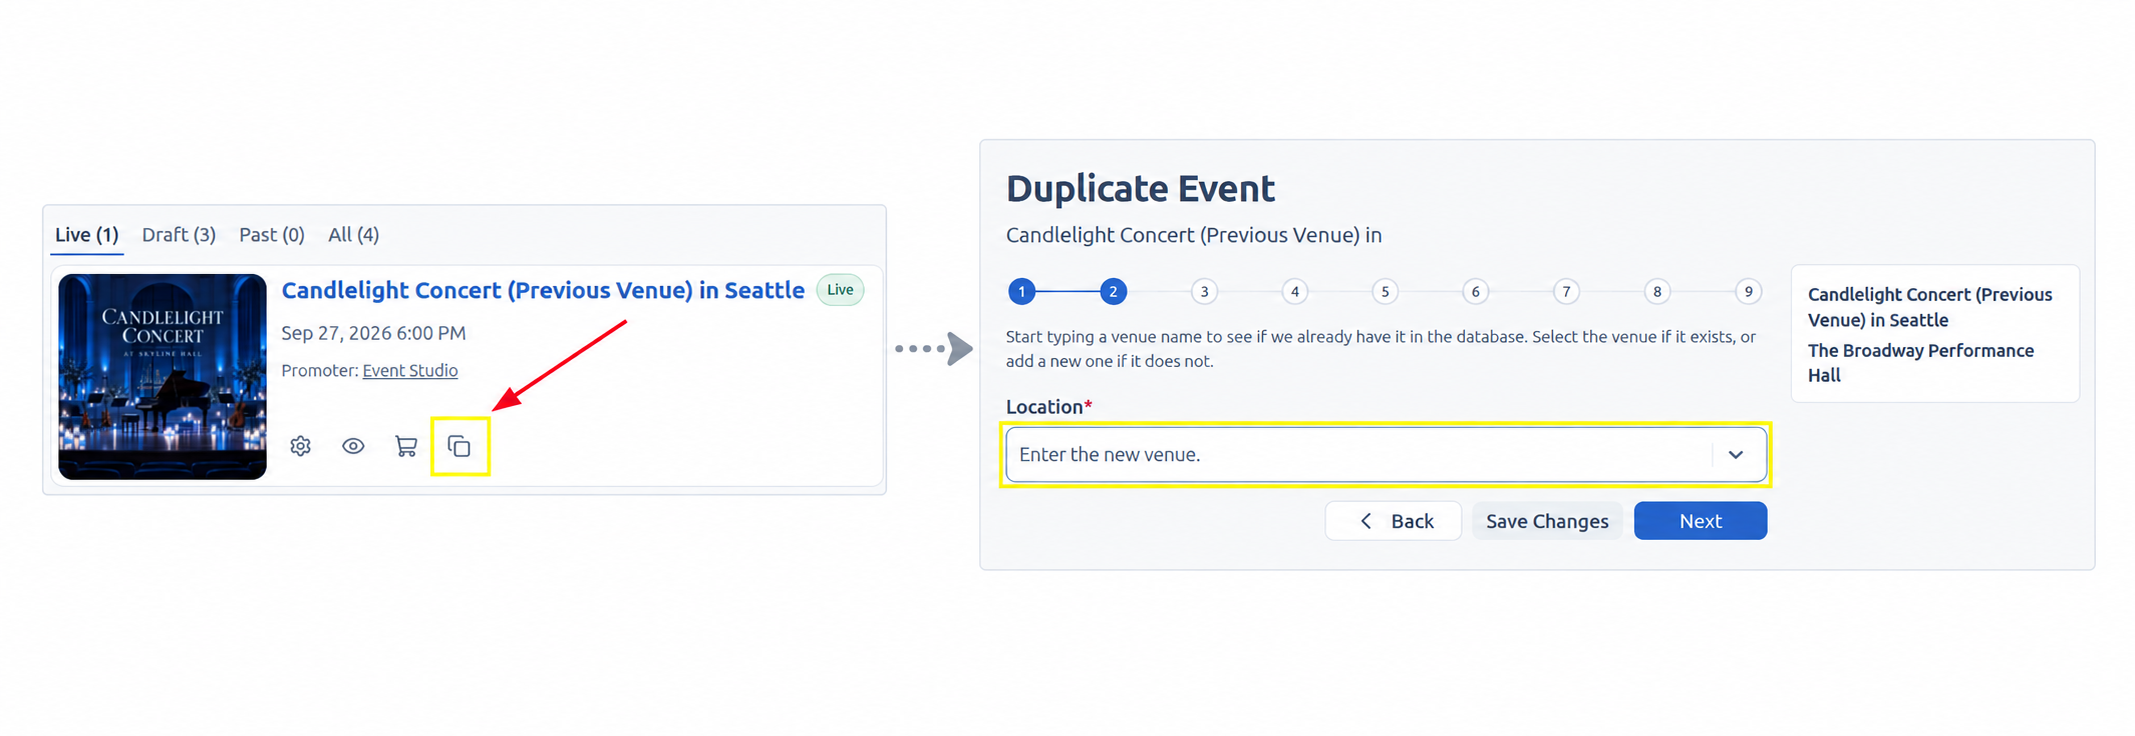
Create a new event for the new venue. To avoid entering all the details again, you can duplicate the original event:
- Open "Events".
- Find the original event.
- Click the duplicate icon ⧉.
- In Step 2, select the new venue.
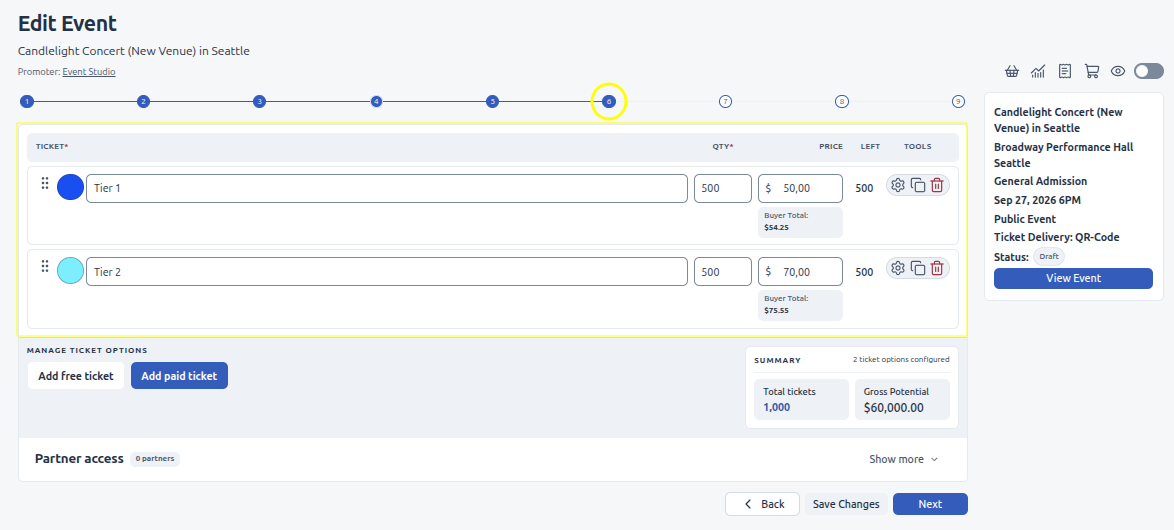
At Step 6, prepare the tickets for the new event:
- If the event does not have a seating map, create the necessary Ticket Options and set the number of tickets available.
- If the event has a seating map, create Ticket Options and assign them to seats. If the venue layouts are similar, try to keep the same ticket categories in comparable areas.
- At Step 9, you can leave the new event as a draft while you issue new tickets to all buyers. Once you have finished, publish it to open ticket sales to new buyers.
Issuing replacement tickets:
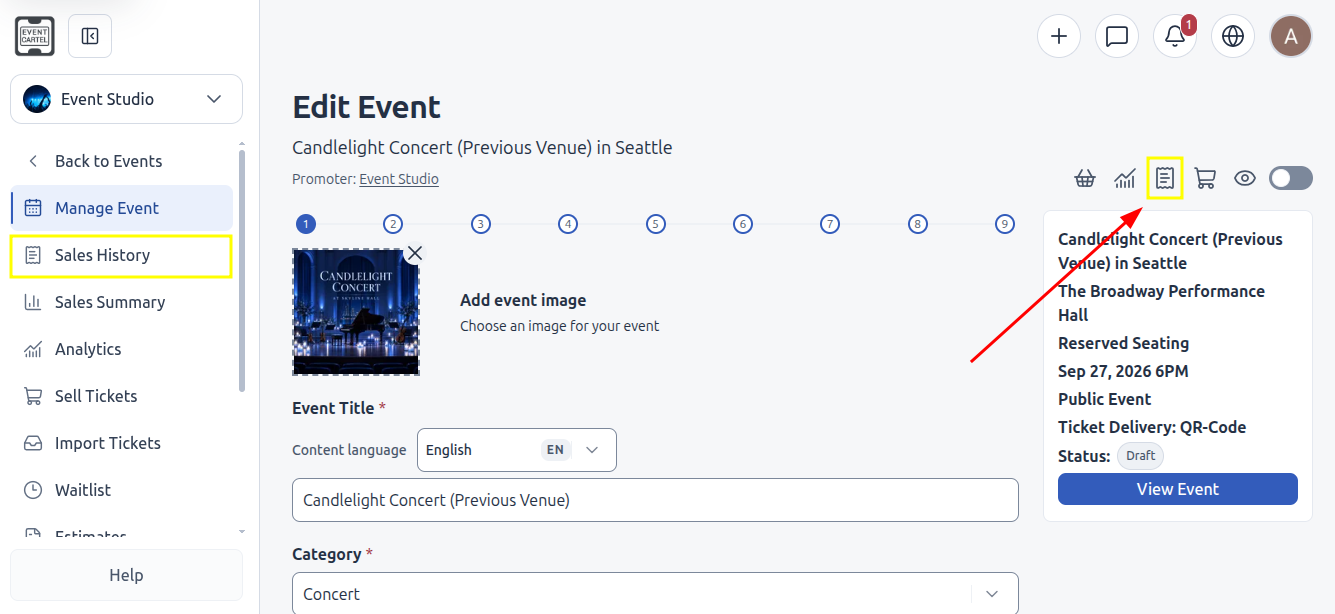
You need to issue new tickets for each order separately. To make it easier to compare the details, open the old and new events in separate browser tabs.
- In the first tab, open the old event and go to "Sales History" using the menu on the left or by clicking the 📄 icon in the upper-right corner of the page.
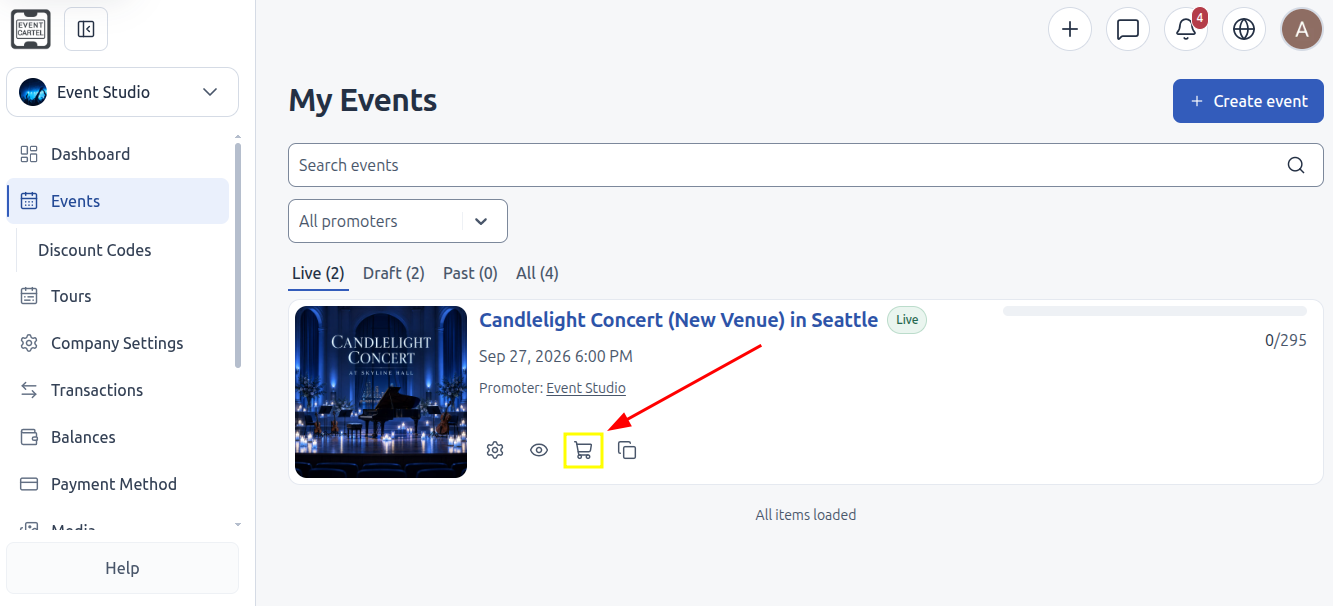
- In the second tab, open the new event and click the 🛒 "Sell Tickets" icon to issue tickets through Business Manager.
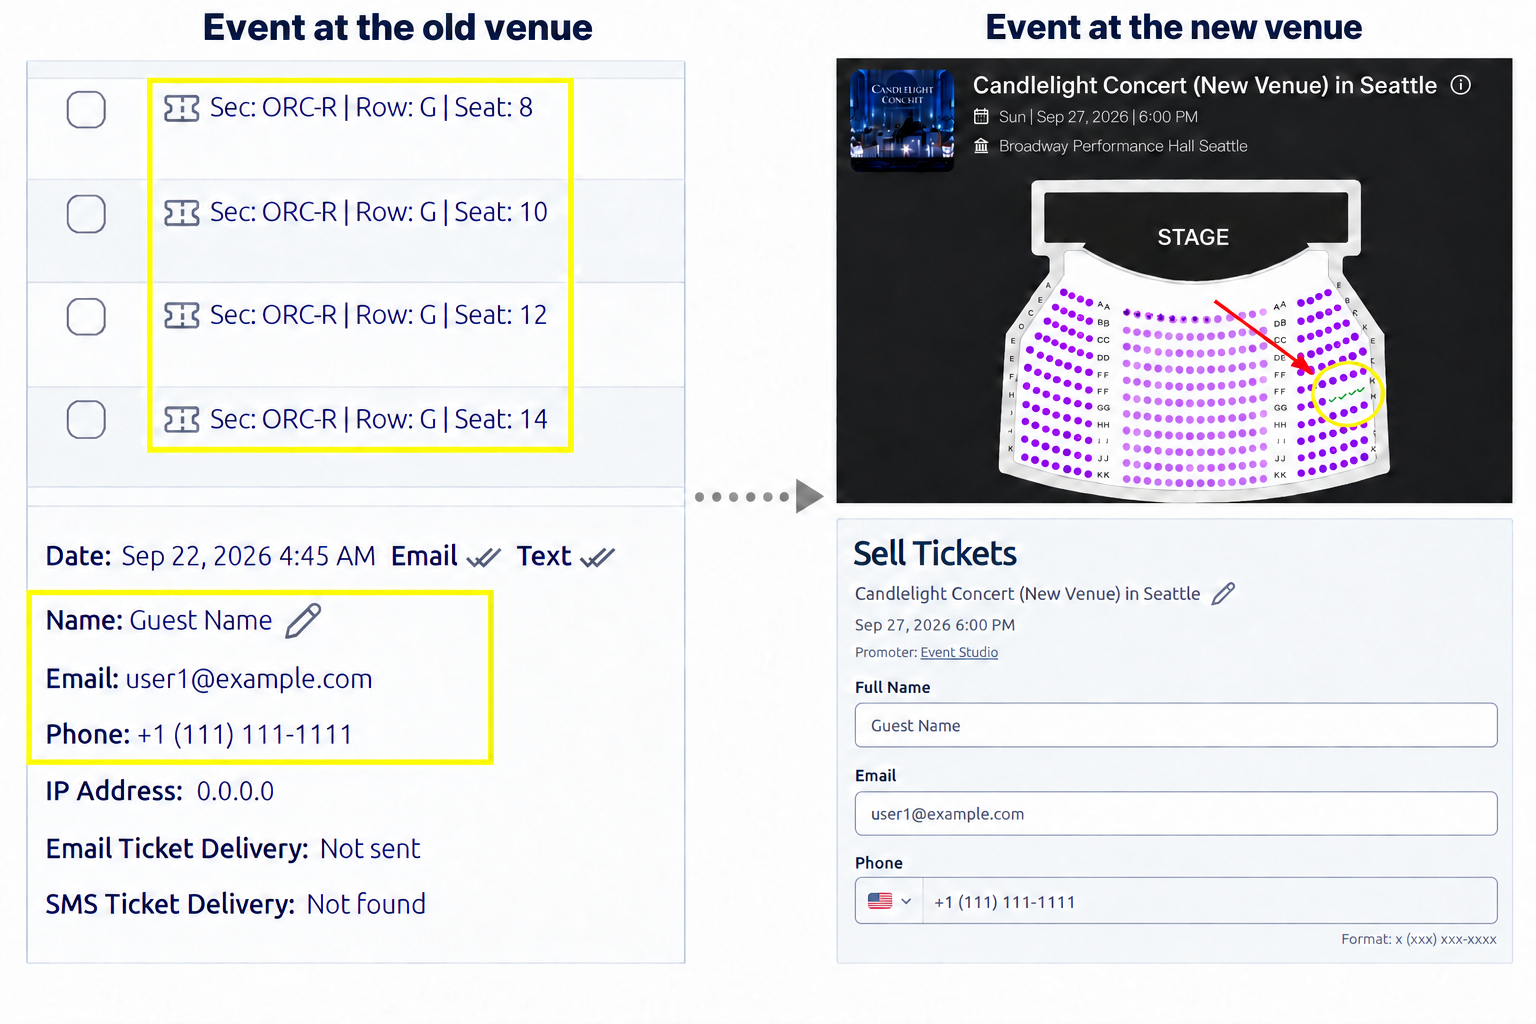
To issue new tickets for an event with a seating map:
- In the old event’s "Sales History", open the buyer’s order.
- Check how many seats they purchased and where those seats are located.
- In the tab with the new event, select the same number of seats. Where possible, choose seats in similar locations and ticket categories.
- Click "Next".
- Enter the same name, email address, and phone number as in the original order.
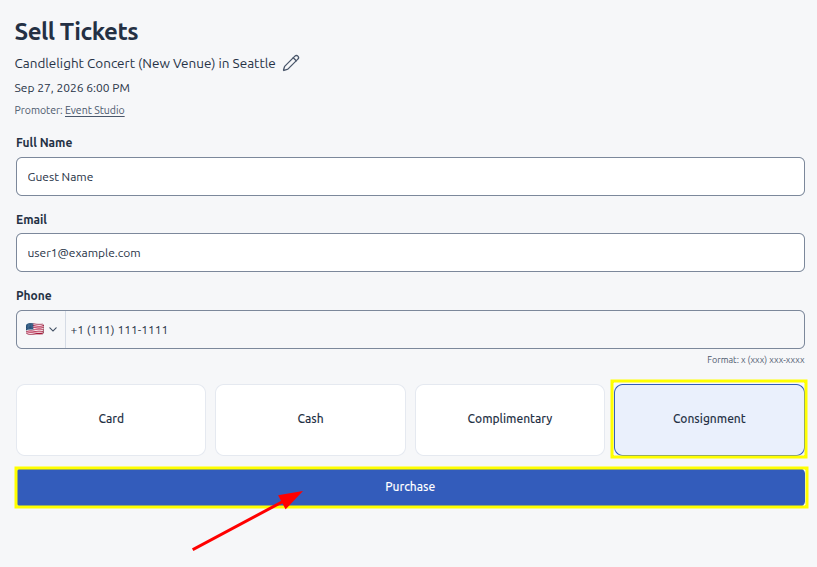
- Select "Consignment" as the checkout method.
- Click "Purchase".
Repeat these steps for every order from the old event.
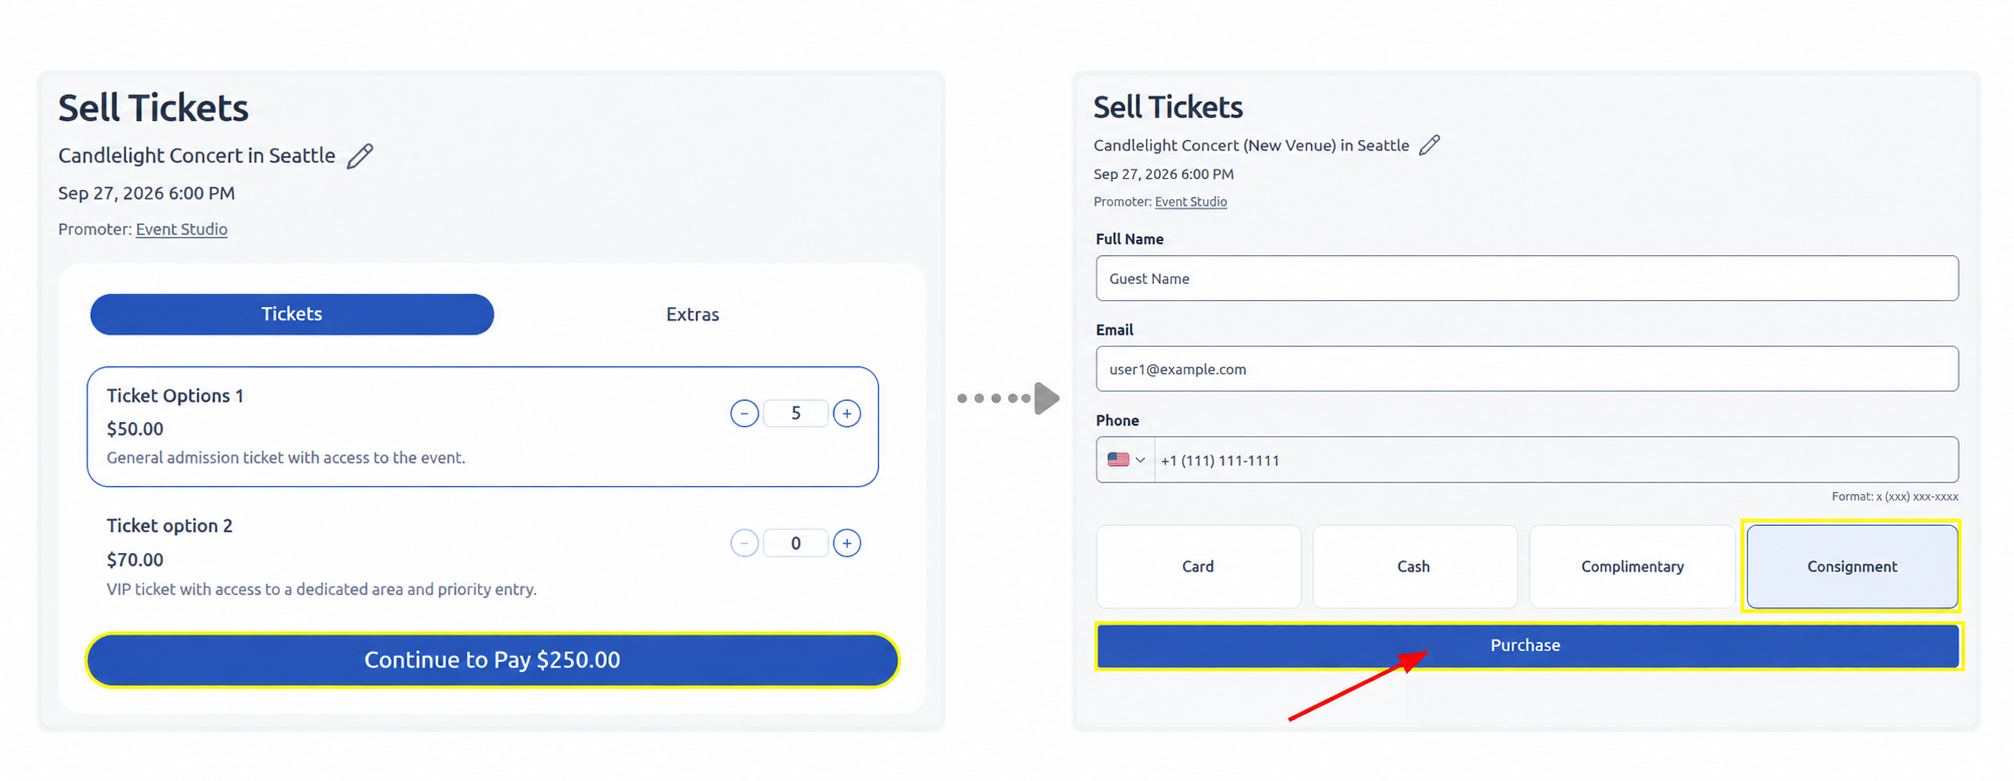
To issue new tickets for an event without a seating map:
- In the old event’s "Sales History", open the buyer’s order.
- Check which Ticket Options they purchased and how many tickets they bought.
- In the tab with the new event, select the corresponding Ticket Option.
- Select the same number of tickets and click "Continue to Pay".
- Enter the same name, email address, and phone number as in the original order.
- Select "Consignment".
- Click "Purchase".
Repeat these steps for every order from the old event.
Refunding tickets:
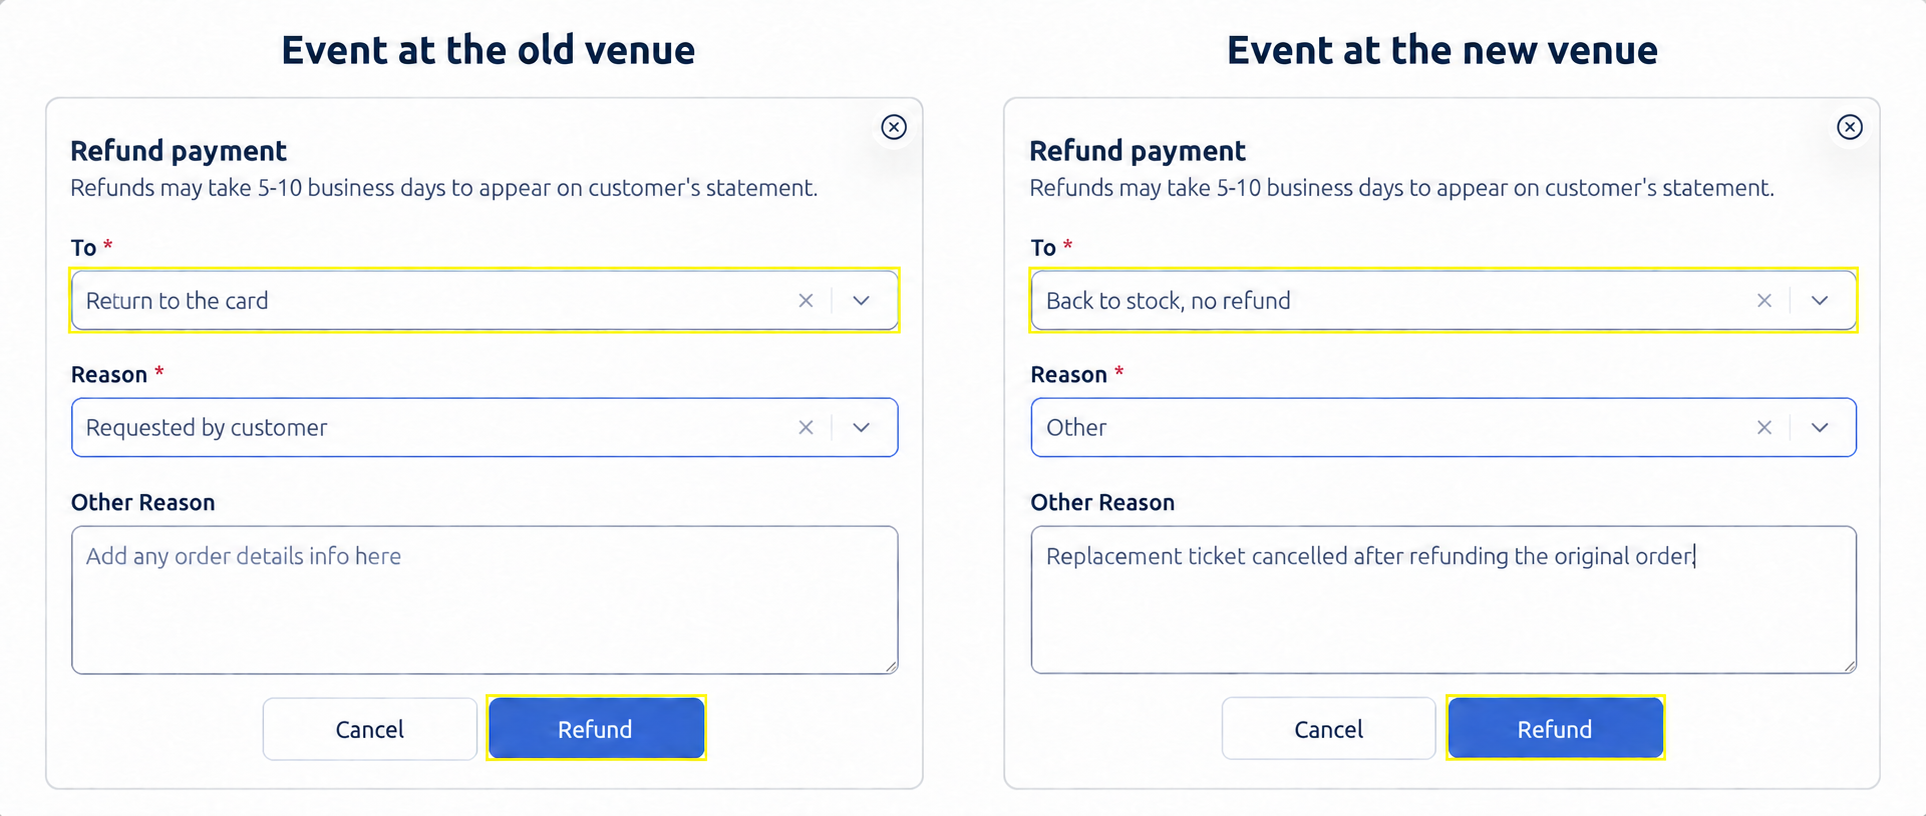
After issuing the new tickets, do not refund the original tickets. Keep the paid orders in the old event’s "Sales History" so you can refund buyers if needed.
If a buyer requests a refund, refund the original order. Then, in the new event, return the corresponding Consignment ticket to inventory without issuing another refund. In the "To" field, select "Back to stock, no refund", choose the appropriate reason, and click "Refund". If needed, add an explanation in the "Other Reason" field.
Notifying buyers:
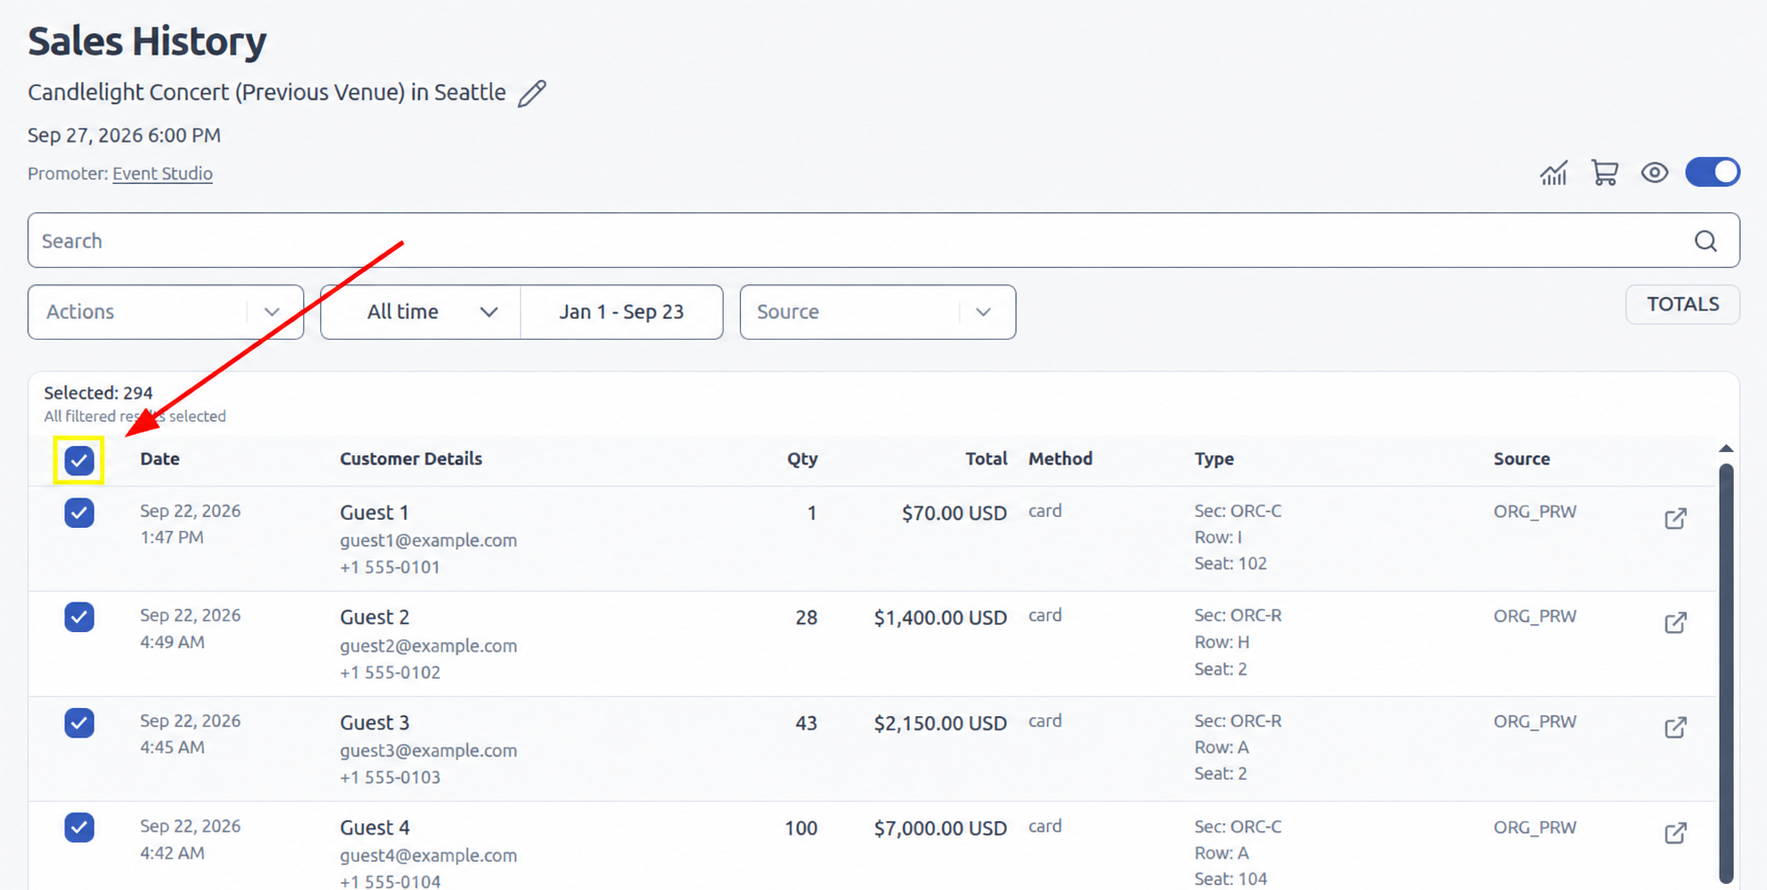
After issuing the new tickets, notify buyers about the venue change. Send the message from the old event’s "Sales History" so it reaches everyone who bought tickets for the old venue.
To do this:
- Open the old event’s "Sales History";
- Select the checkbox at the top of the list to select all buyers.
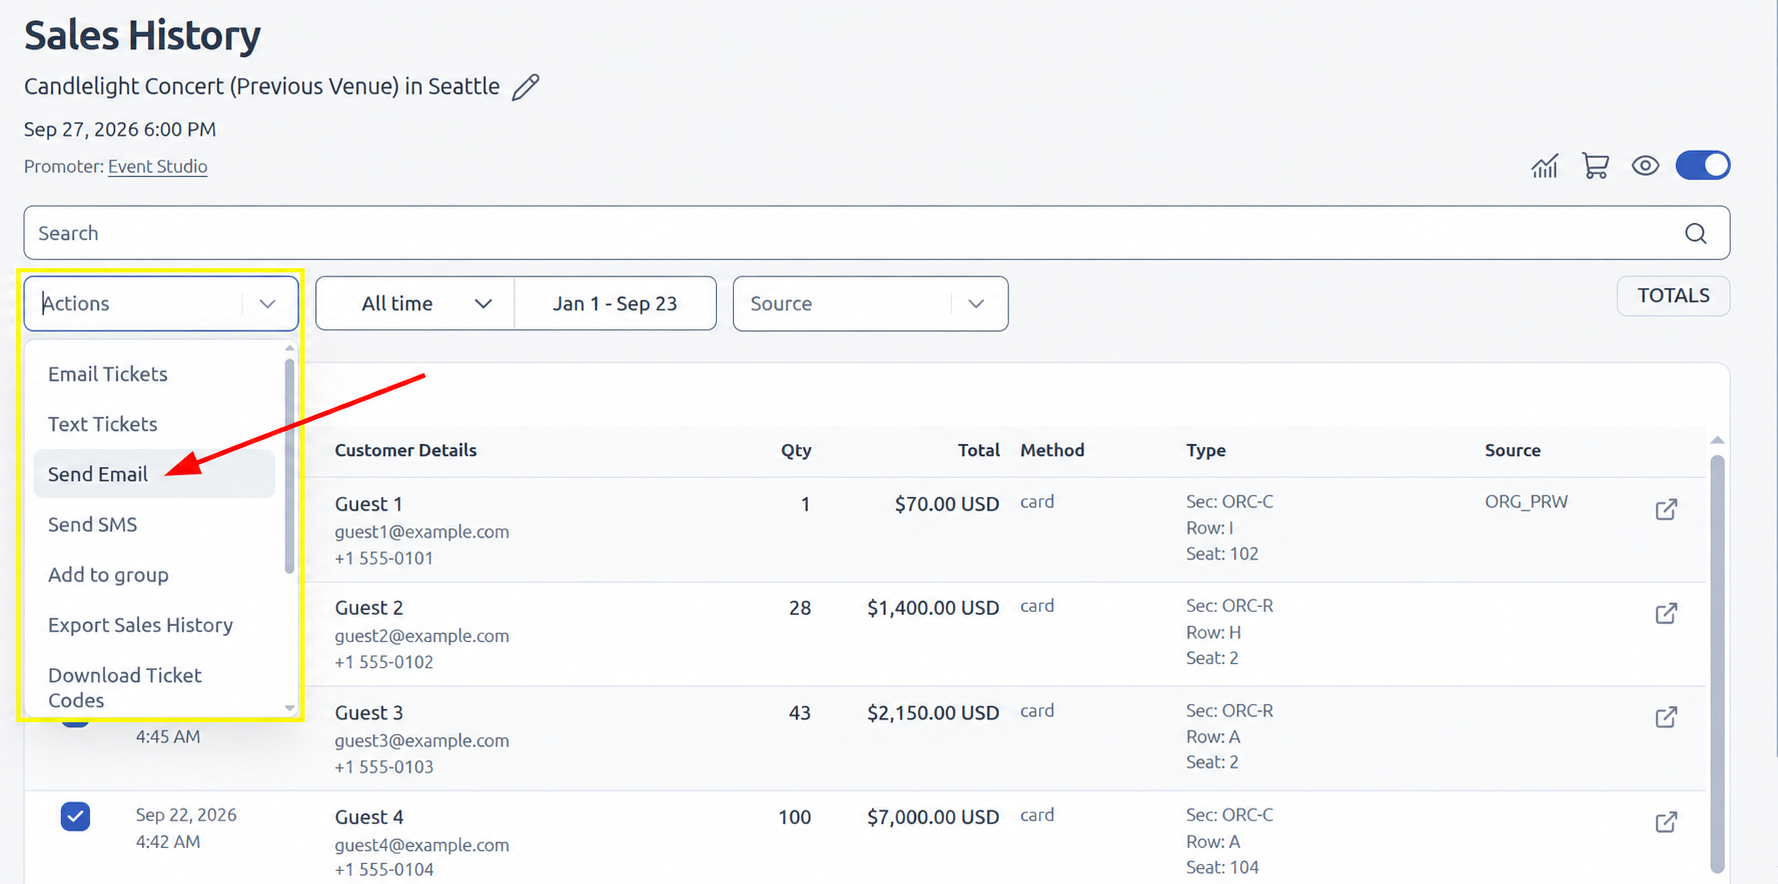
- Open the "Actions" menu;
- Select "Send Email".
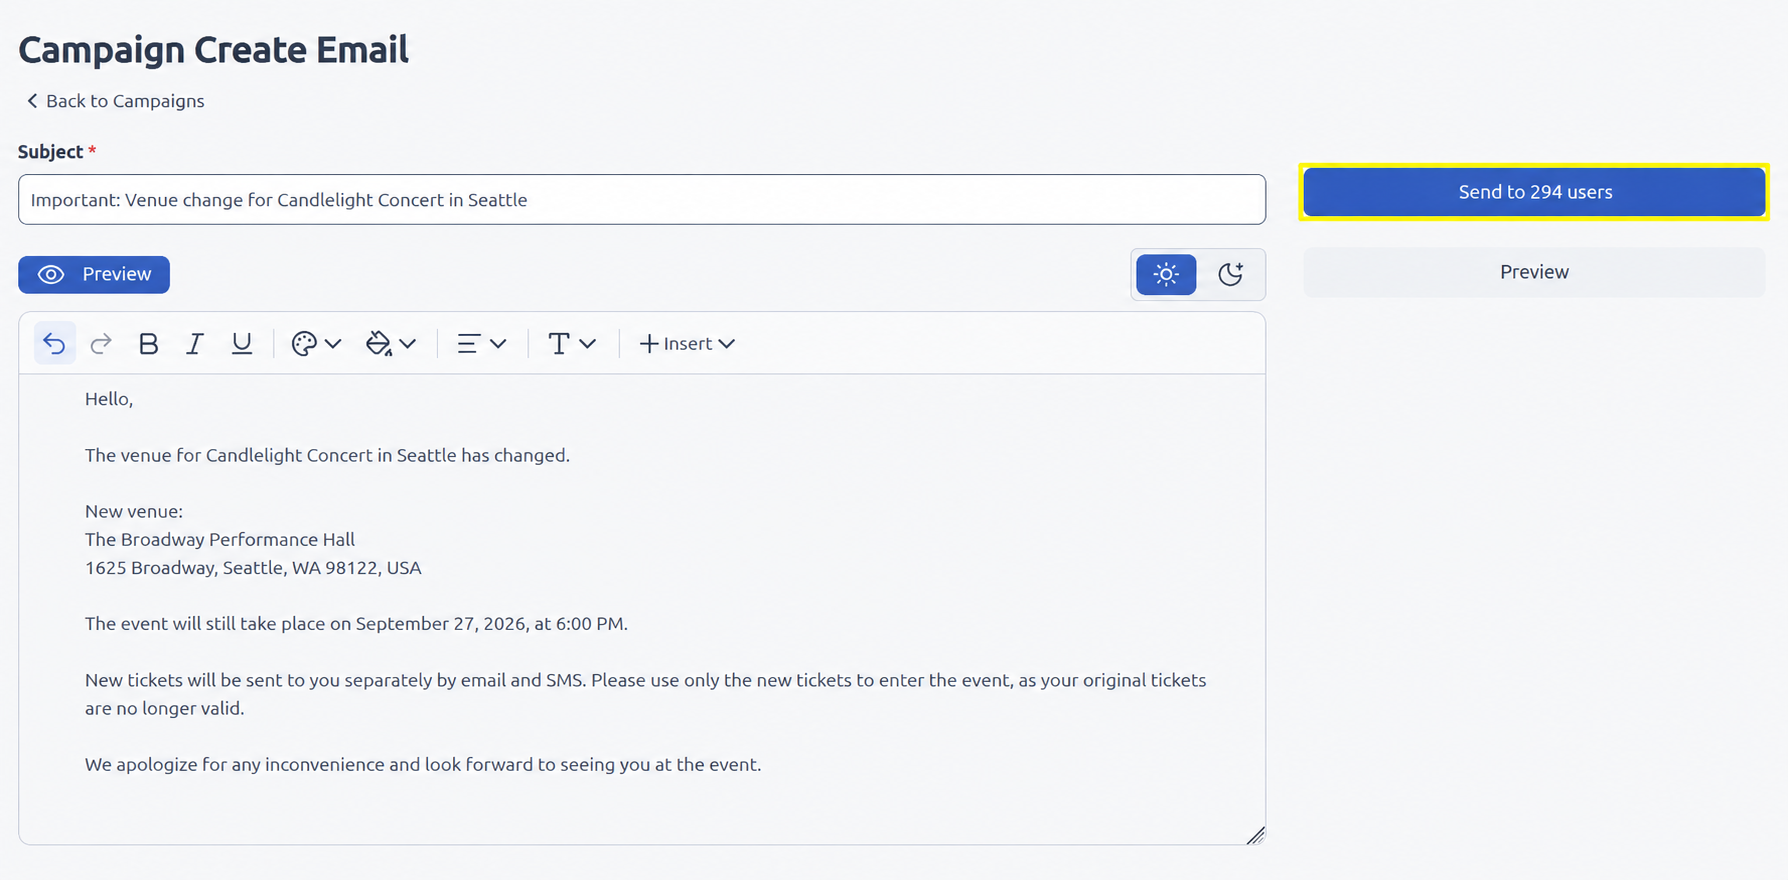
The email composer will open.
- Enter a subject and message. Tell buyers the name and address of the new venue, confirm the event date and time, and let them know that their new tickets will be sent separately. Make clear that they should use only the new tickets for entry.
- Click "Send to users".
- In the window that opens, click "Send now" to confirm.
Sending new tickets to buyers:
- Open the new event at the new venue.
- Select "Sales Summary" from the menu on the left.
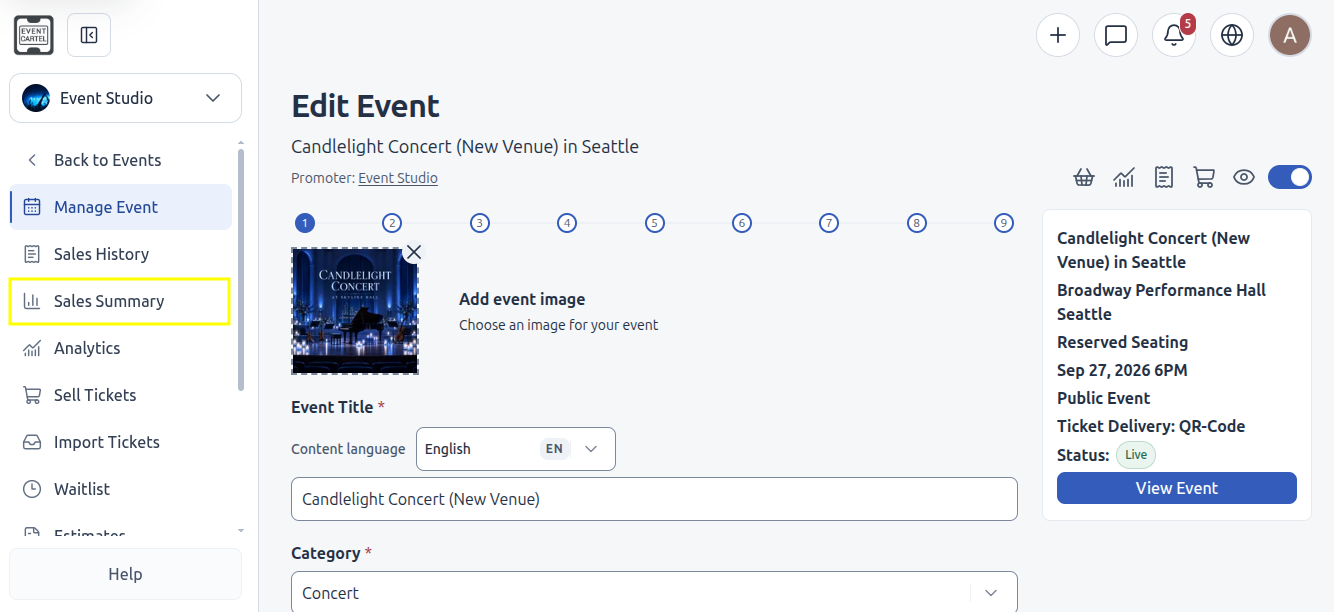
- Scroll down to the "Consignment" section.
- Click the arrow next to "Consignment" to expand it.
- Click "Tickets".
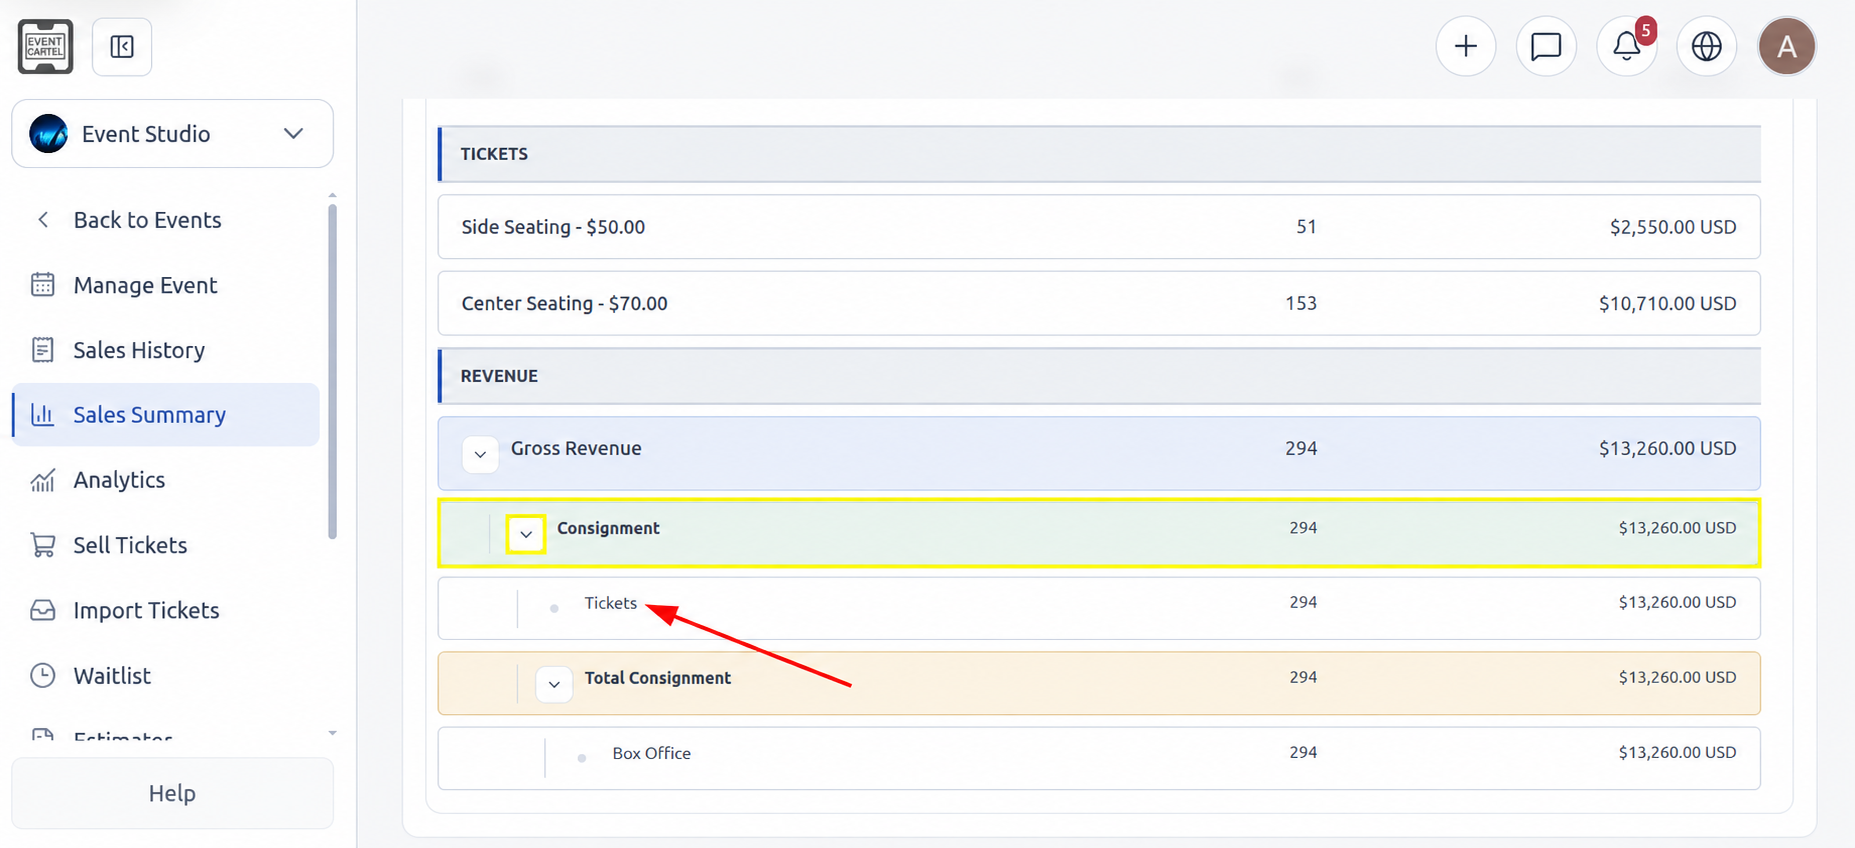
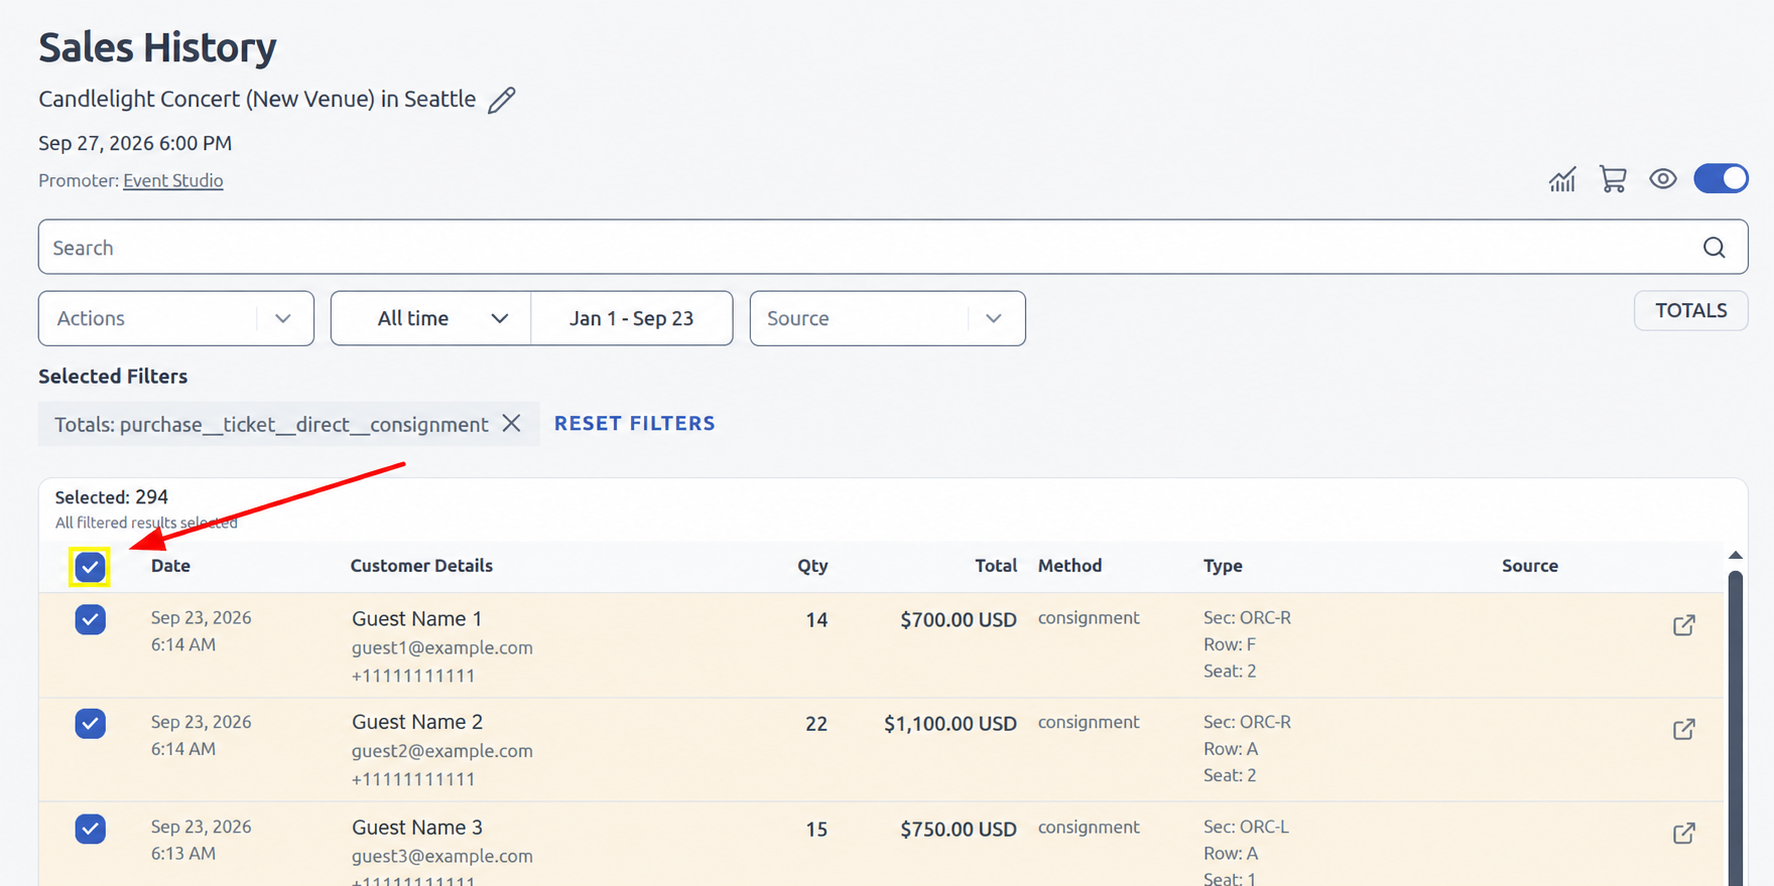
The "Sales History" page will open, automatically showing only Consignment orders for the new event.
- Select the checkbox at the top of the list to select all orders.
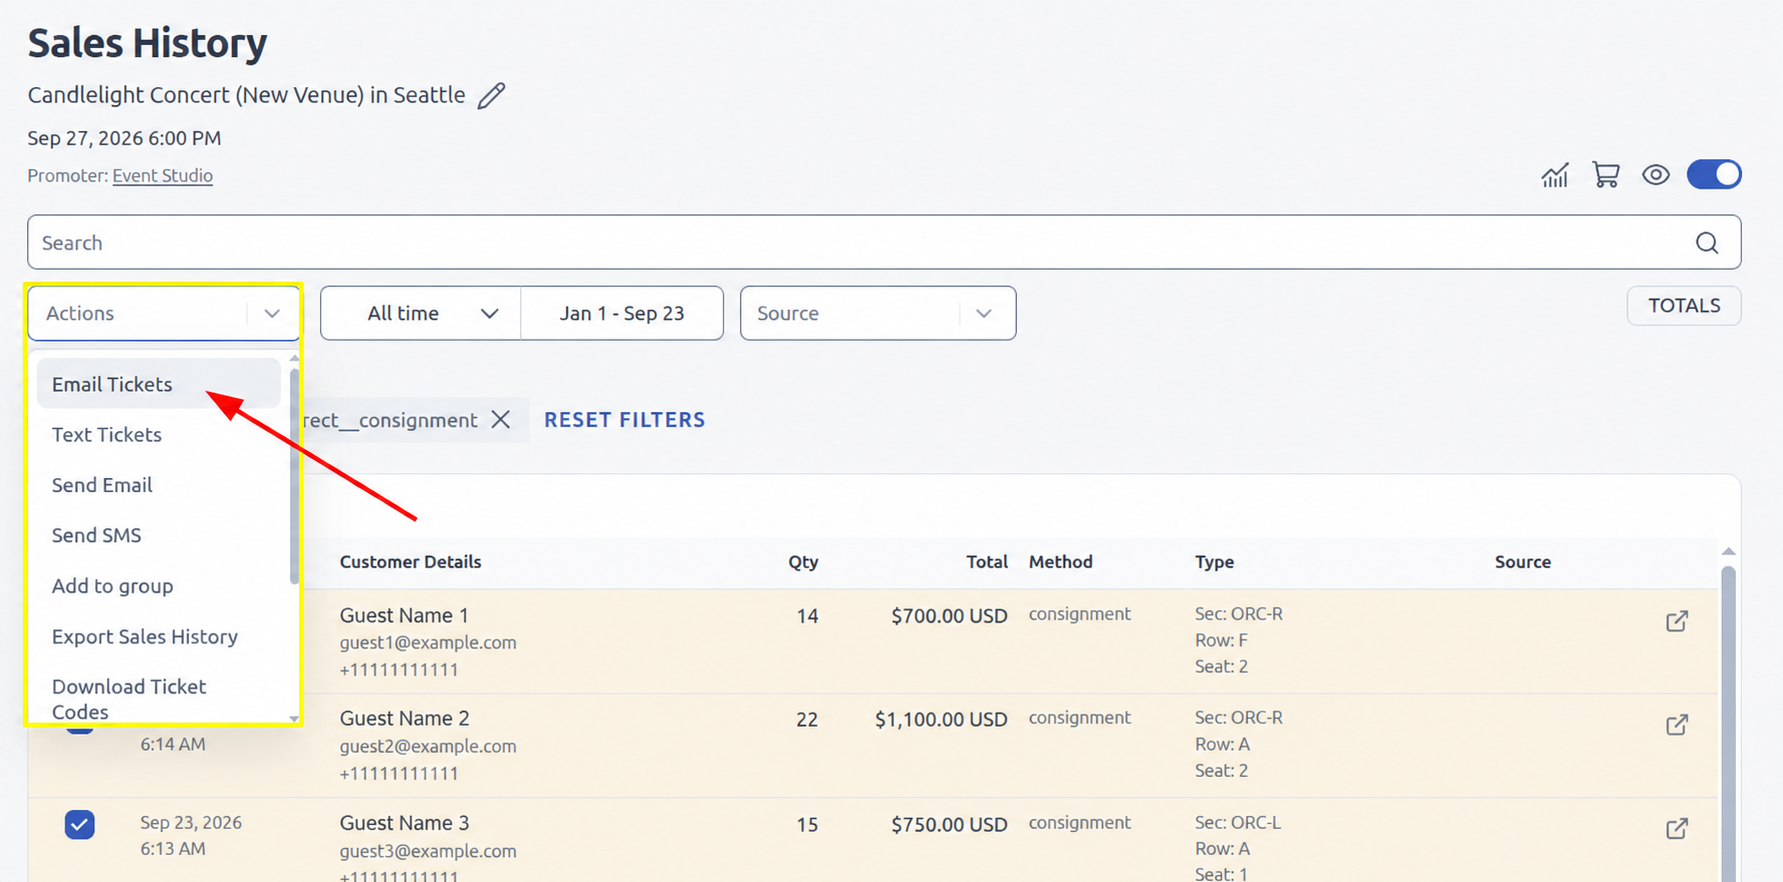
- Open the "Actions" menu.
- Select "Email Tickets" to email the new tickets to buyers.
After the tickets are sent, you’ll see the message "✅ Sent email".
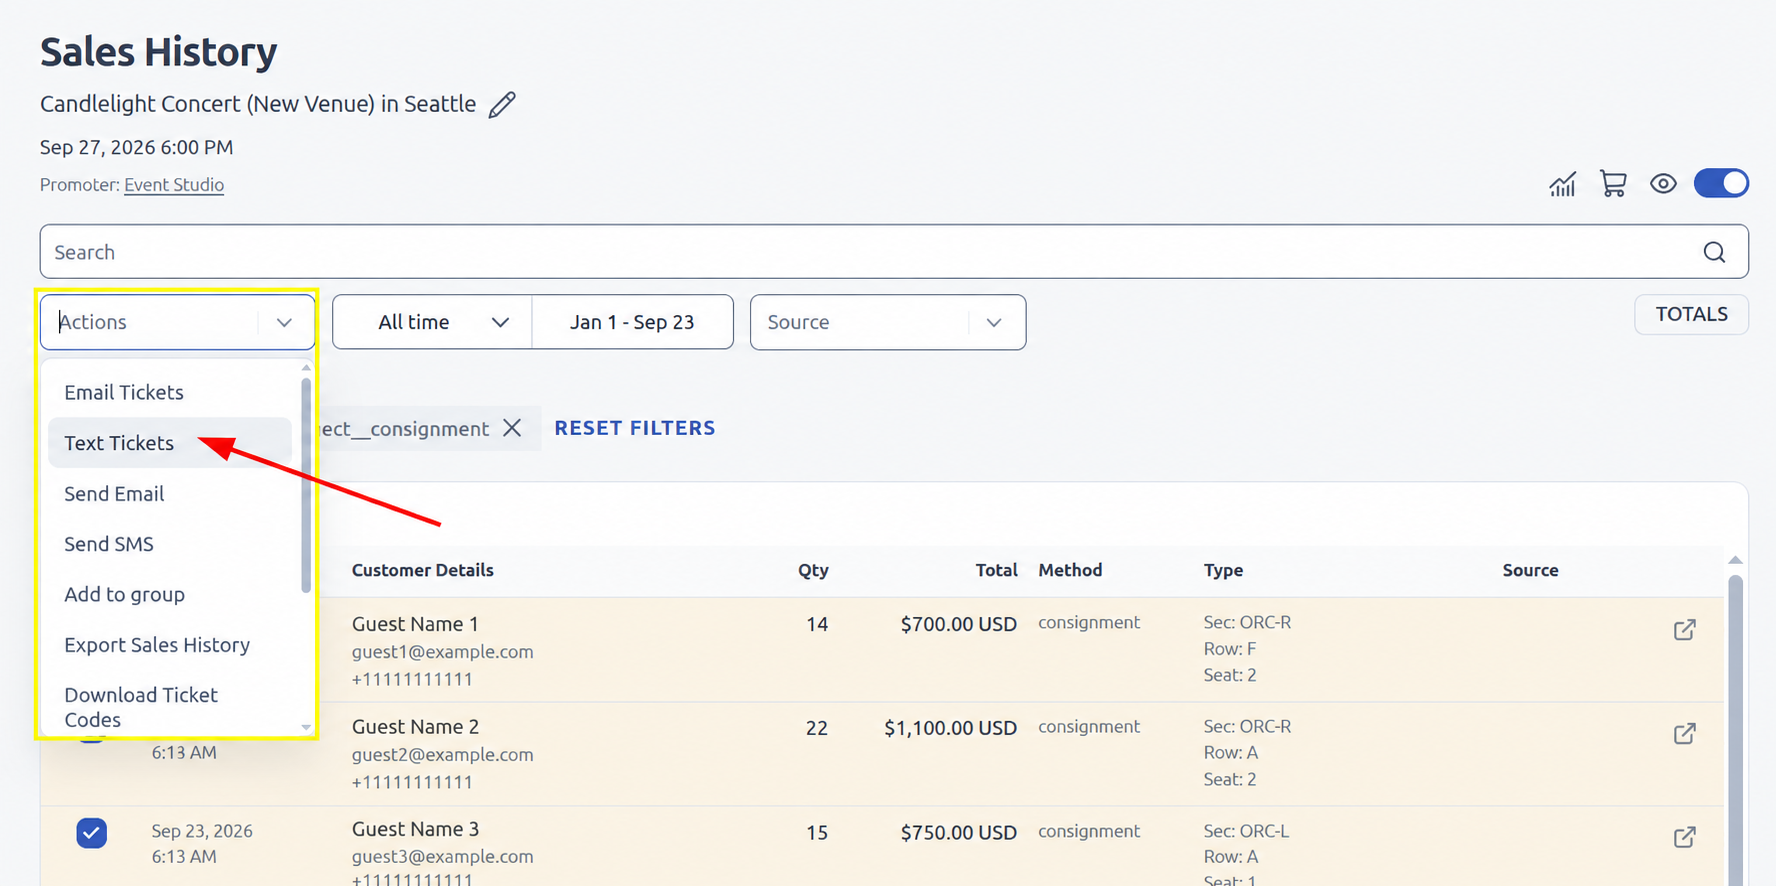
After emailing the tickets, send them to buyers’ phone numbers as well:
- Select all Consignment tickets again.
- Open the "Actions" menu.
- Select "Text Tickets".
After the tickets are sent, you’ll see the message "✅ Sent sms".
Done! The main steps for changing the venue are complete: buyers have been notified and sent new tickets. Before the event, inform the staff scanning tickets about the venue change. Some buyers may miss the new tickets and arrive with their original ones. In that case, staff should look them up by first or last name in the new event’s attendee list.